⌛️ Approximate time to complete: 15 min.
Access to the Databricks integration must be activated on your account. Please contact us if you would like more information about running on Databricks.
This quickstart guide will walk you through integrating Nextmv with Databricks. At the end of the walk-through you will be able to run your Nextmv-managed models in Databricks’s execution environment while still being able to view all of the run’s details and results in Nextmv. You can use your compute integration for any capability in Nextmv including running experiments, ensemble runs, or shadow runs.
This tutorial assumes that you have familiarity with:
- Pushing a model to Nextmv (using either Nextmv CLI or Nextmv Python SDK).
- Managing instances used to run your model.
1. Set up Databricks
This first section will walk through the steps and requirements to set up a Databricks job environment that allows the Nextmv integration connection. In order to proceed you will need the Nextmv agent (distributed by request at the moment) and a Databricks account.
Add new service principal
In order to configure a service principal, you must have account admin access on Databricks.
Learn more about who can manage and use service principals on Databricks
First you will create a service principal to manage the integration access. Service principals are a more secure way to grant machine access (API-only) to Databricks resources (as opposed to using a user account’s permissions).
- Navigate to User Settings by clicking your user profile in the top-right corner and selecting Settings.
- In the Settings sidebar on the left, navigate to Identity and Access.
- Under Service Principals, choose Manage, then Add service principal.
- In the popup menu:
Click the
Add Newbutton, thenEnter a name for the service principal and click
Add.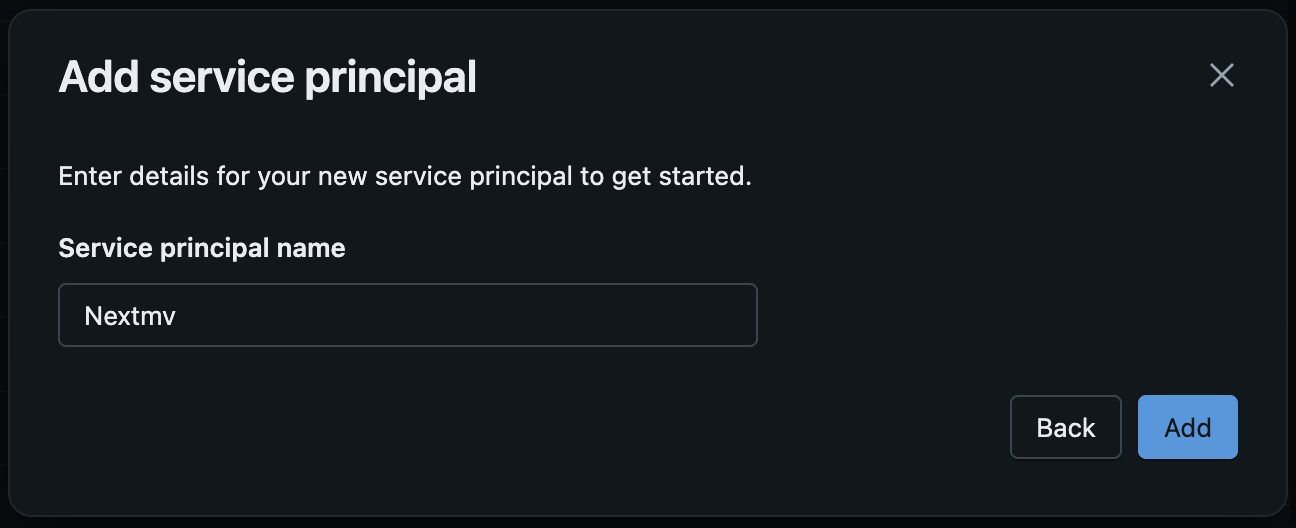
For additional information on Service Principals, see Databricks documentation on creating a Service Principal
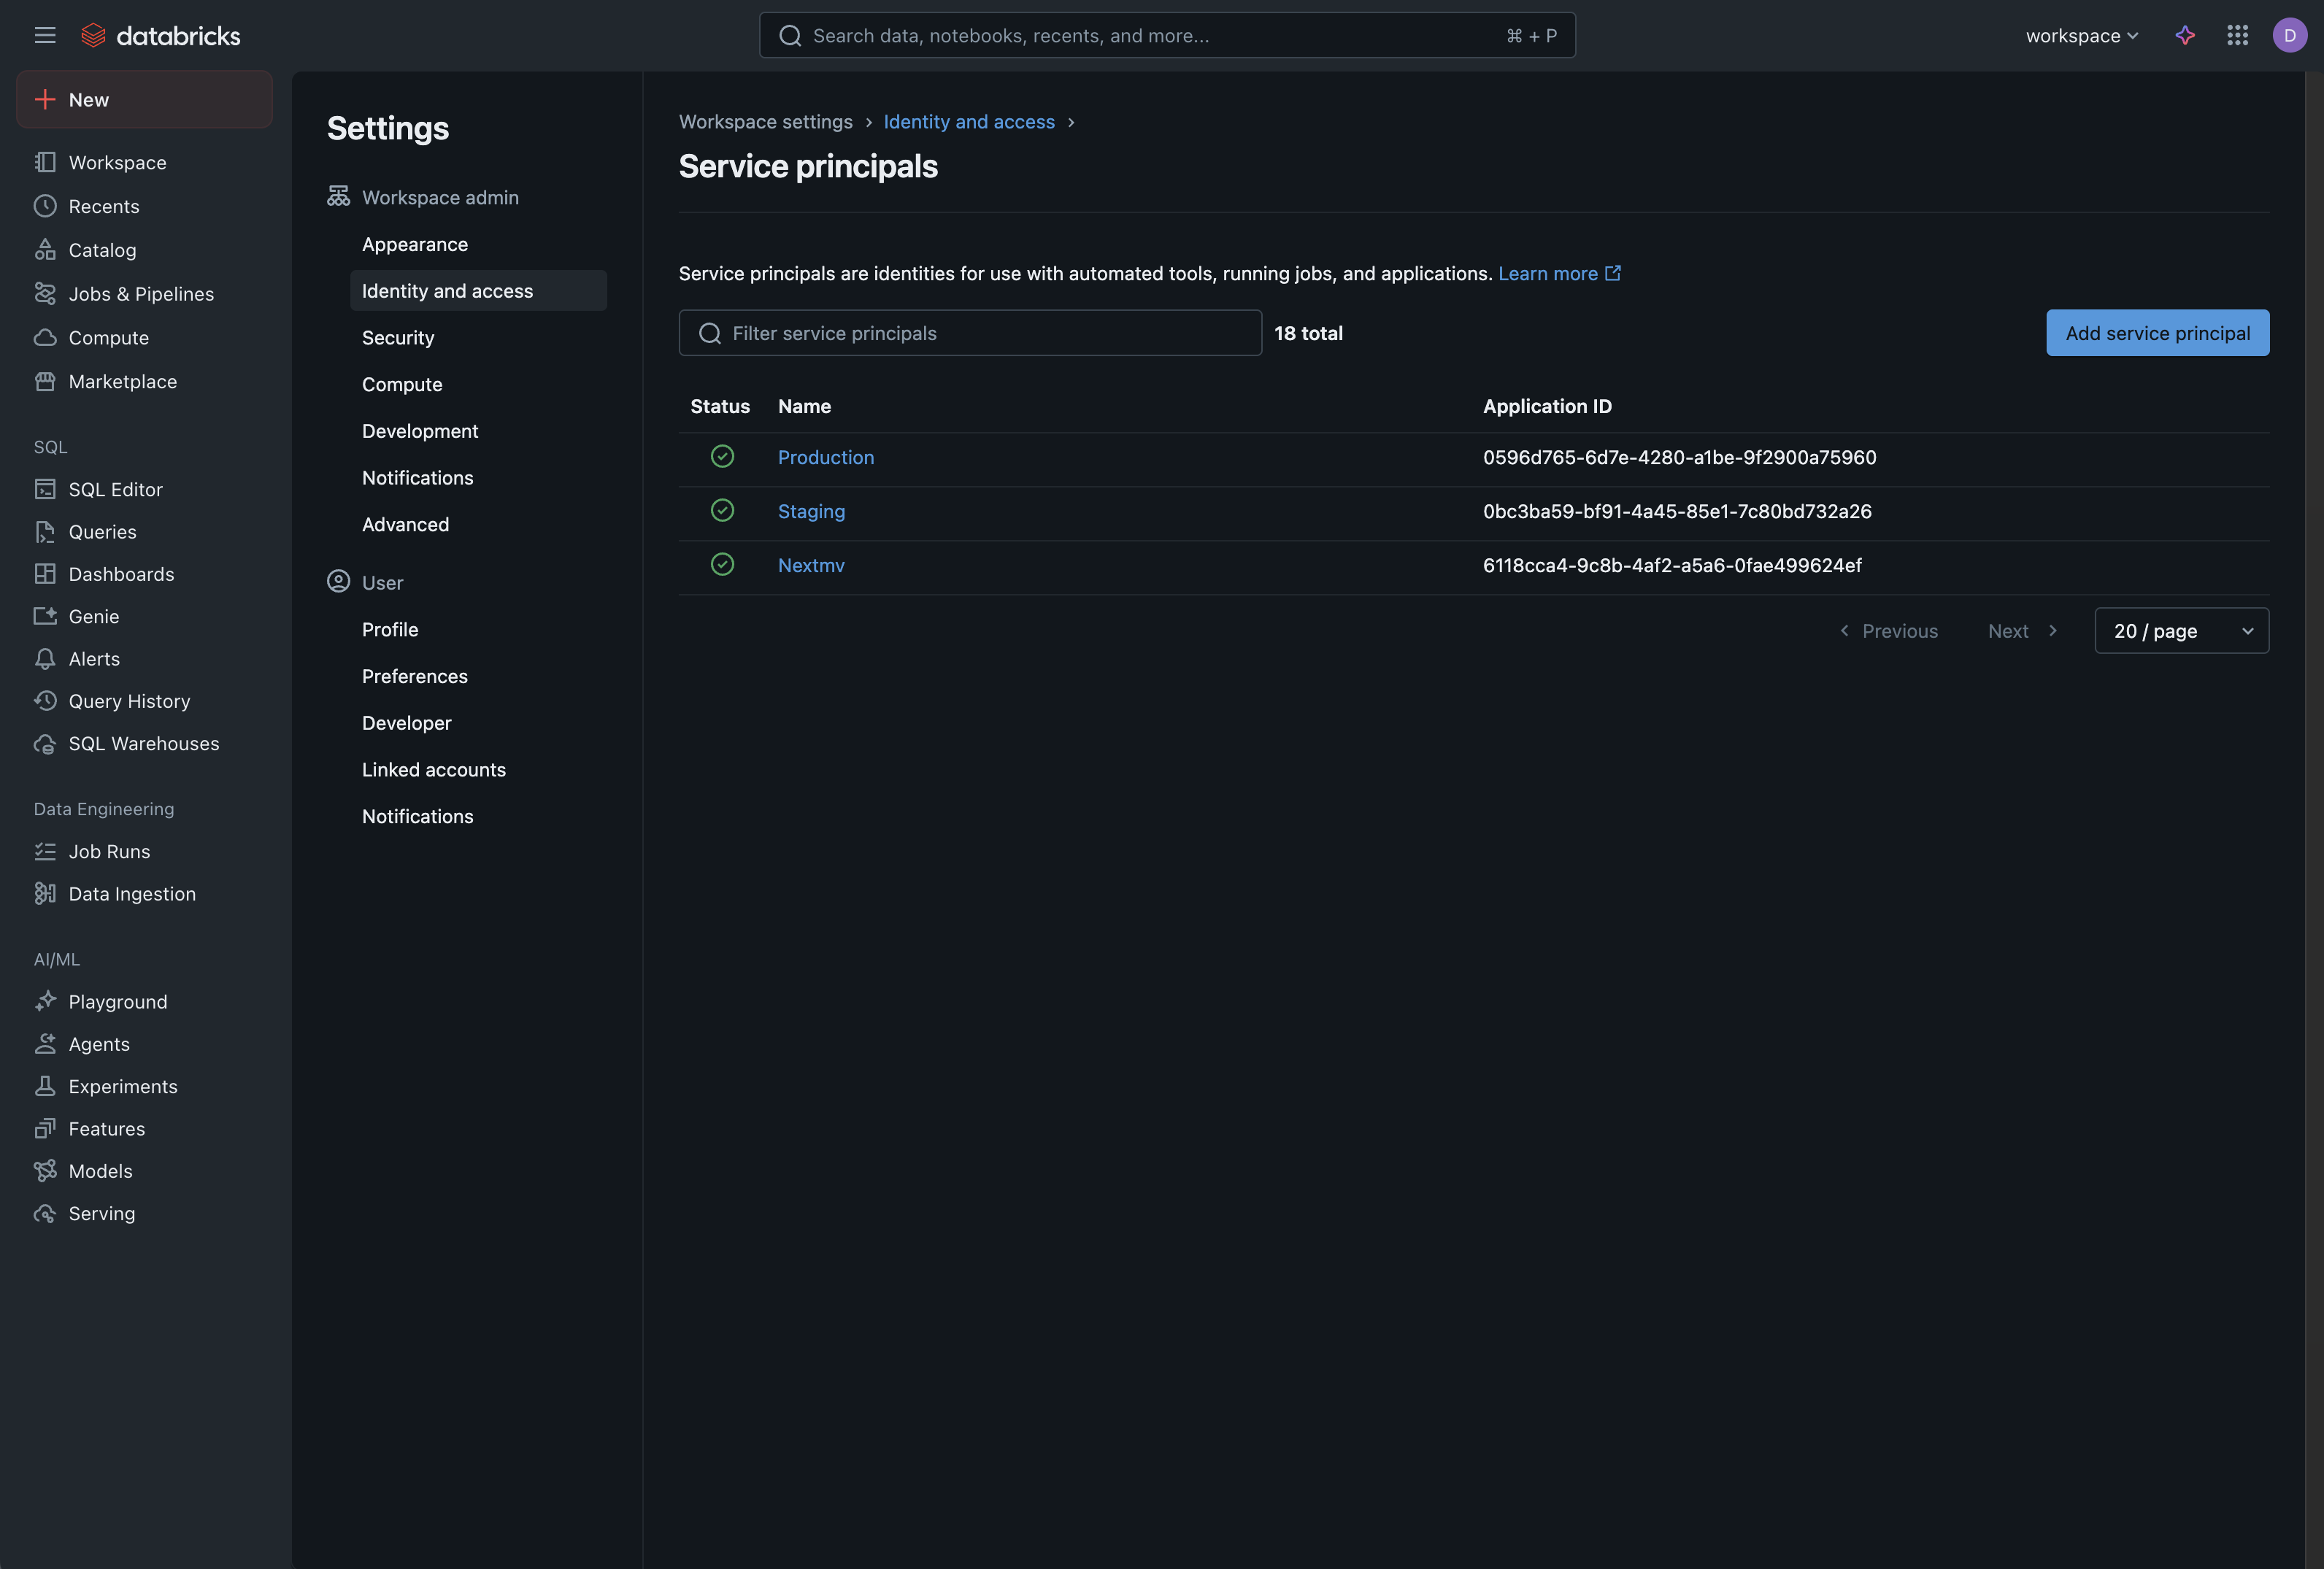
You should now see your service principal in the list.
Create a Secret for Your Service Principal
Next, you will generate a secret that is associated with this service principal. As the notification below states, make sure to copy and save the secret and client ID that are generated in this step. You will need to enter this information later in Nextmv as part of the integration setup.
Important: When you generate the secret in step 2 below, make sure you copy both your Secret and Client ID. You will need both of these to configure your Nextmv integration.
After the service principal is created, click into it from the list of service principals and navigate to the Secrets tab.
Click Generate Secret and then:
Select a lifetime for your secret, and then
Click
Generateto generate the secret.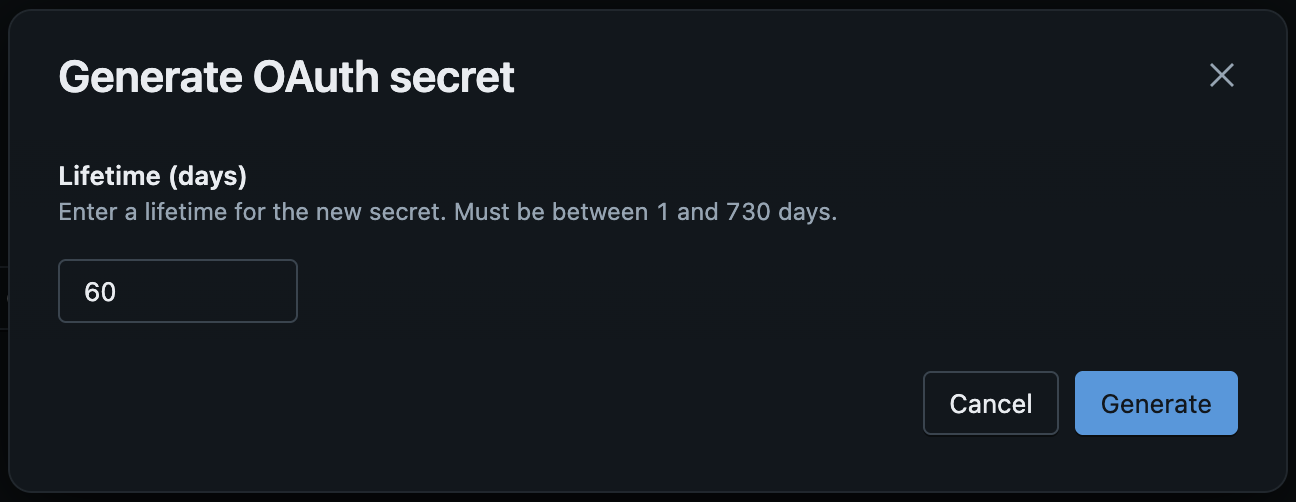
This will generate a Secret and Client ID. Again, make sure to copy both of these values for later use.
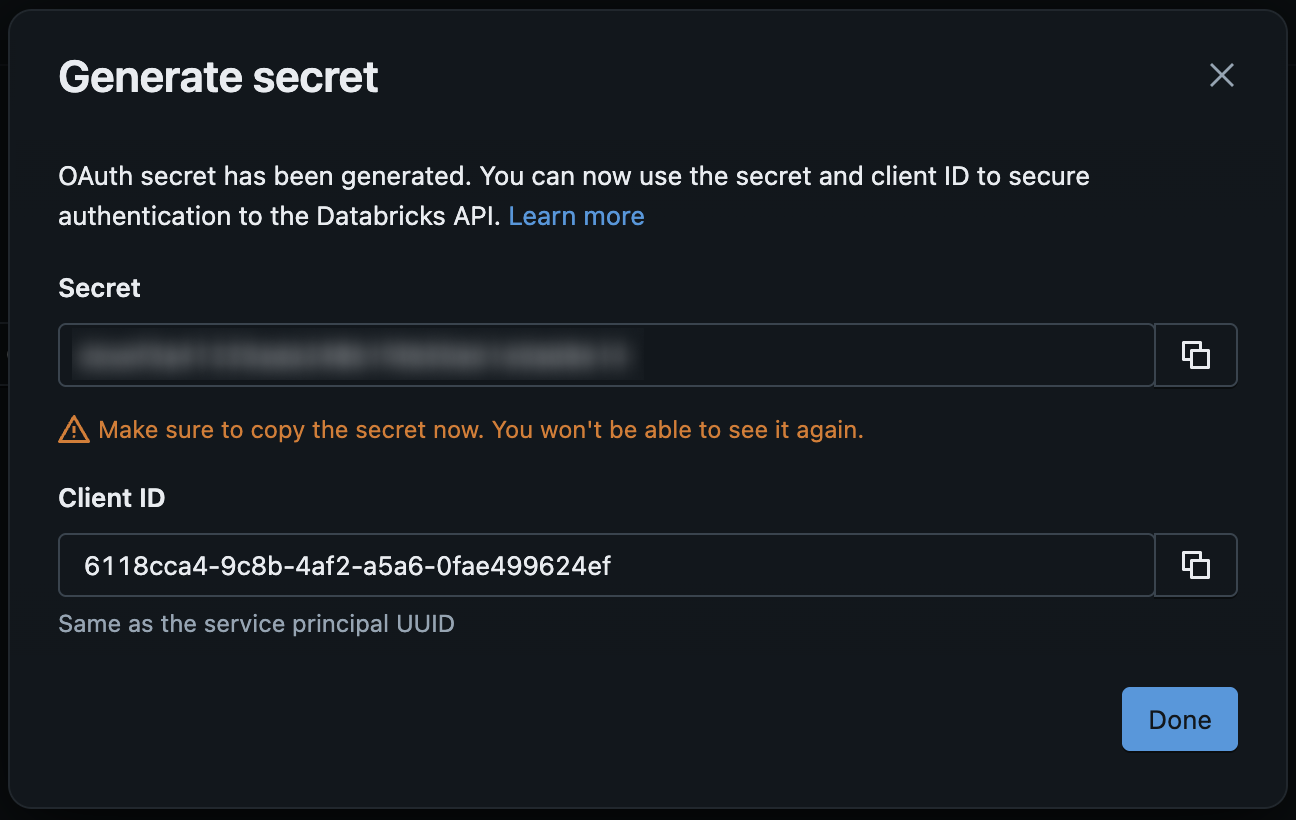
After you have copied the Secret and Client ID, click the
Donebutton.
Create your Nextmv Job
After the service principal has been created, you will then need to create a new Job specifically for the integration.
In your Databricks Workspace UI, navigate to Jobs & Pipelines on the left.
On the right side, click
Createand choose Job from the dropdown. (You can name your job whatever you would like by clicking on the auto-created name for the team and editing it.)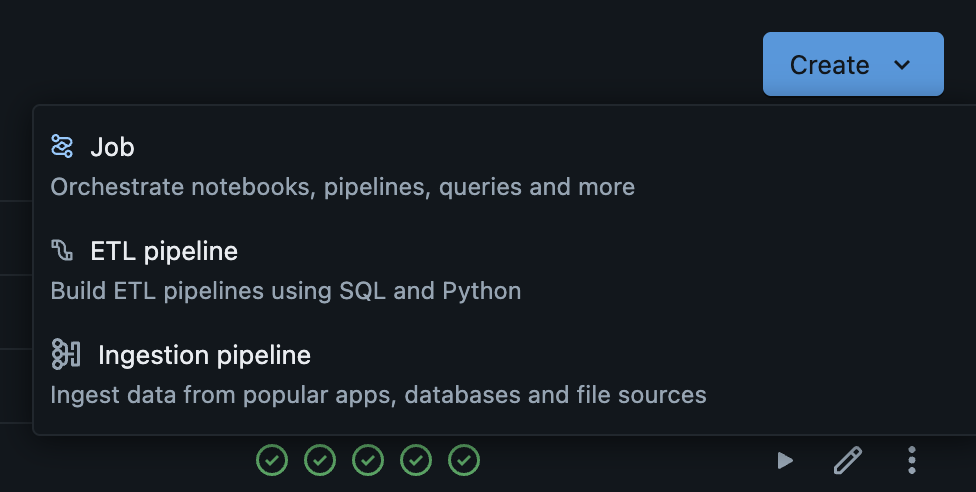
Under the “Add your first task” header, select Python Wheel as the task type.
- If Python Wheel is not visible, choose
+ Add another task type, then select Python Wheel. 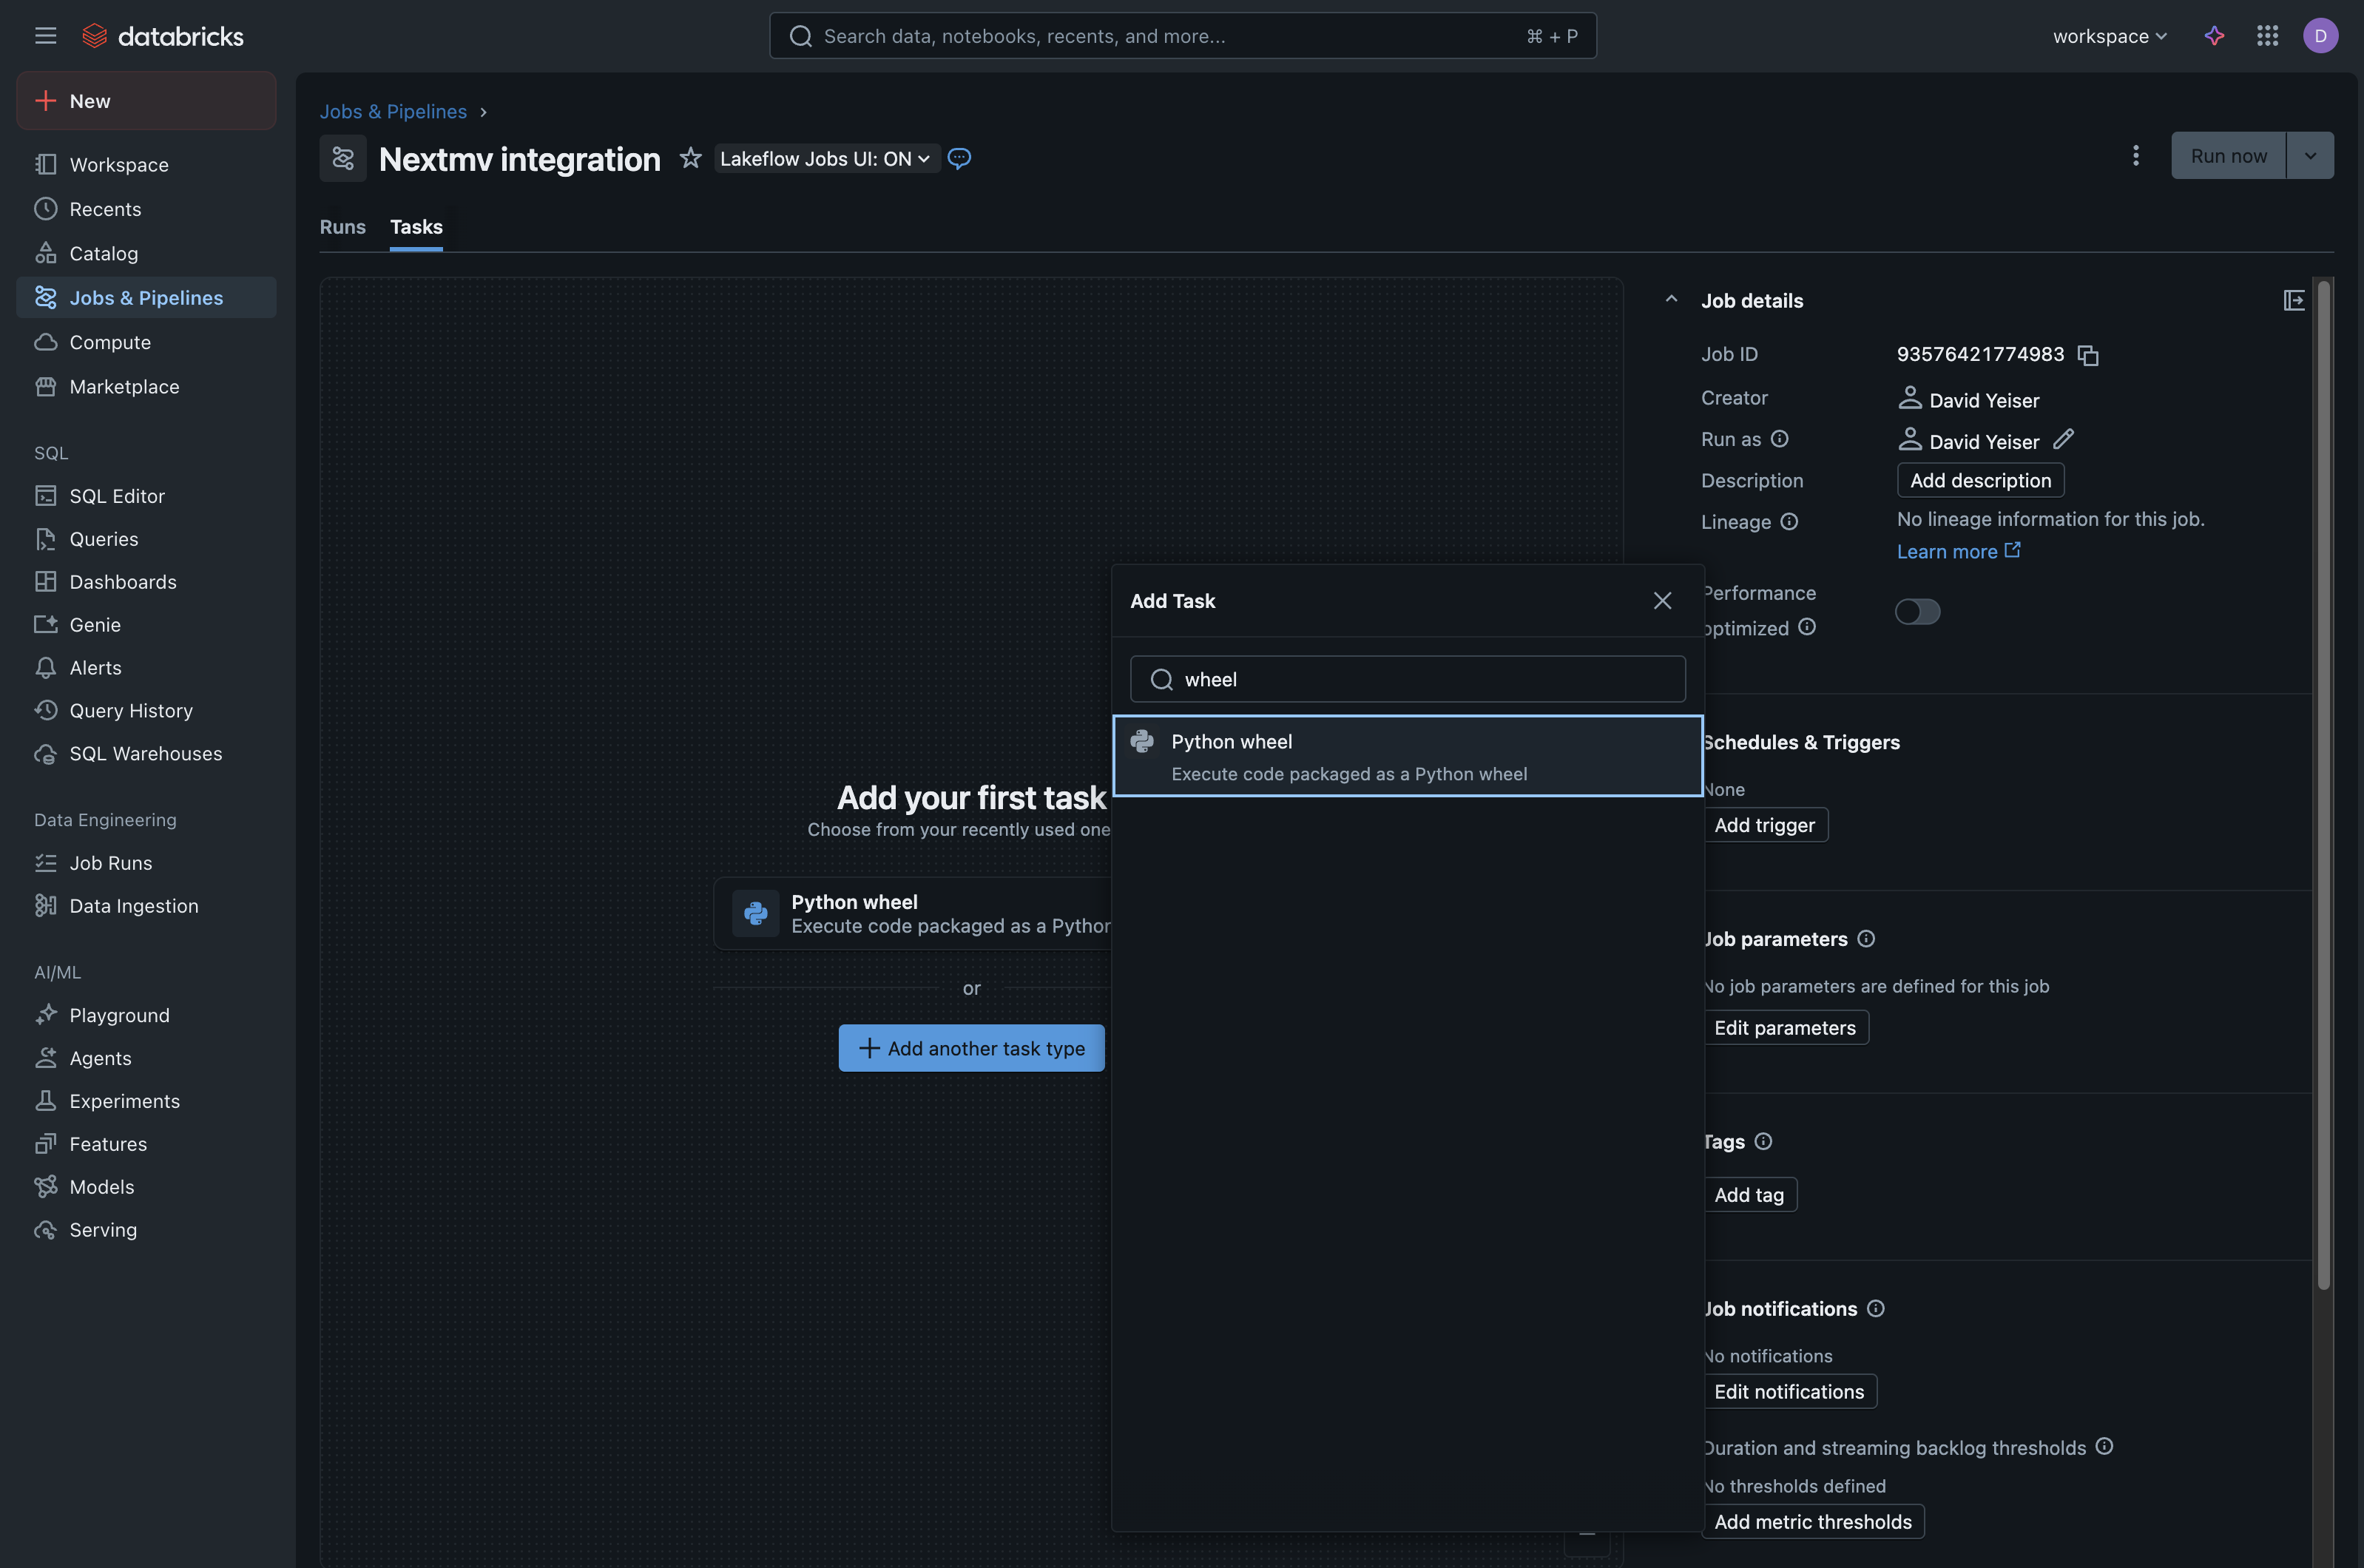
- If Python Wheel is not visible, choose
Task name is for your reference, it is a unique identifier for your task.
Type field should be pre-selected as Python wheel, and the
Compute field is your preference as well.
Package name and Entry Point should both have the value
nextmv-agent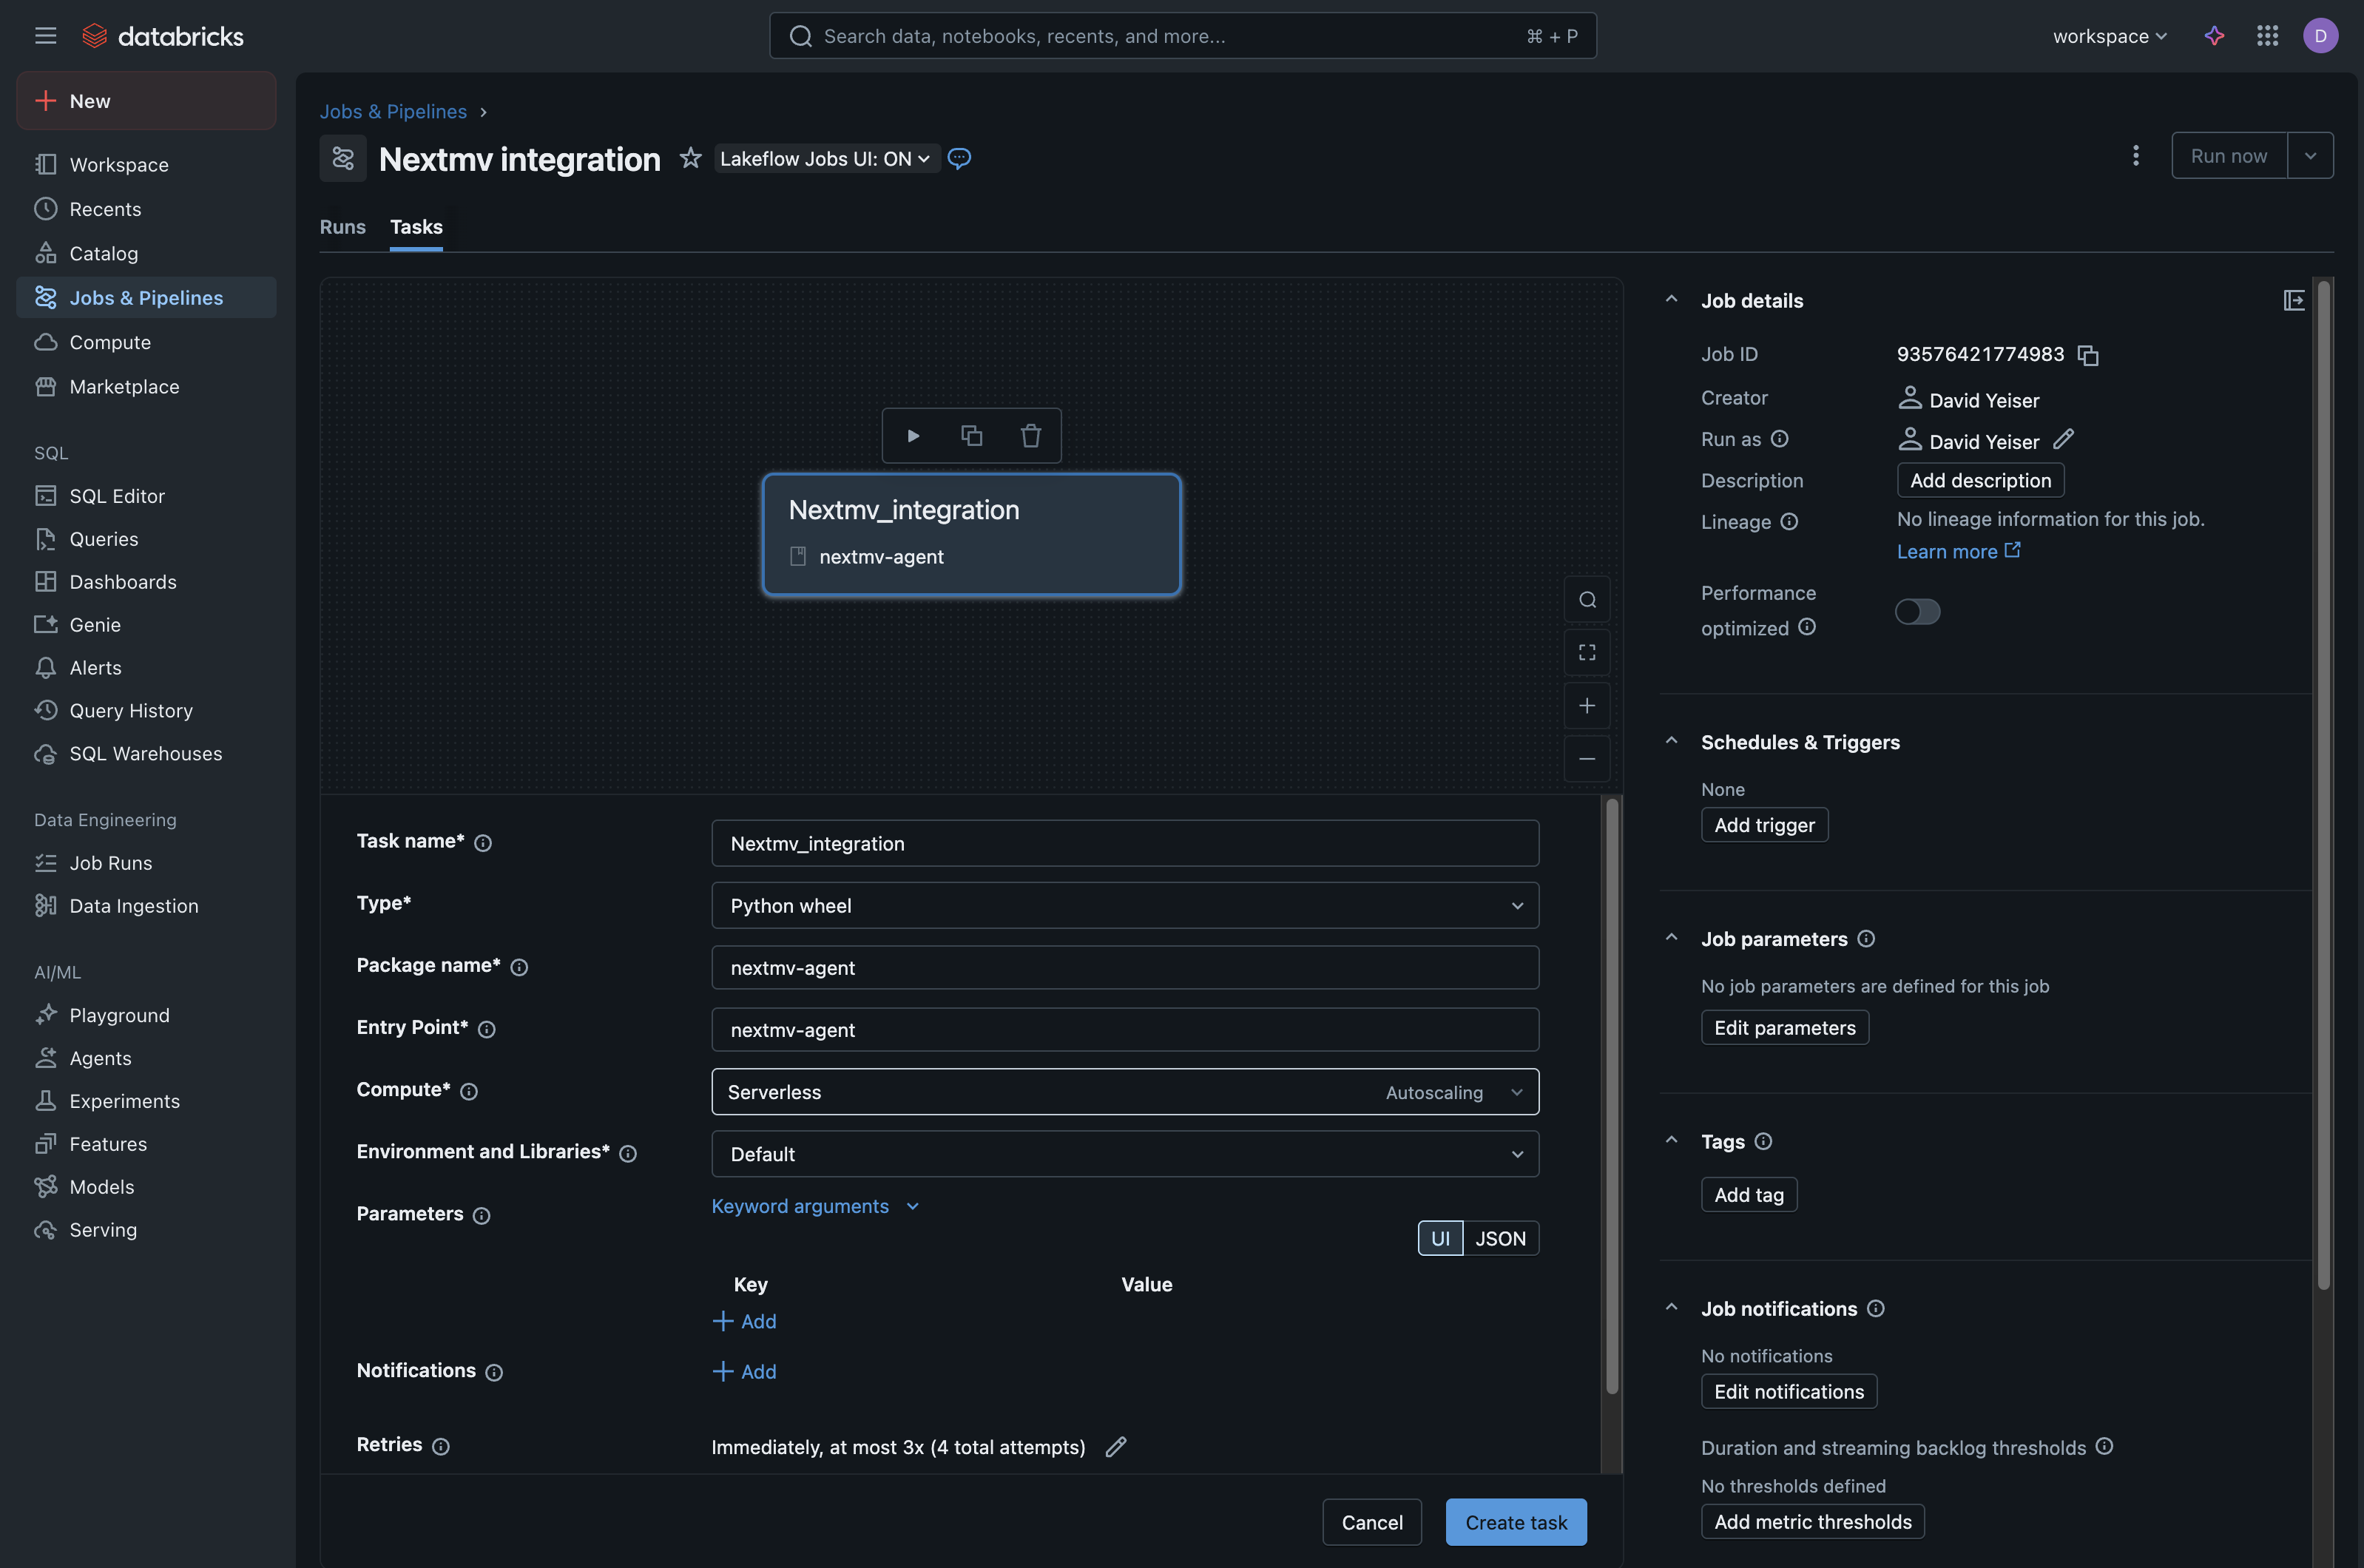
Then, for Environments and Libraries, from the dropdown menu choose
+ Add a new jobs environment. This will bring up a new modal window with additional fields that allow you to upload the Nextmv agent Python wheel file.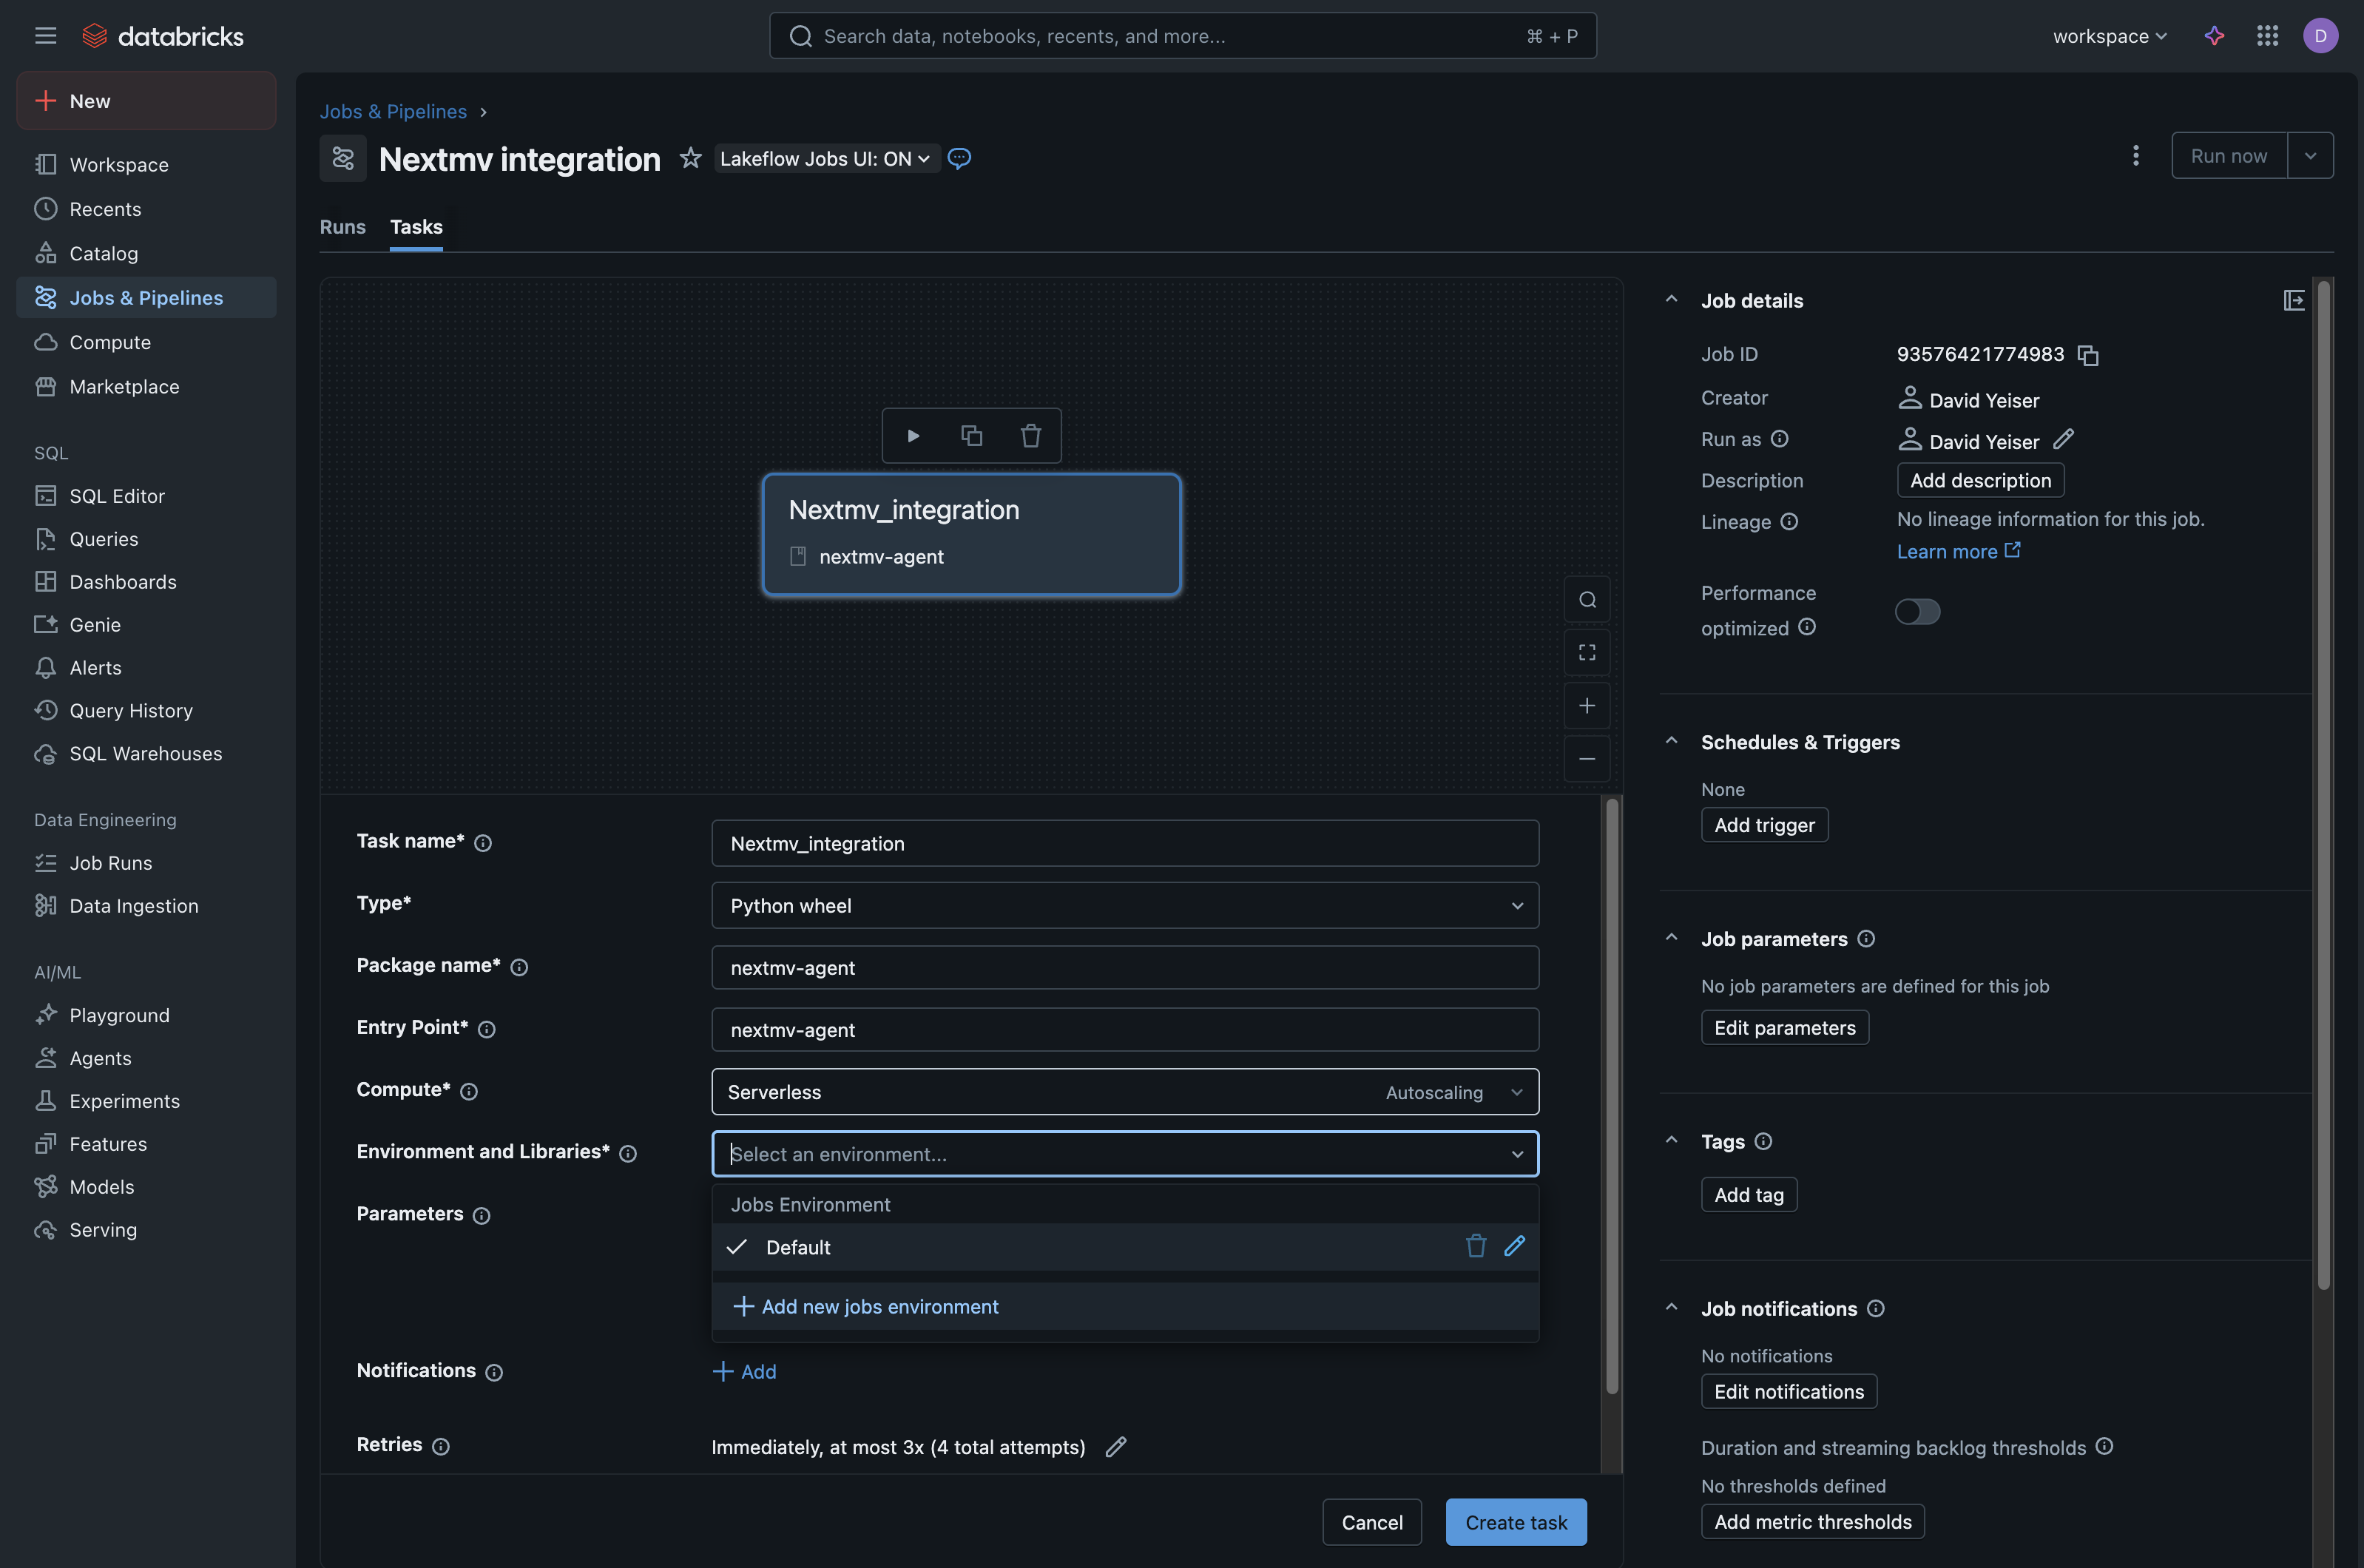
In the Configure environment modal:
Click the file button next to one of the existing inputs (or if none are shown, click
+ Add dependency).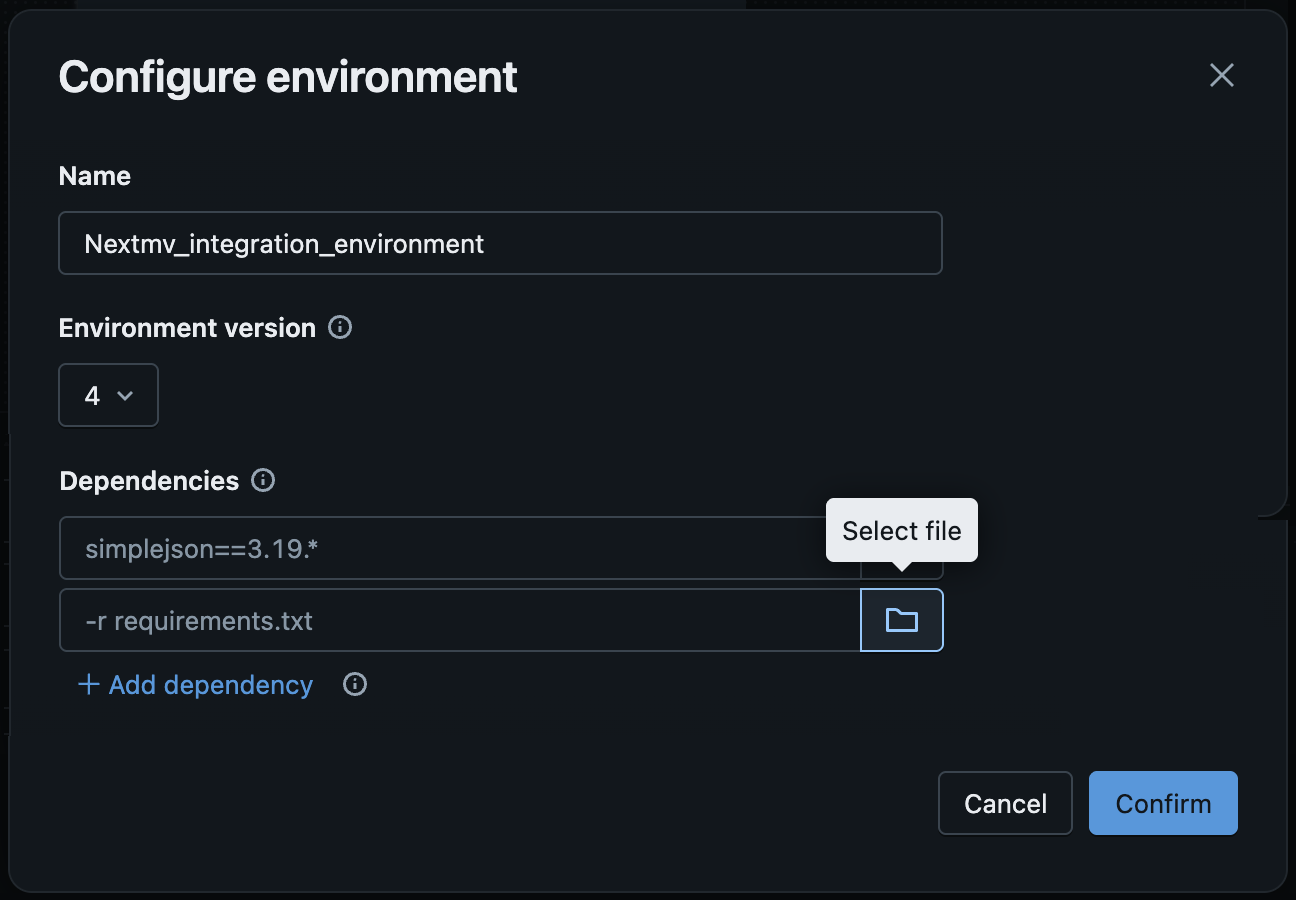
If the Python wheel file has already been added to the environment, select it by browsing the Workspace on the left. Otherwise, either drag it to the file upload area or click the Browse link to select it via the file selector dialog.
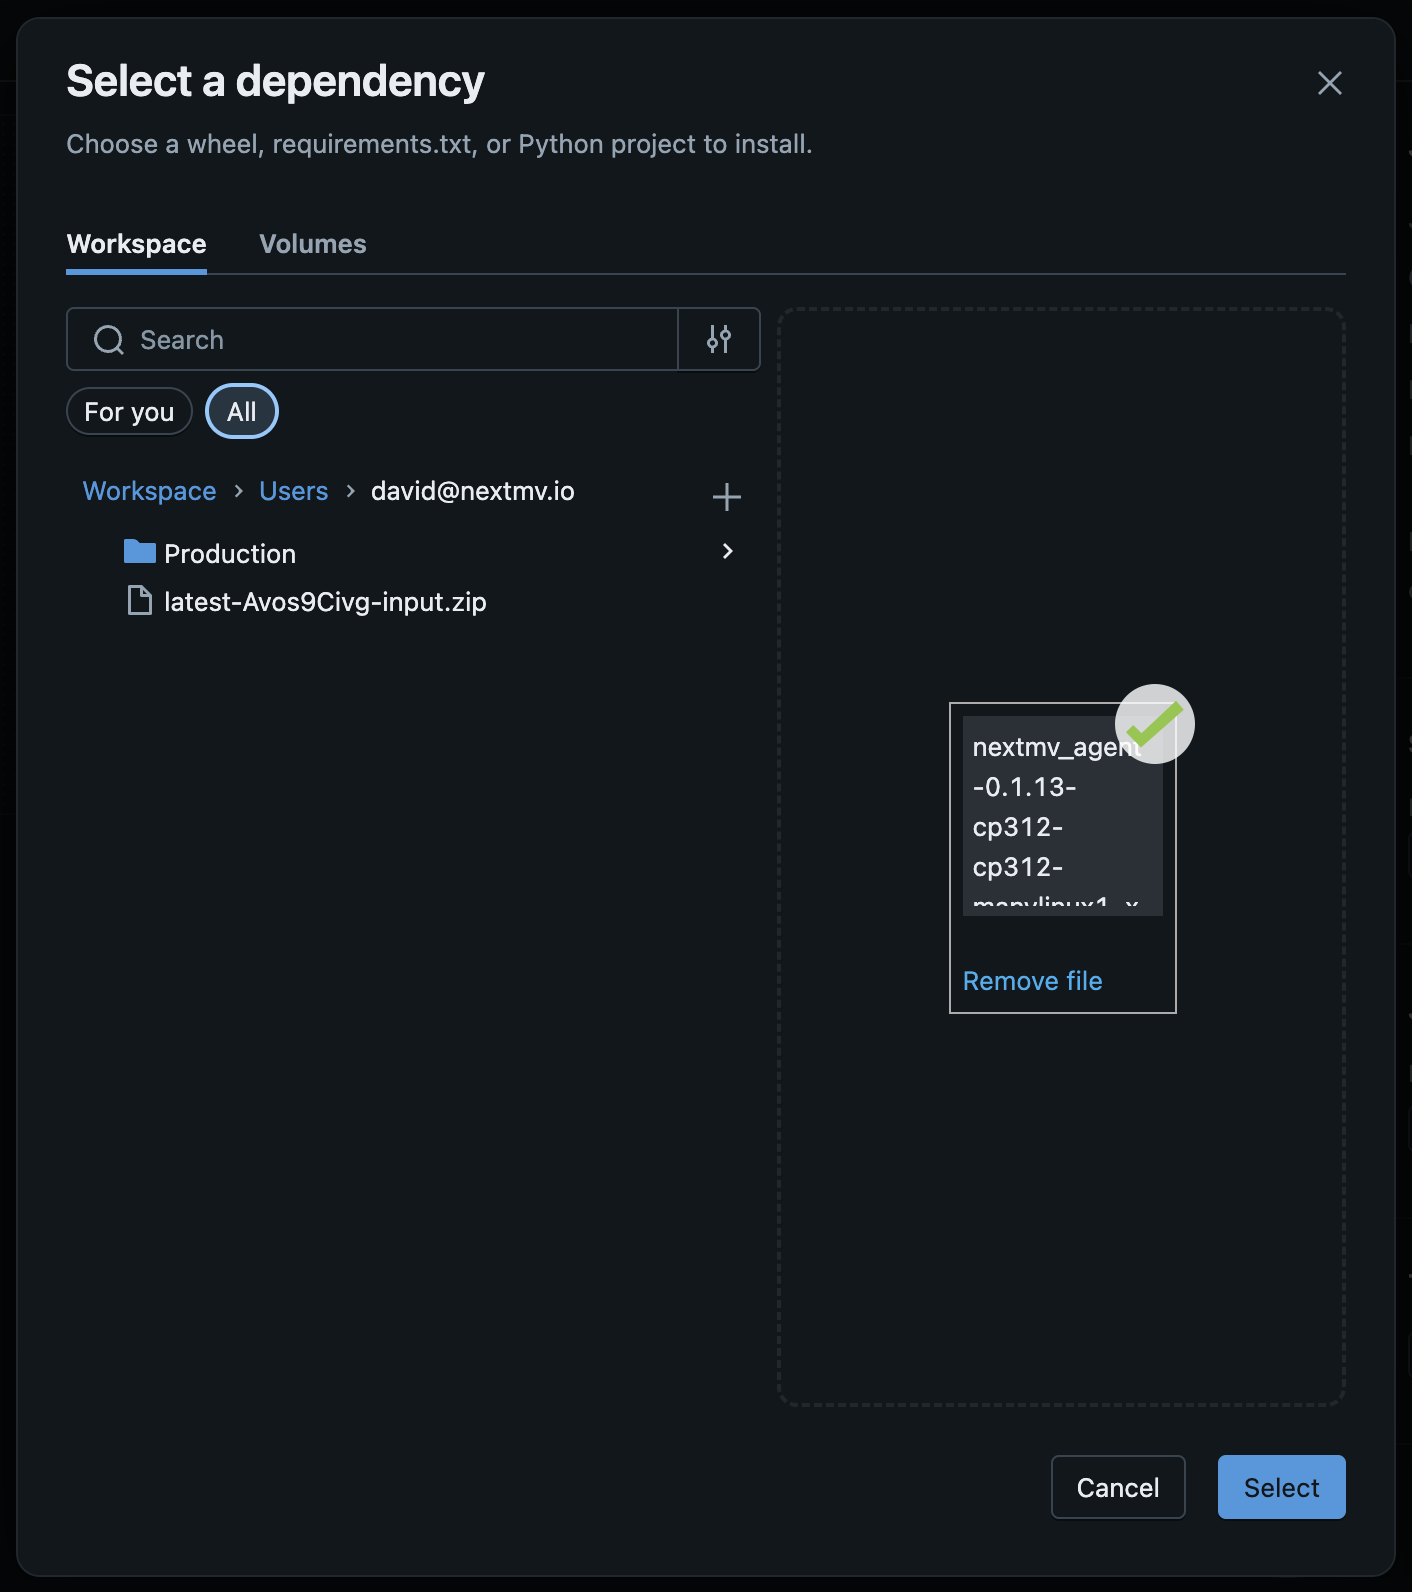
Click the
Selectbutton to save the file, and thenClick
Confirmto save this environment.
Choose
Create Taskto complete the job creation.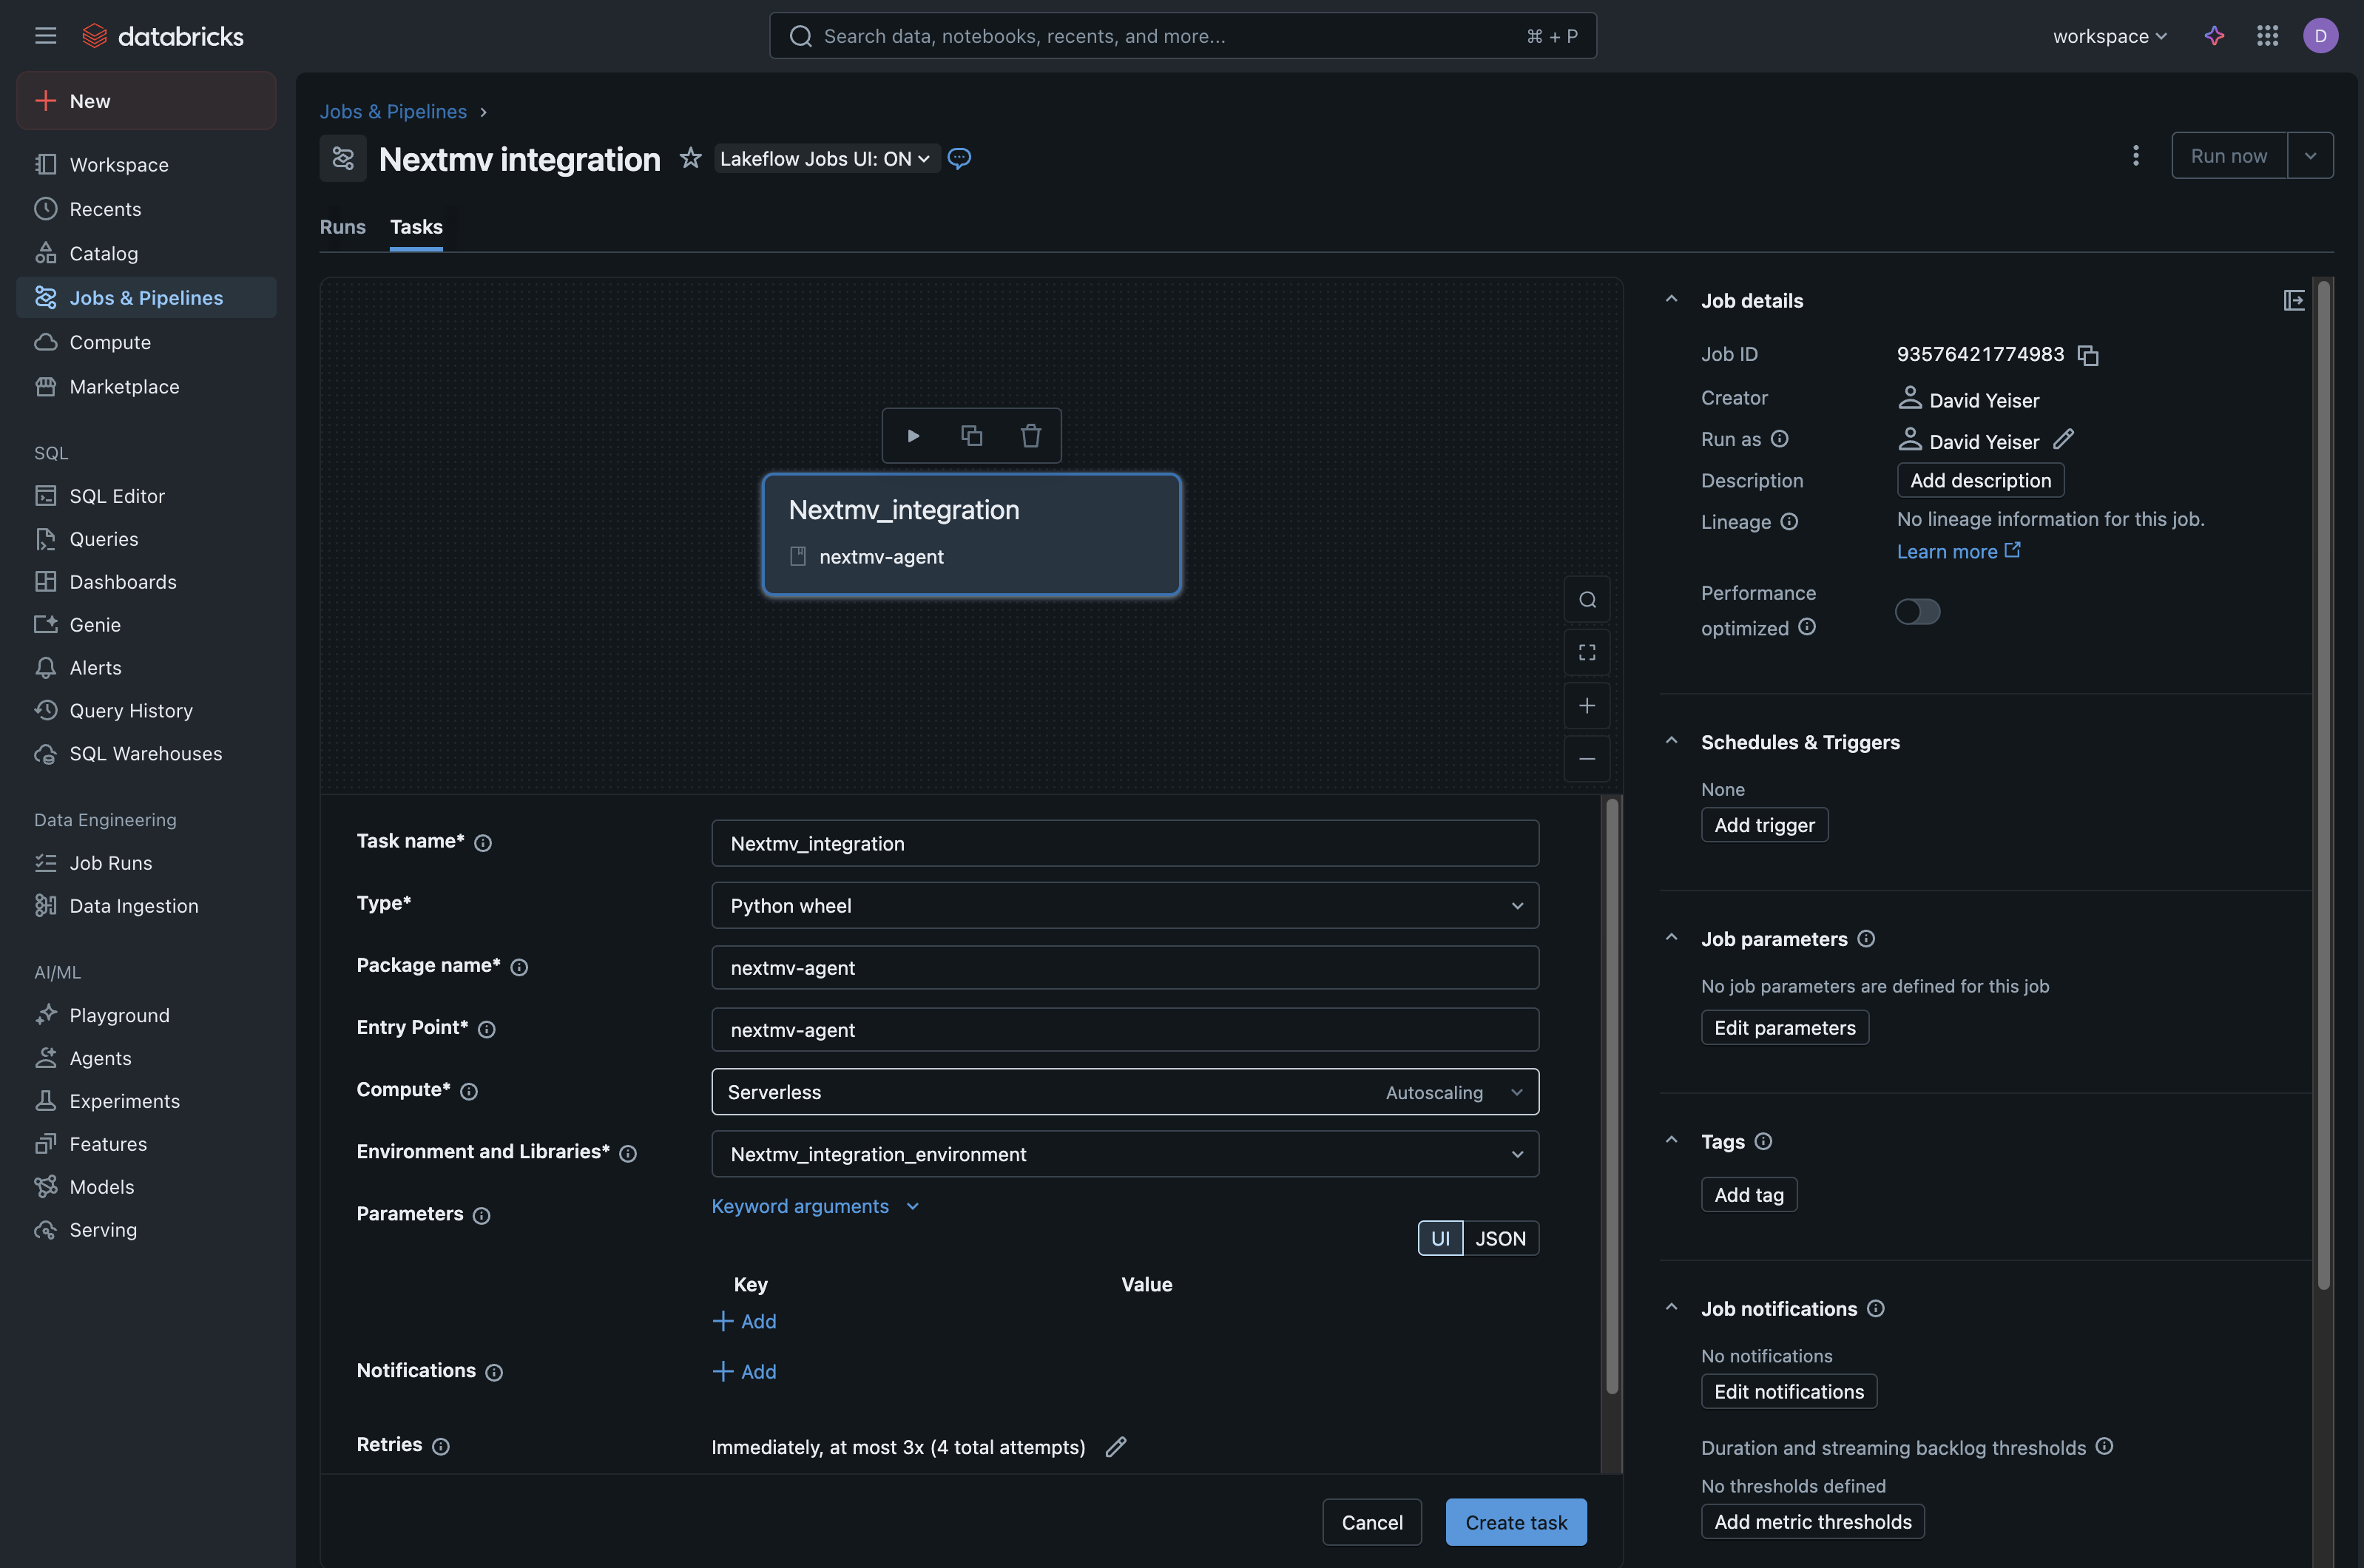
For additional information on creating a job with a Python wheel, see
Databricks documentation on using Python wheels in workflows.
Grant Service Principal Permissions
The last step required is to grant permissions to the service principal we first created for this newly created job.
- Navigate to Jobs & Pipelines and select your newly created Nextmv job.
- In the right-hand menu, near the bottom under the Permissions section, click Edit Permissions.
- In the modal that appears, in the “Select user, group or service principal…” dropdown:
- Select your service principal (note that you may need to search for the service principal by name for it to appear).
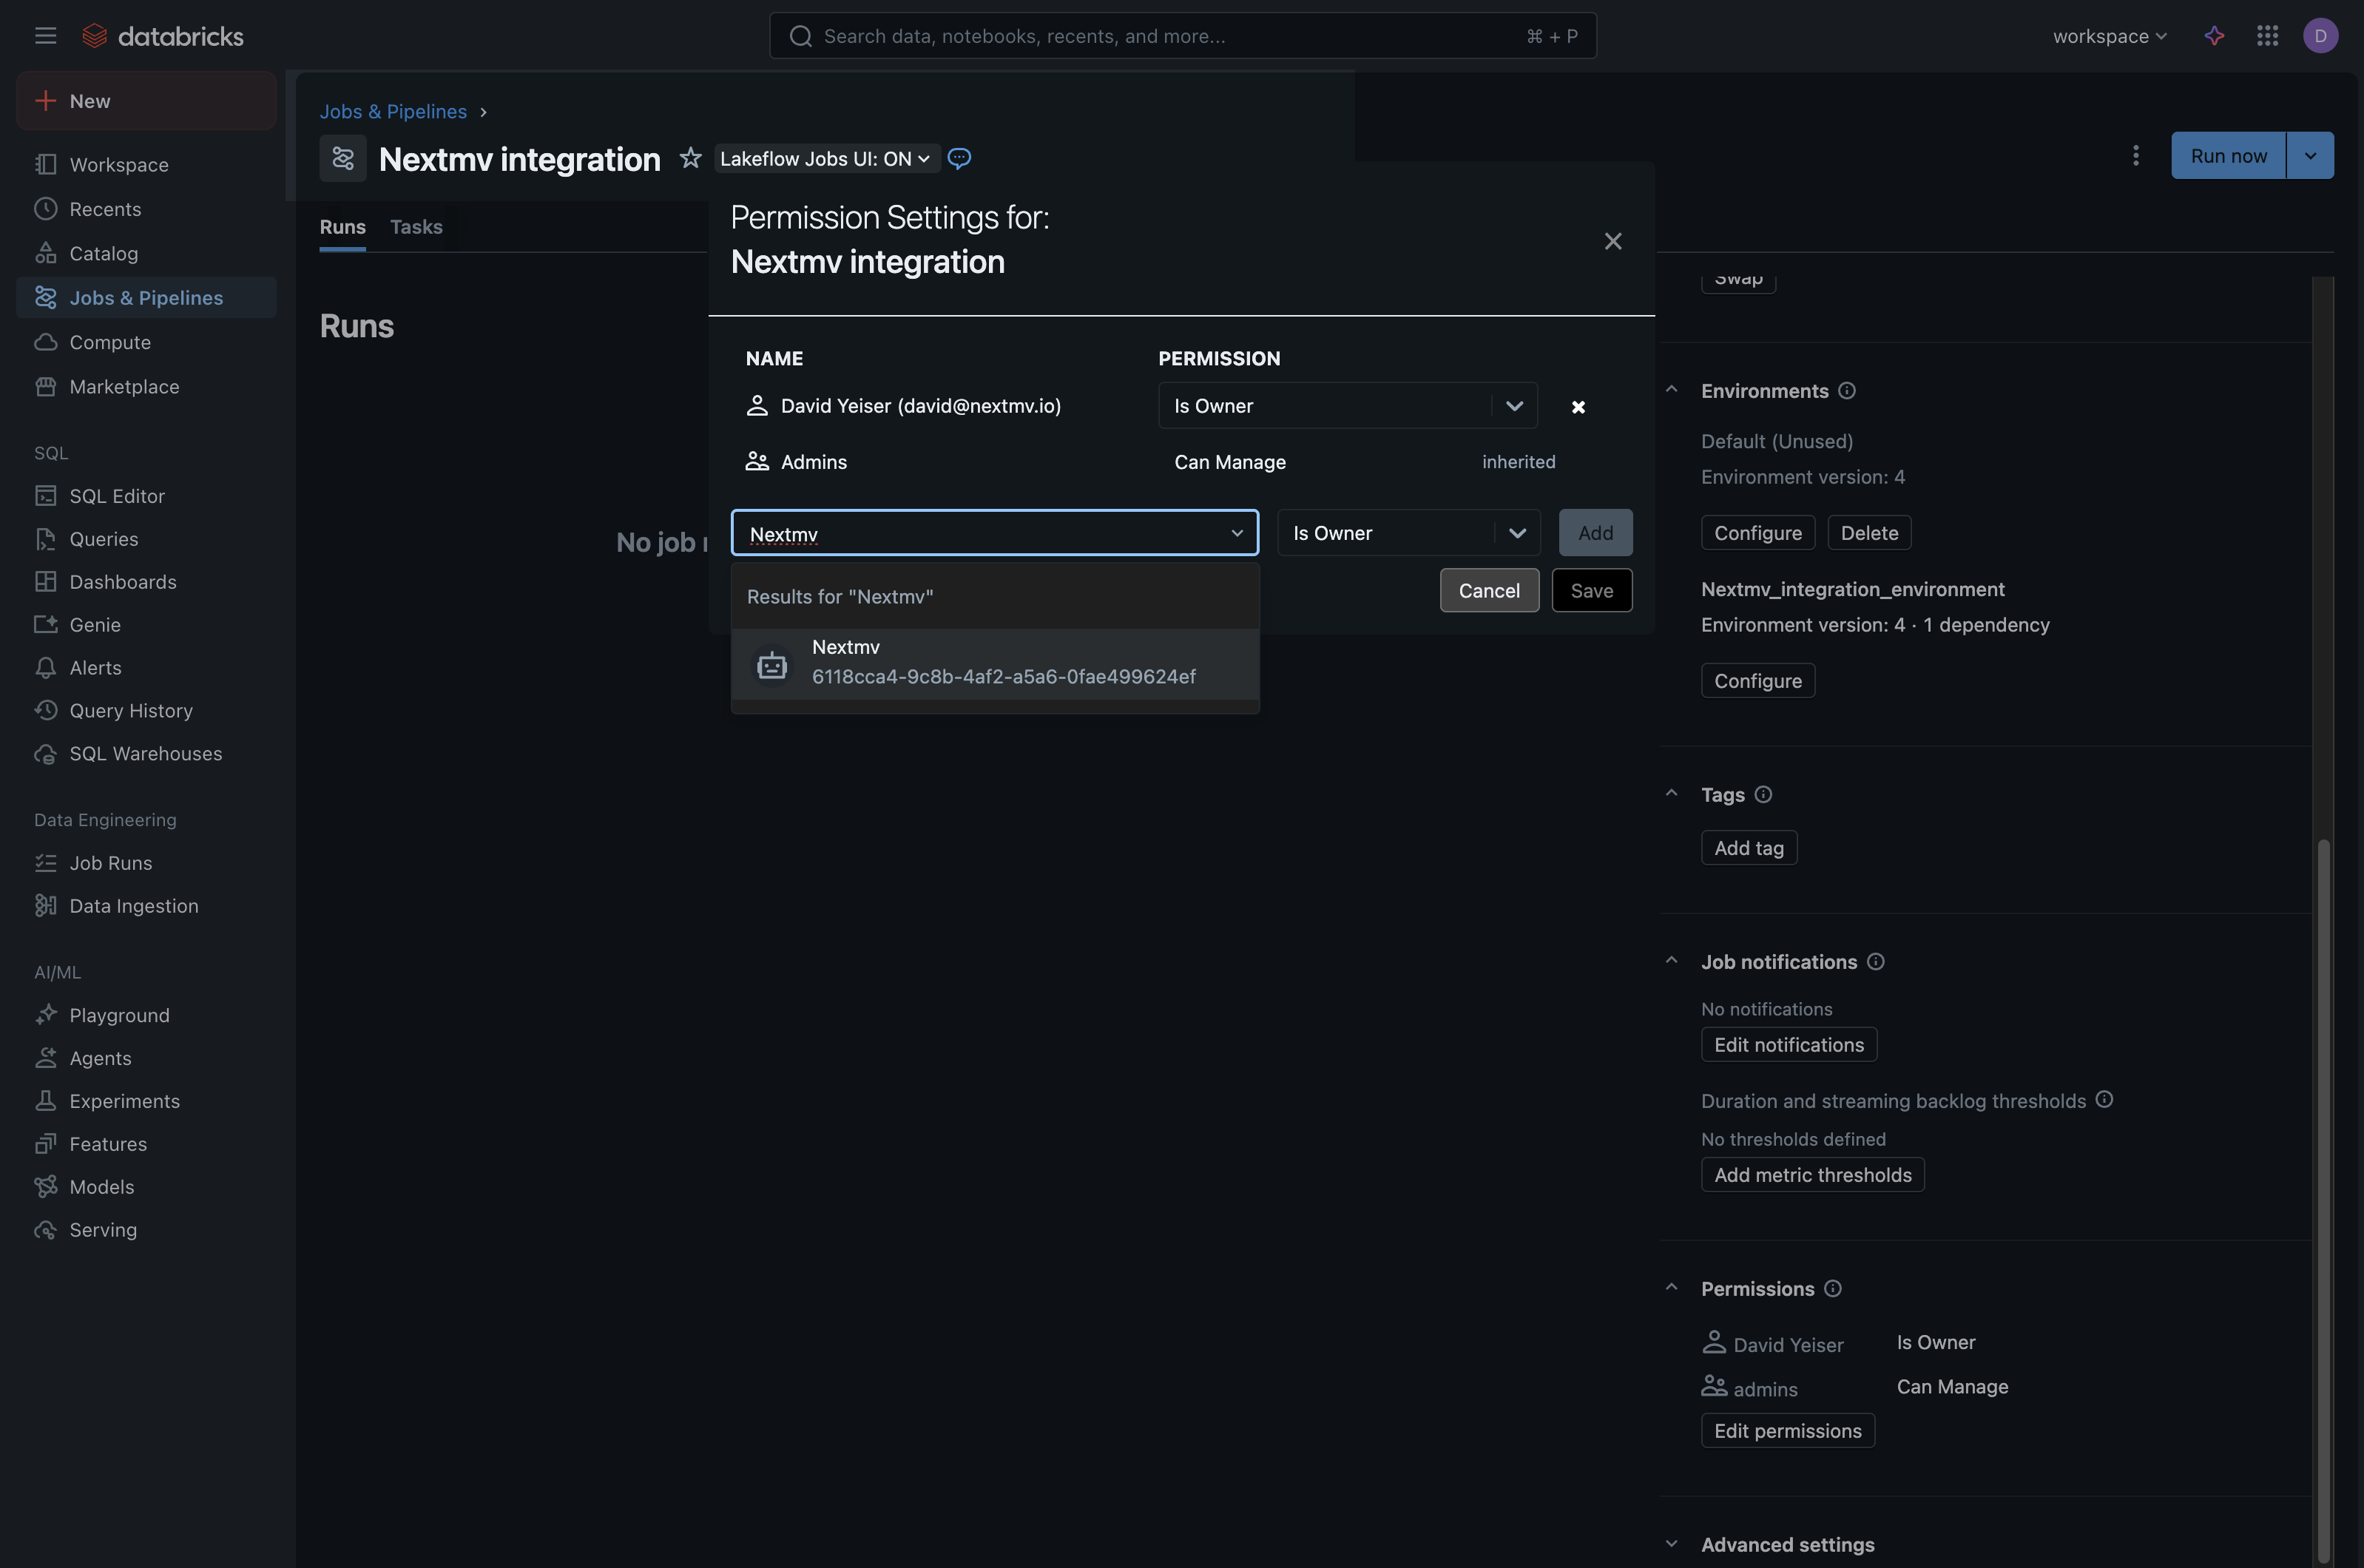
- In the permissions dropdown next to the service principal, select Can Manage Run.
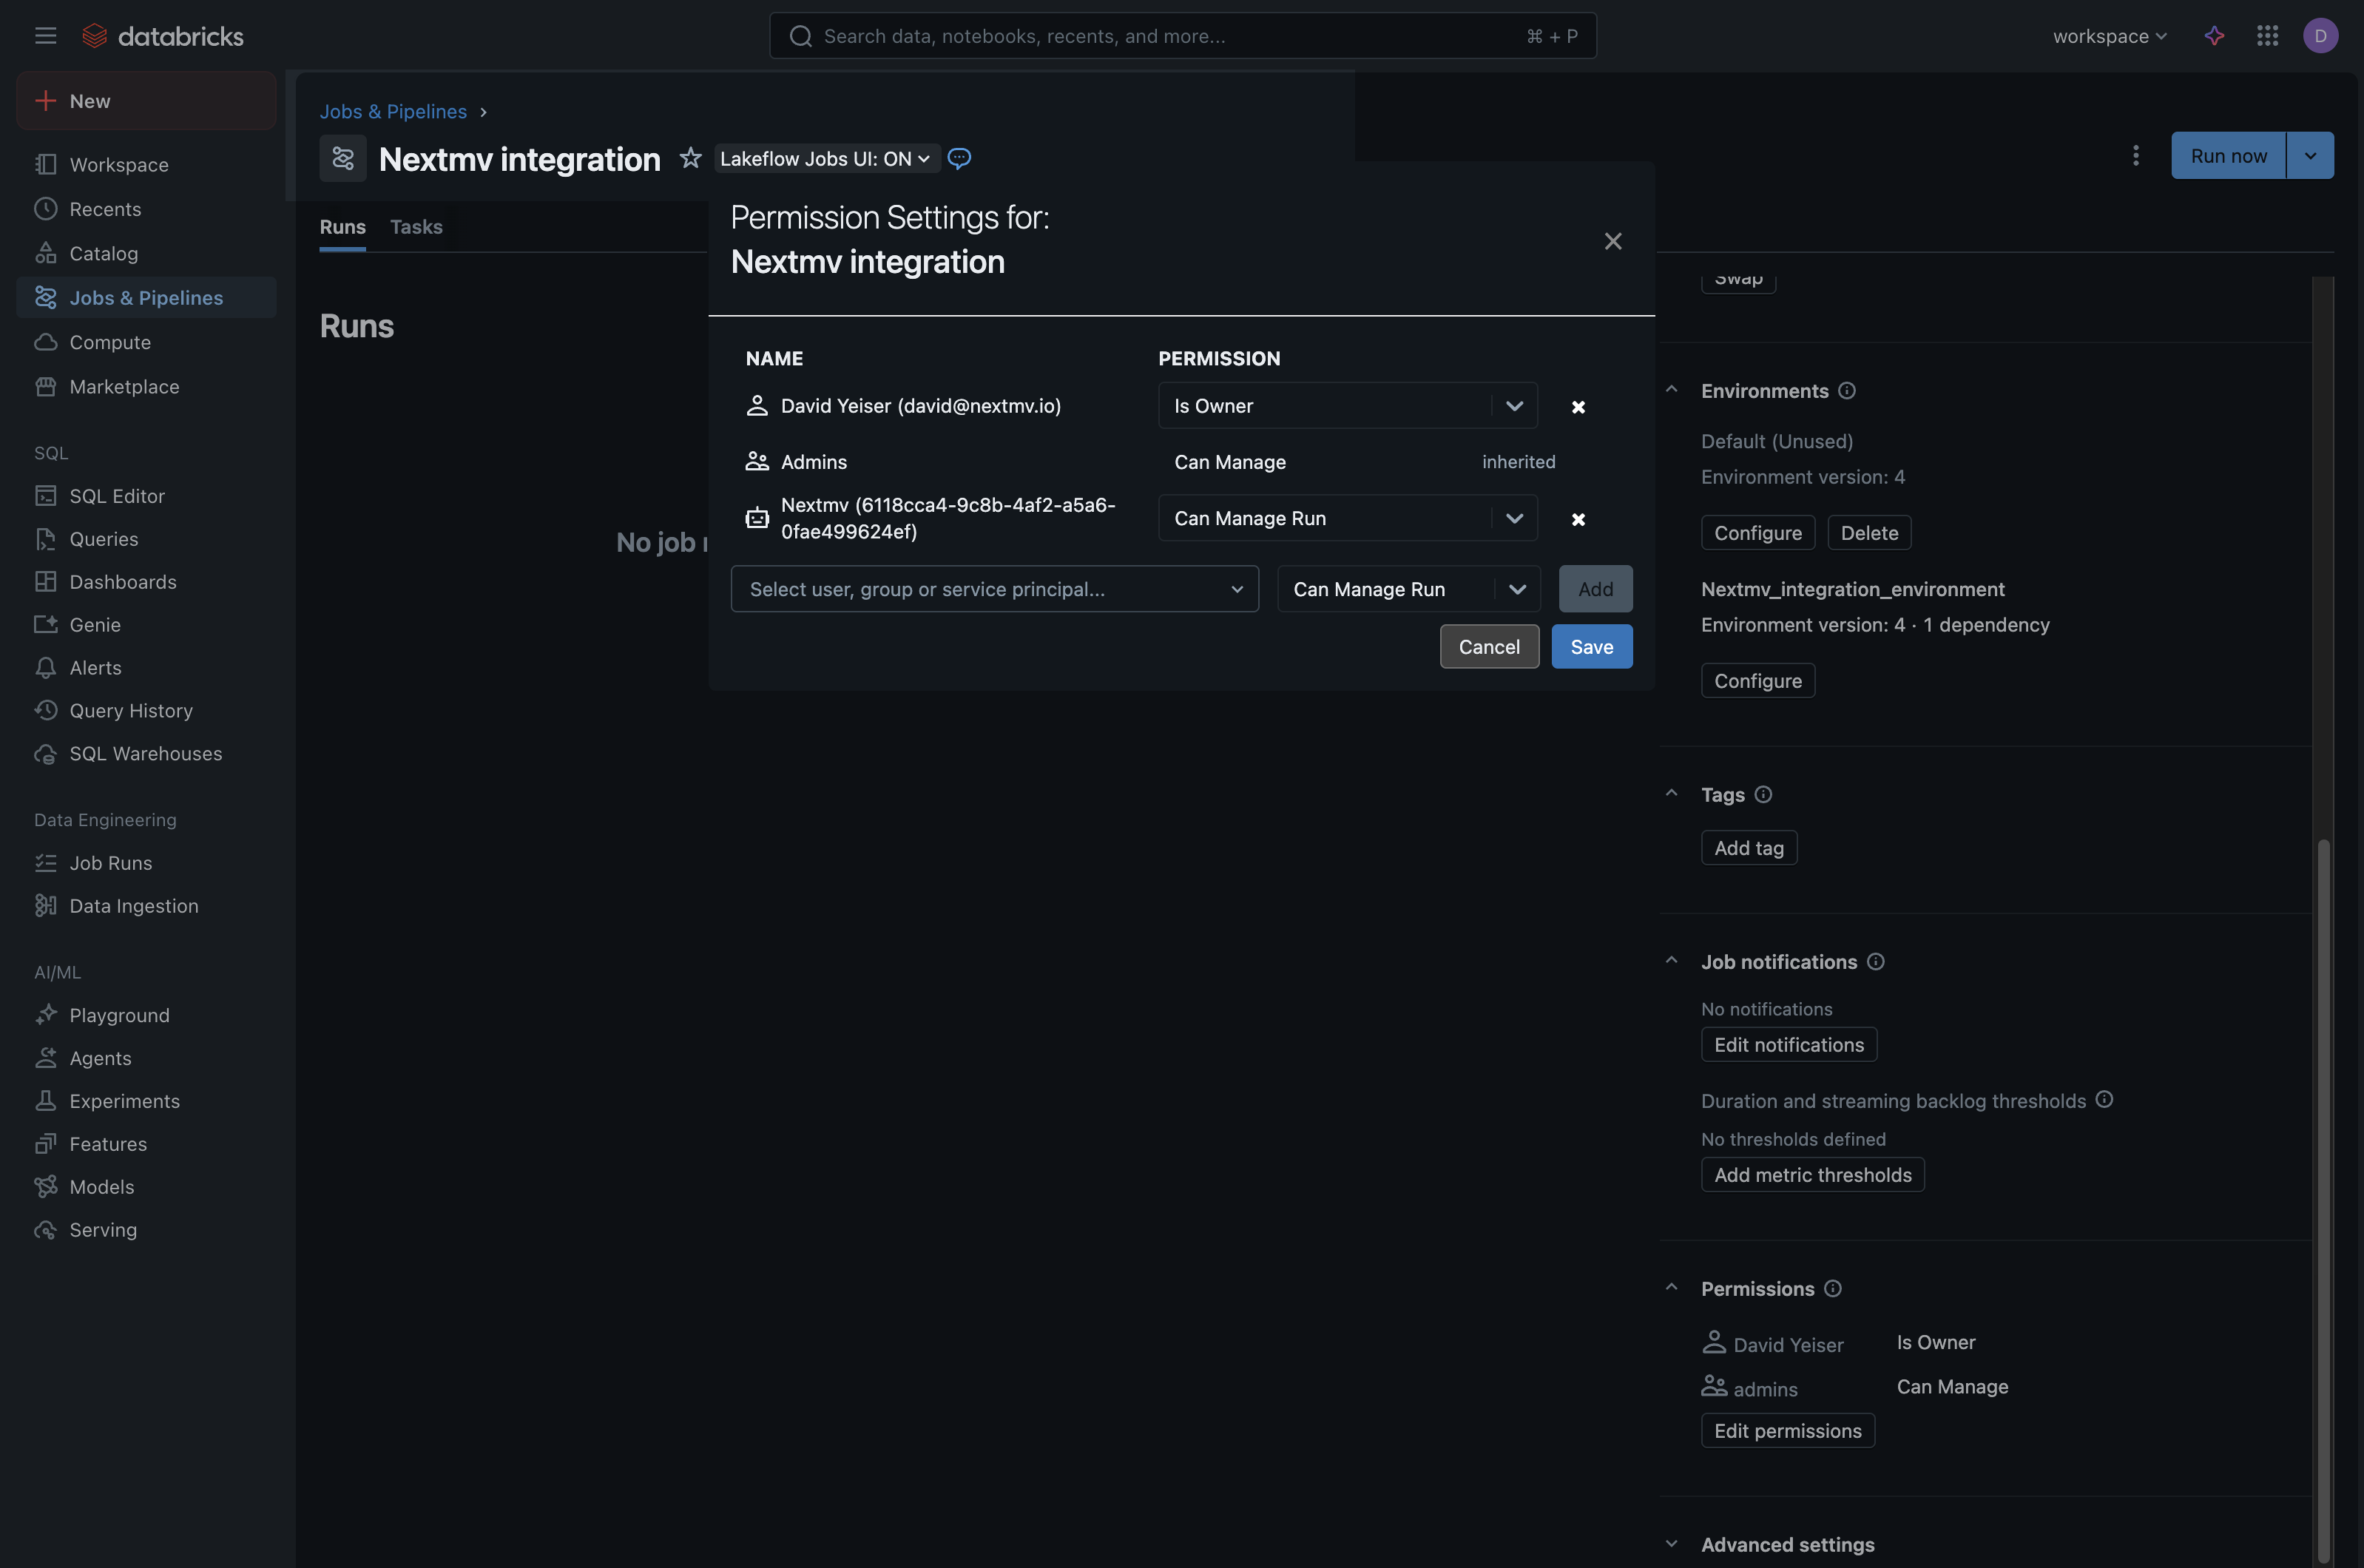
- Click
Addand thenSaveto add your service principal
- Select your service principal (note that you may need to search for the service principal by name for it to appear).
- You can then close the modal and verify that your service principal has been added to the Permissions section and is listed with the correct permissions.
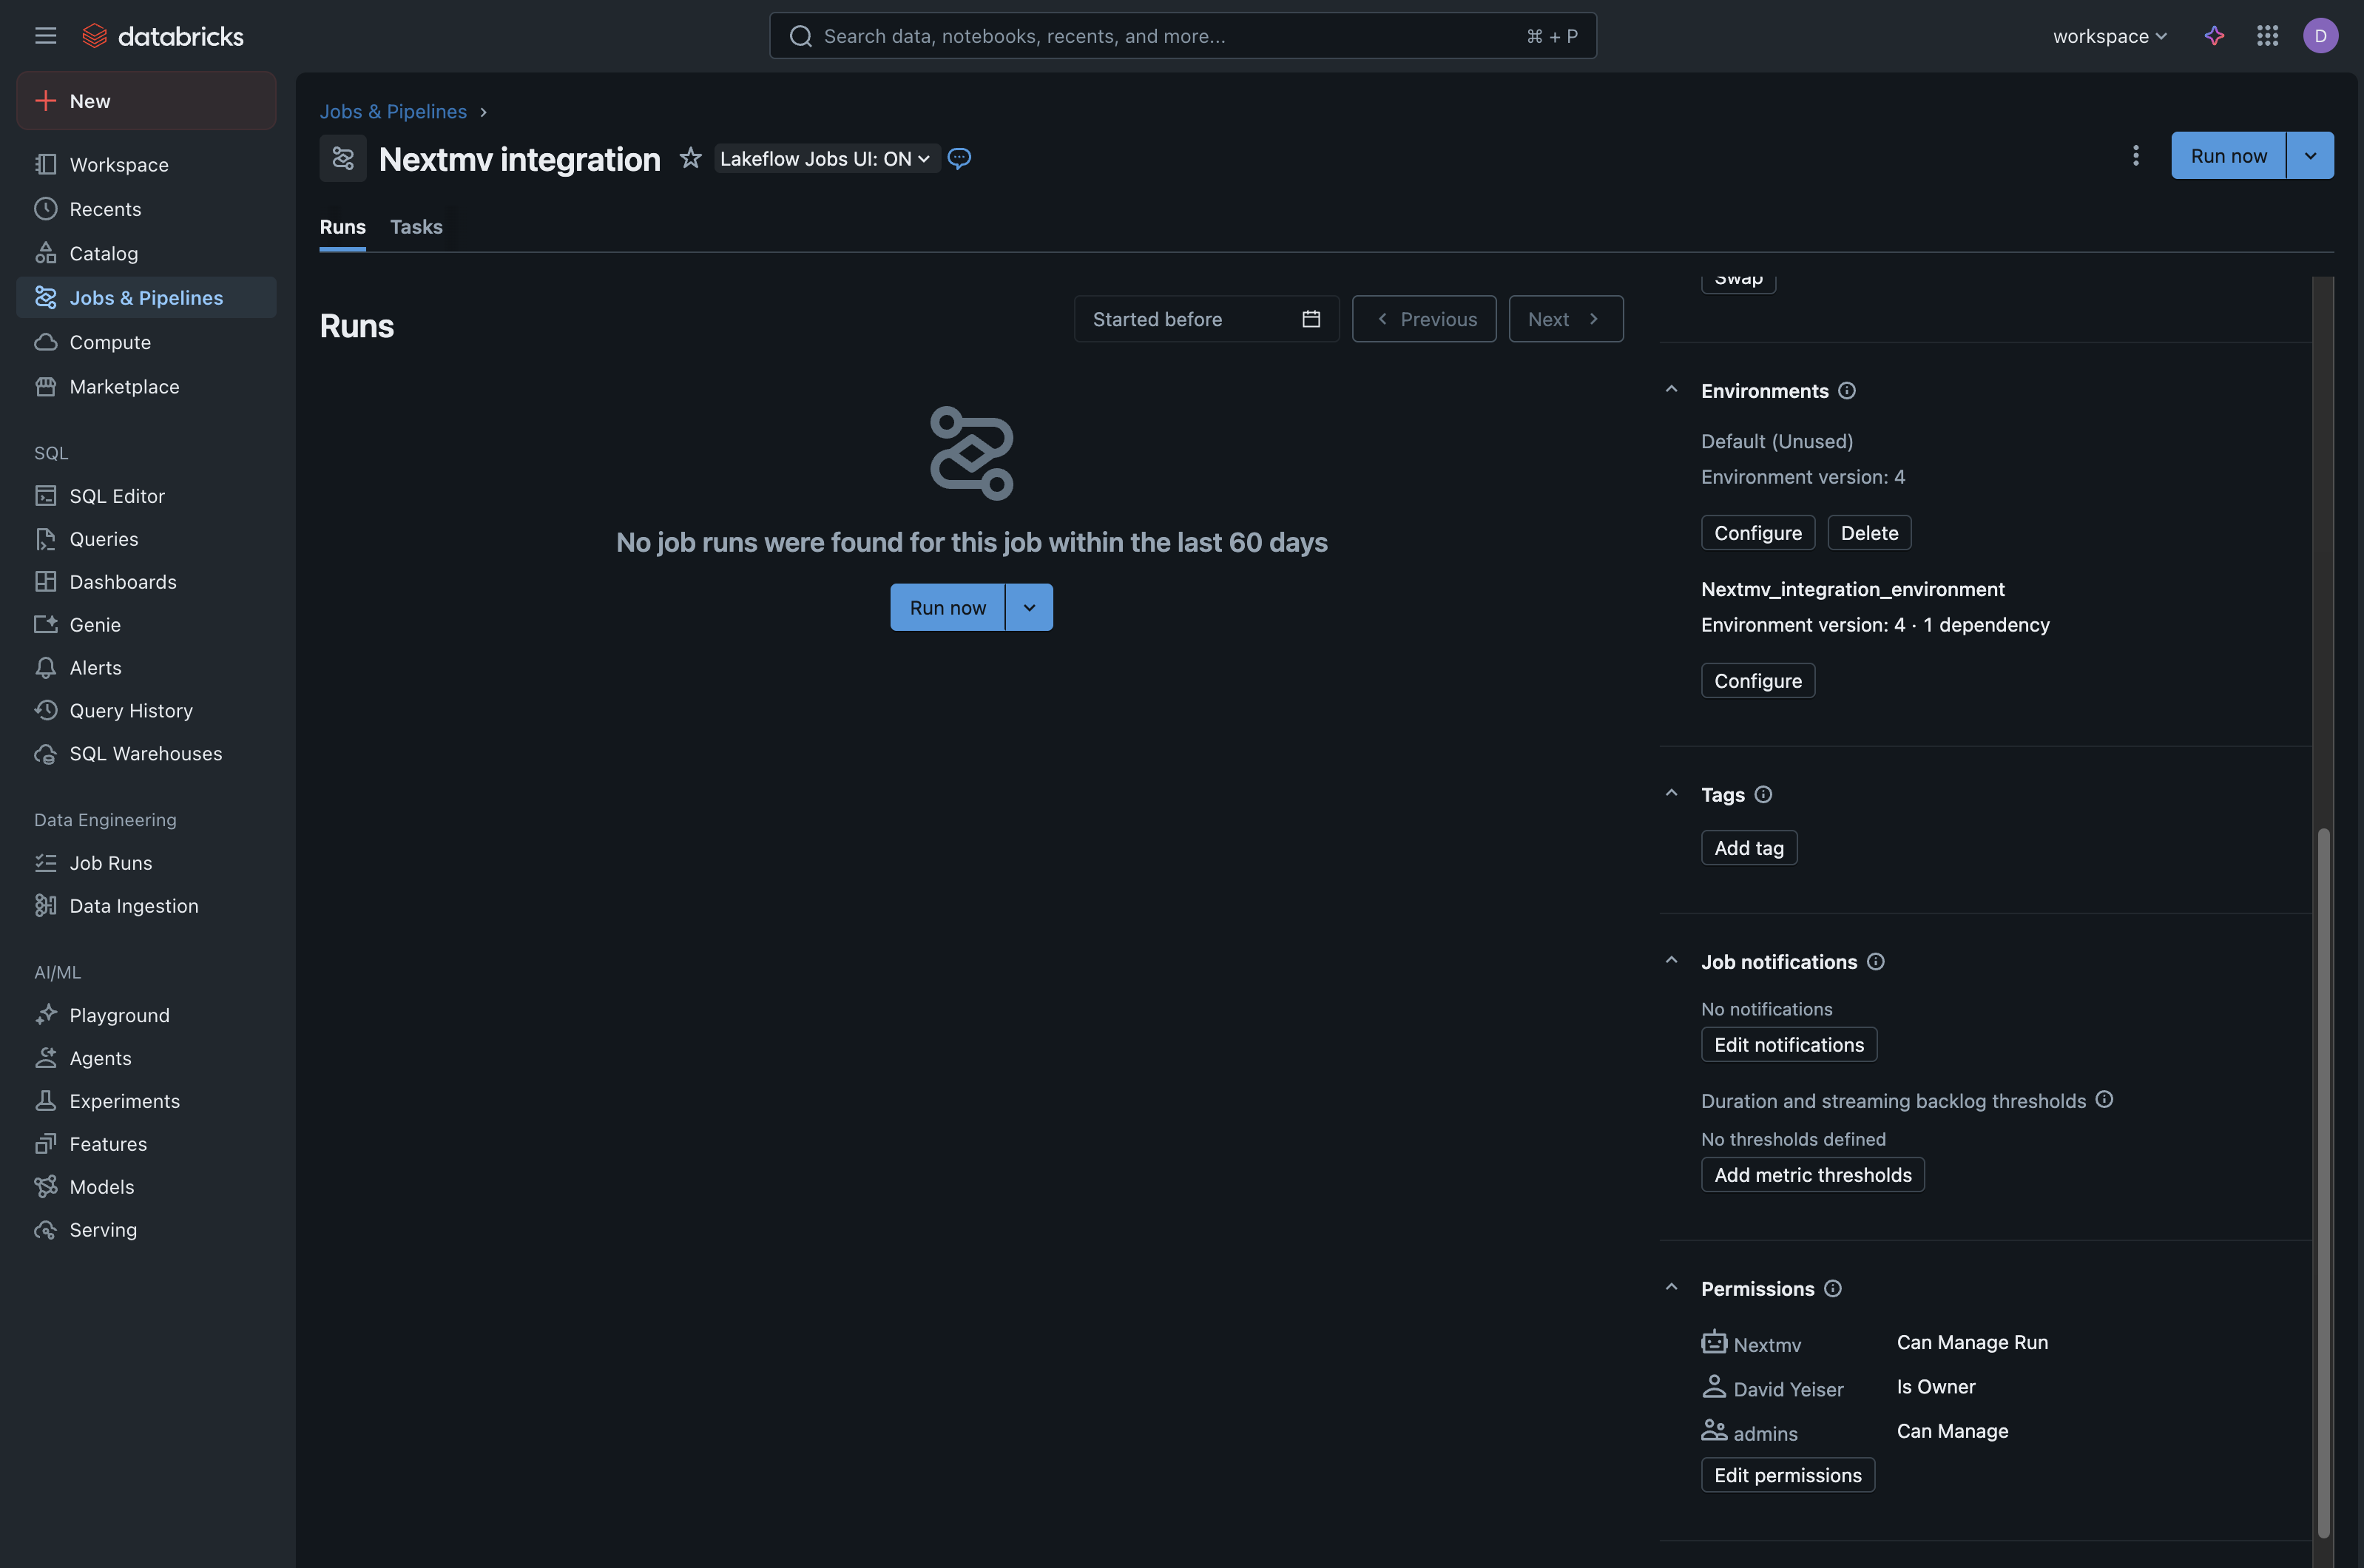
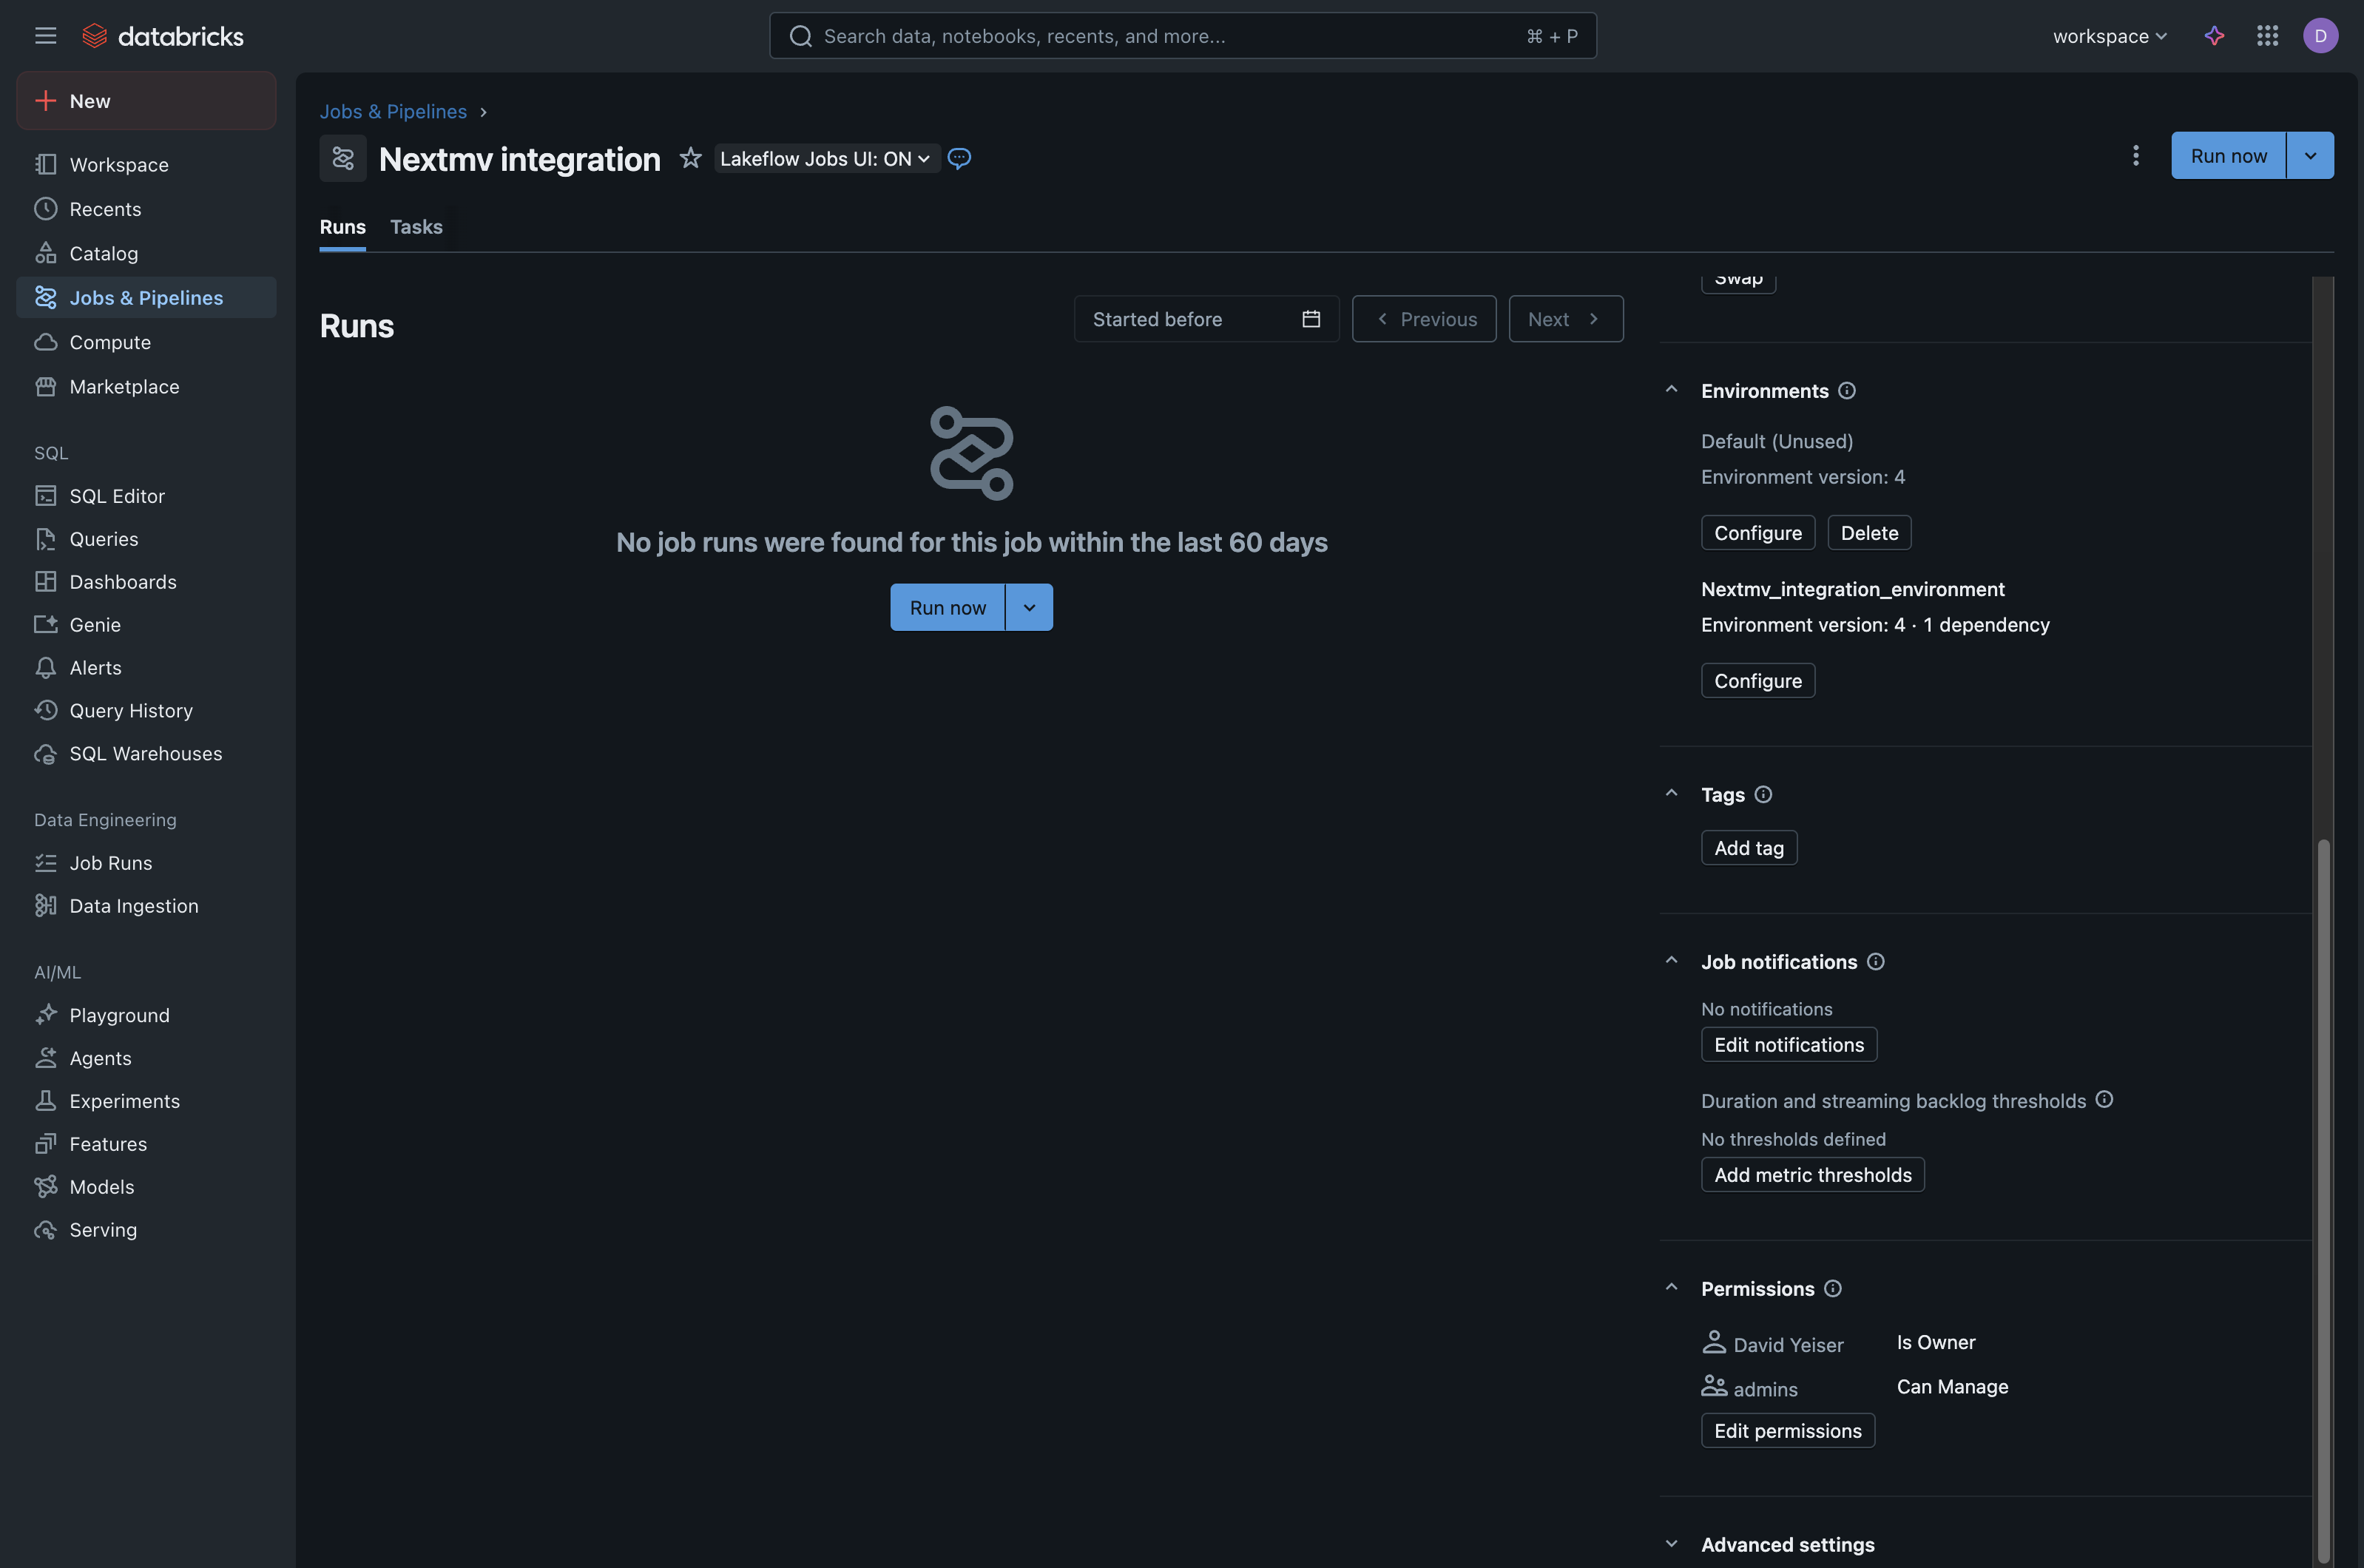
For your convenience, while you are on this screen, copy your Job ID number and your
Databricks workspace base URL. You will need both of these to configure your Nextmv integration later.
- Job ID: Found on the job details page, in the right sidebar under “Job Details”.
- Workspace URL: This is your Databricks workspace URL (e.g.,
https://dbc-a1b2345c-d6e7.cloud.databricks.com). Note that this is the base URL for the Databricks workspace, not the job-specific URL.
2. Configure your app manifest
Depending on the set up and compute configuration of your Databricks job, your application config file may need to be updated to match the Databricks execution environment.
For example, the code samples below match a Databricks compute environment of Python 3.12 and amd64 architecture, which is compatible with Databricks environment 4 (Python 3.12) on serverless compute.
Once you have matched the compute environment of your Databricks container, no other change is required to your app manifest.
3. Set up Nextmv integration
Once the Databricks job is configured with the Nextmv Agent (Python wheel), you need to create an integration in Nextmv that holds the relevent Databricks information. This integration can then be assigned to application runs which will execute the run in the Databricks job environment. In Nextmv, integrations are created at the account level and applied at the app level.
In this section we are going to create a new Databricks integration and a new app that uses the integration. Note that while the tutorial walks through the process of creating a new app, if you have an existing Nextmv application that you would like to connect to Databricks, you can use that application in place of the new one created in this tutorial. instead.
Create the integration
First we will create the integration at the account level. In the top navigation bar, click on Team Settings and then in the left sidebar click on Integrations and then click the + button in the upper right to create a new integration. Alternatively, you can navigate to this page via Marketplace > Integrations > Connect button in the Databricks integration card (both paths lead to the same place).
The create integration screen is essentially divided into two parts: the first part is the configuration of the integration on the Nextmv side, the second part is for the Databricks details.
Here is a breakdown of the fields for the first part:
- Name, ID, and description: these fields are for your use and reference only. The name and ID are required, the description is optional. Note that the ID cannot be edited once created, but you can always delete the integration and re-create it with a different ID.
- Permissions: this field sets access for which apps in Nextmv are allowed to use the integration. If Enable access for all applications is toggled on, then all applications have access to the integration. If you toggle the switch off, an additional interface will appear to allow you to select specific applications that can use the integration; any app not on the list will not have access to the integration. For this tutorial we are going to enable global access, if you decide to limit access just make sure the app you want to use the Databricks integration with is granted access.
- Integration provider: This dropdown select box is for choosing which kind of integration you are creating. The provider is the service you are integrating with — in this case, Databricks. The fields below are populated based on the selection in this dropdown.
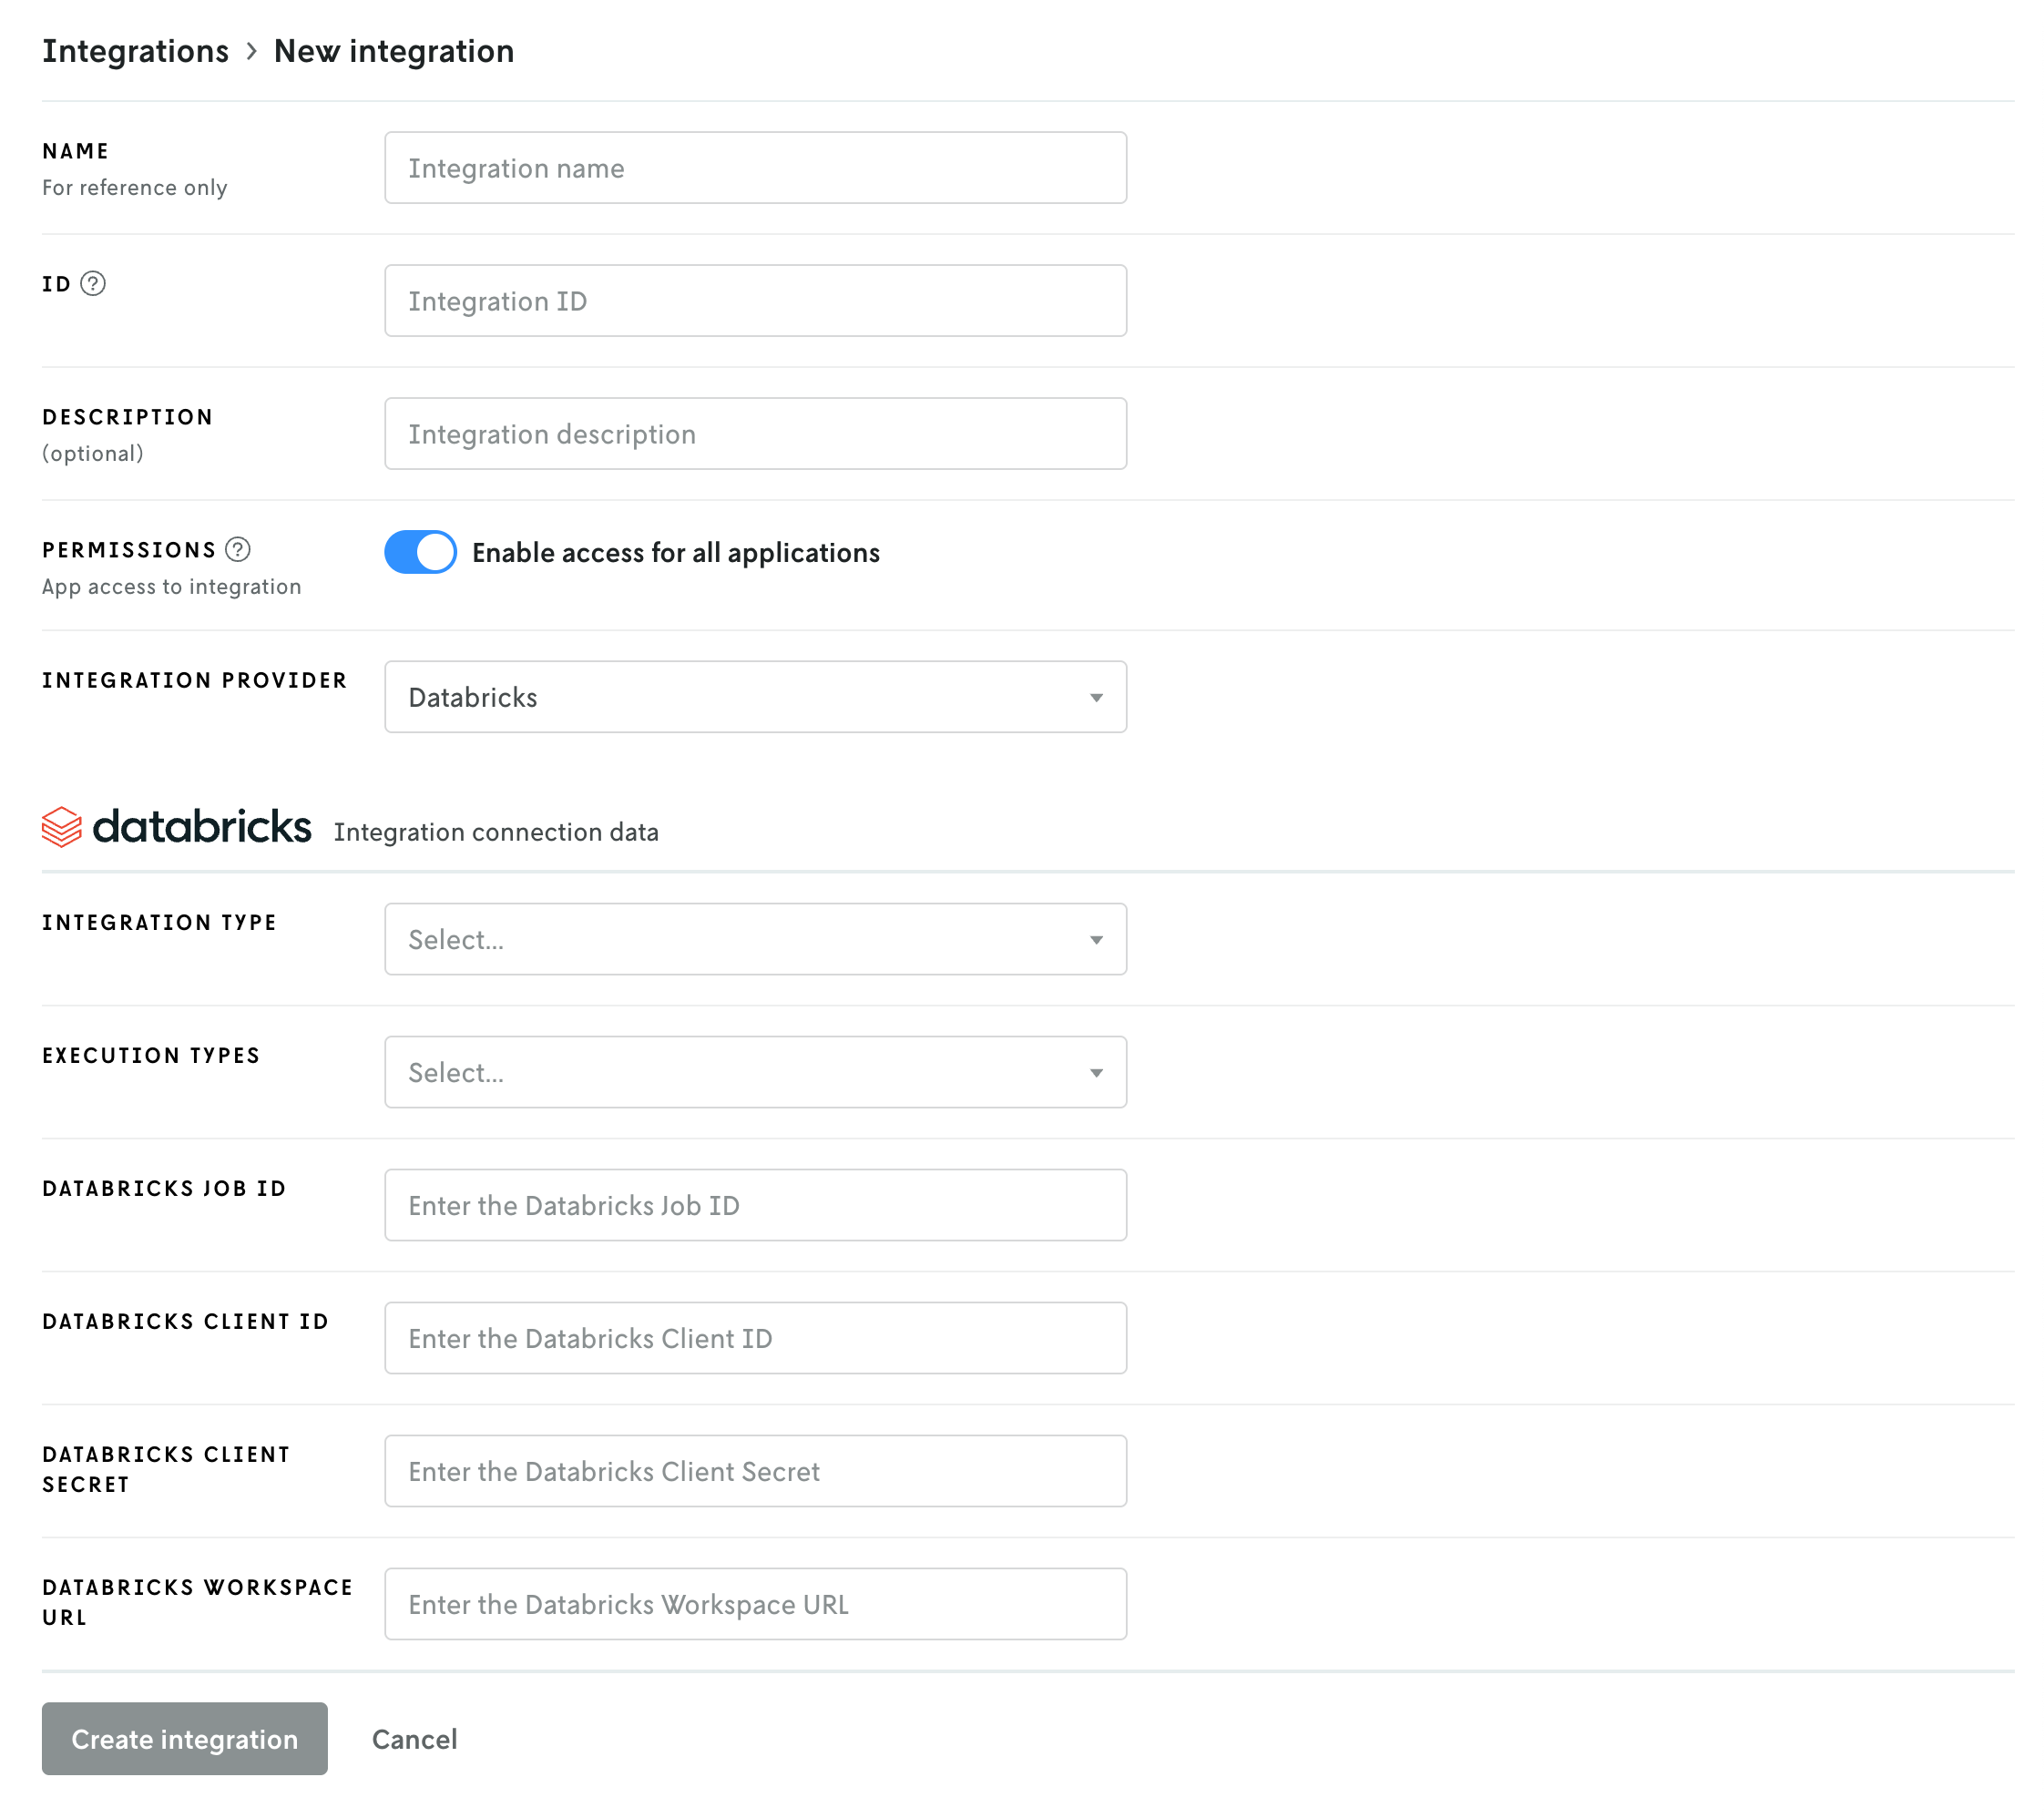
Once the fields above have been filled out, the create new form should look something like this:
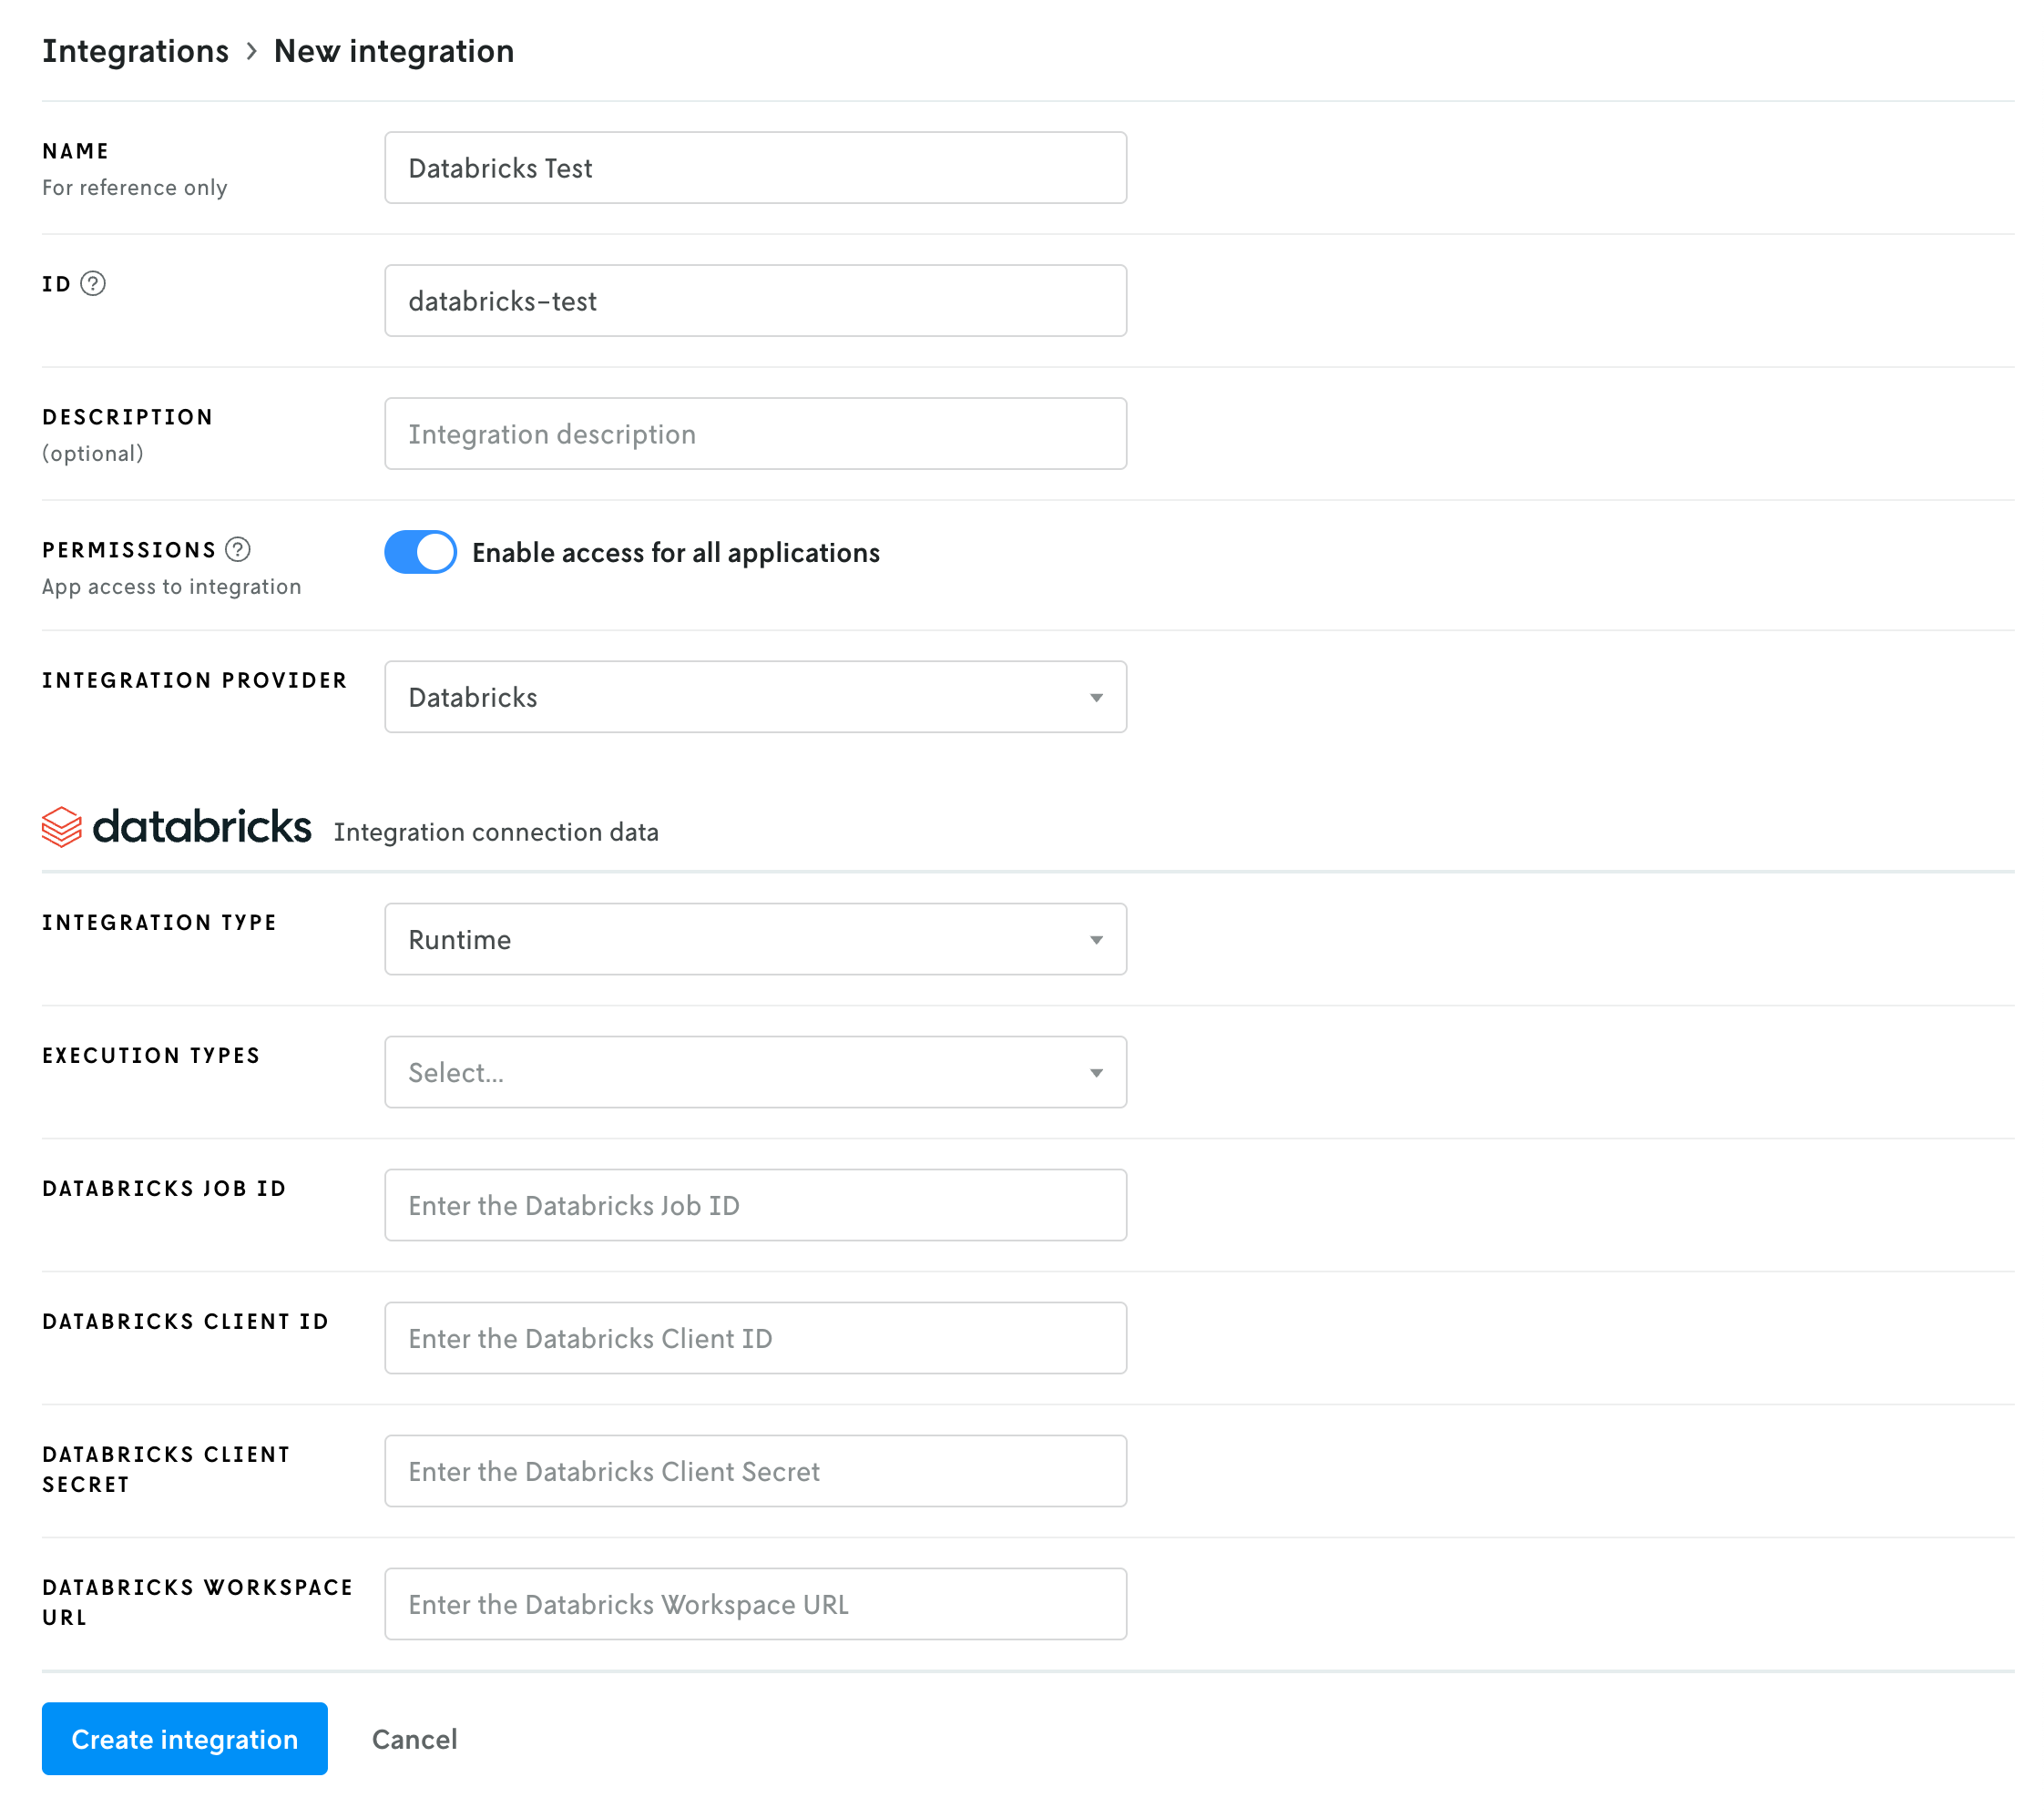
You can enter your own name and ID or you can match the fields shown in the screenshot above. Having different values from what’s shown in the screenshot above will not affect your integration.
The Databricks integration requires six fields:
- Integration type: This field is set by default by the Databricks integration and there is only one option:
Compute. This field communicates the integration type to the Nextmv agent; in this case a compute integration, which means it’s used as an execution environment. - Execution types: There are three different execution types: Python, Java, and Binary. You can select one or more of the types that match up with your application. For example if your app is Python you would select
Python, a Go app would beBinary, and a combination of both would select both types. - Databricks job ID: This is the ID of the Databricks job you created in part 1. You can get this job ID by navigating to Jobs & Pipelines in Databricks and clicking on your job. The ID will be in the right sidebar under Job Details. Copy the ID and paste this value into Nextmv.
- Databricks workspace URL: The workspace URL is the base URL for your Databricks workspace. It is not specific to any job, etc. (e.g.,
https://dbc-a1b2345c-d6e7.cloud.databricks.com) - Databricks client ID: This and the client secret are the credentials for the OAuth secret you created for the service principal in part 1 above. Copy and paste the client ID here.
- Databricks client secret: As with the client ID above, copy and paste the client secret in this field.
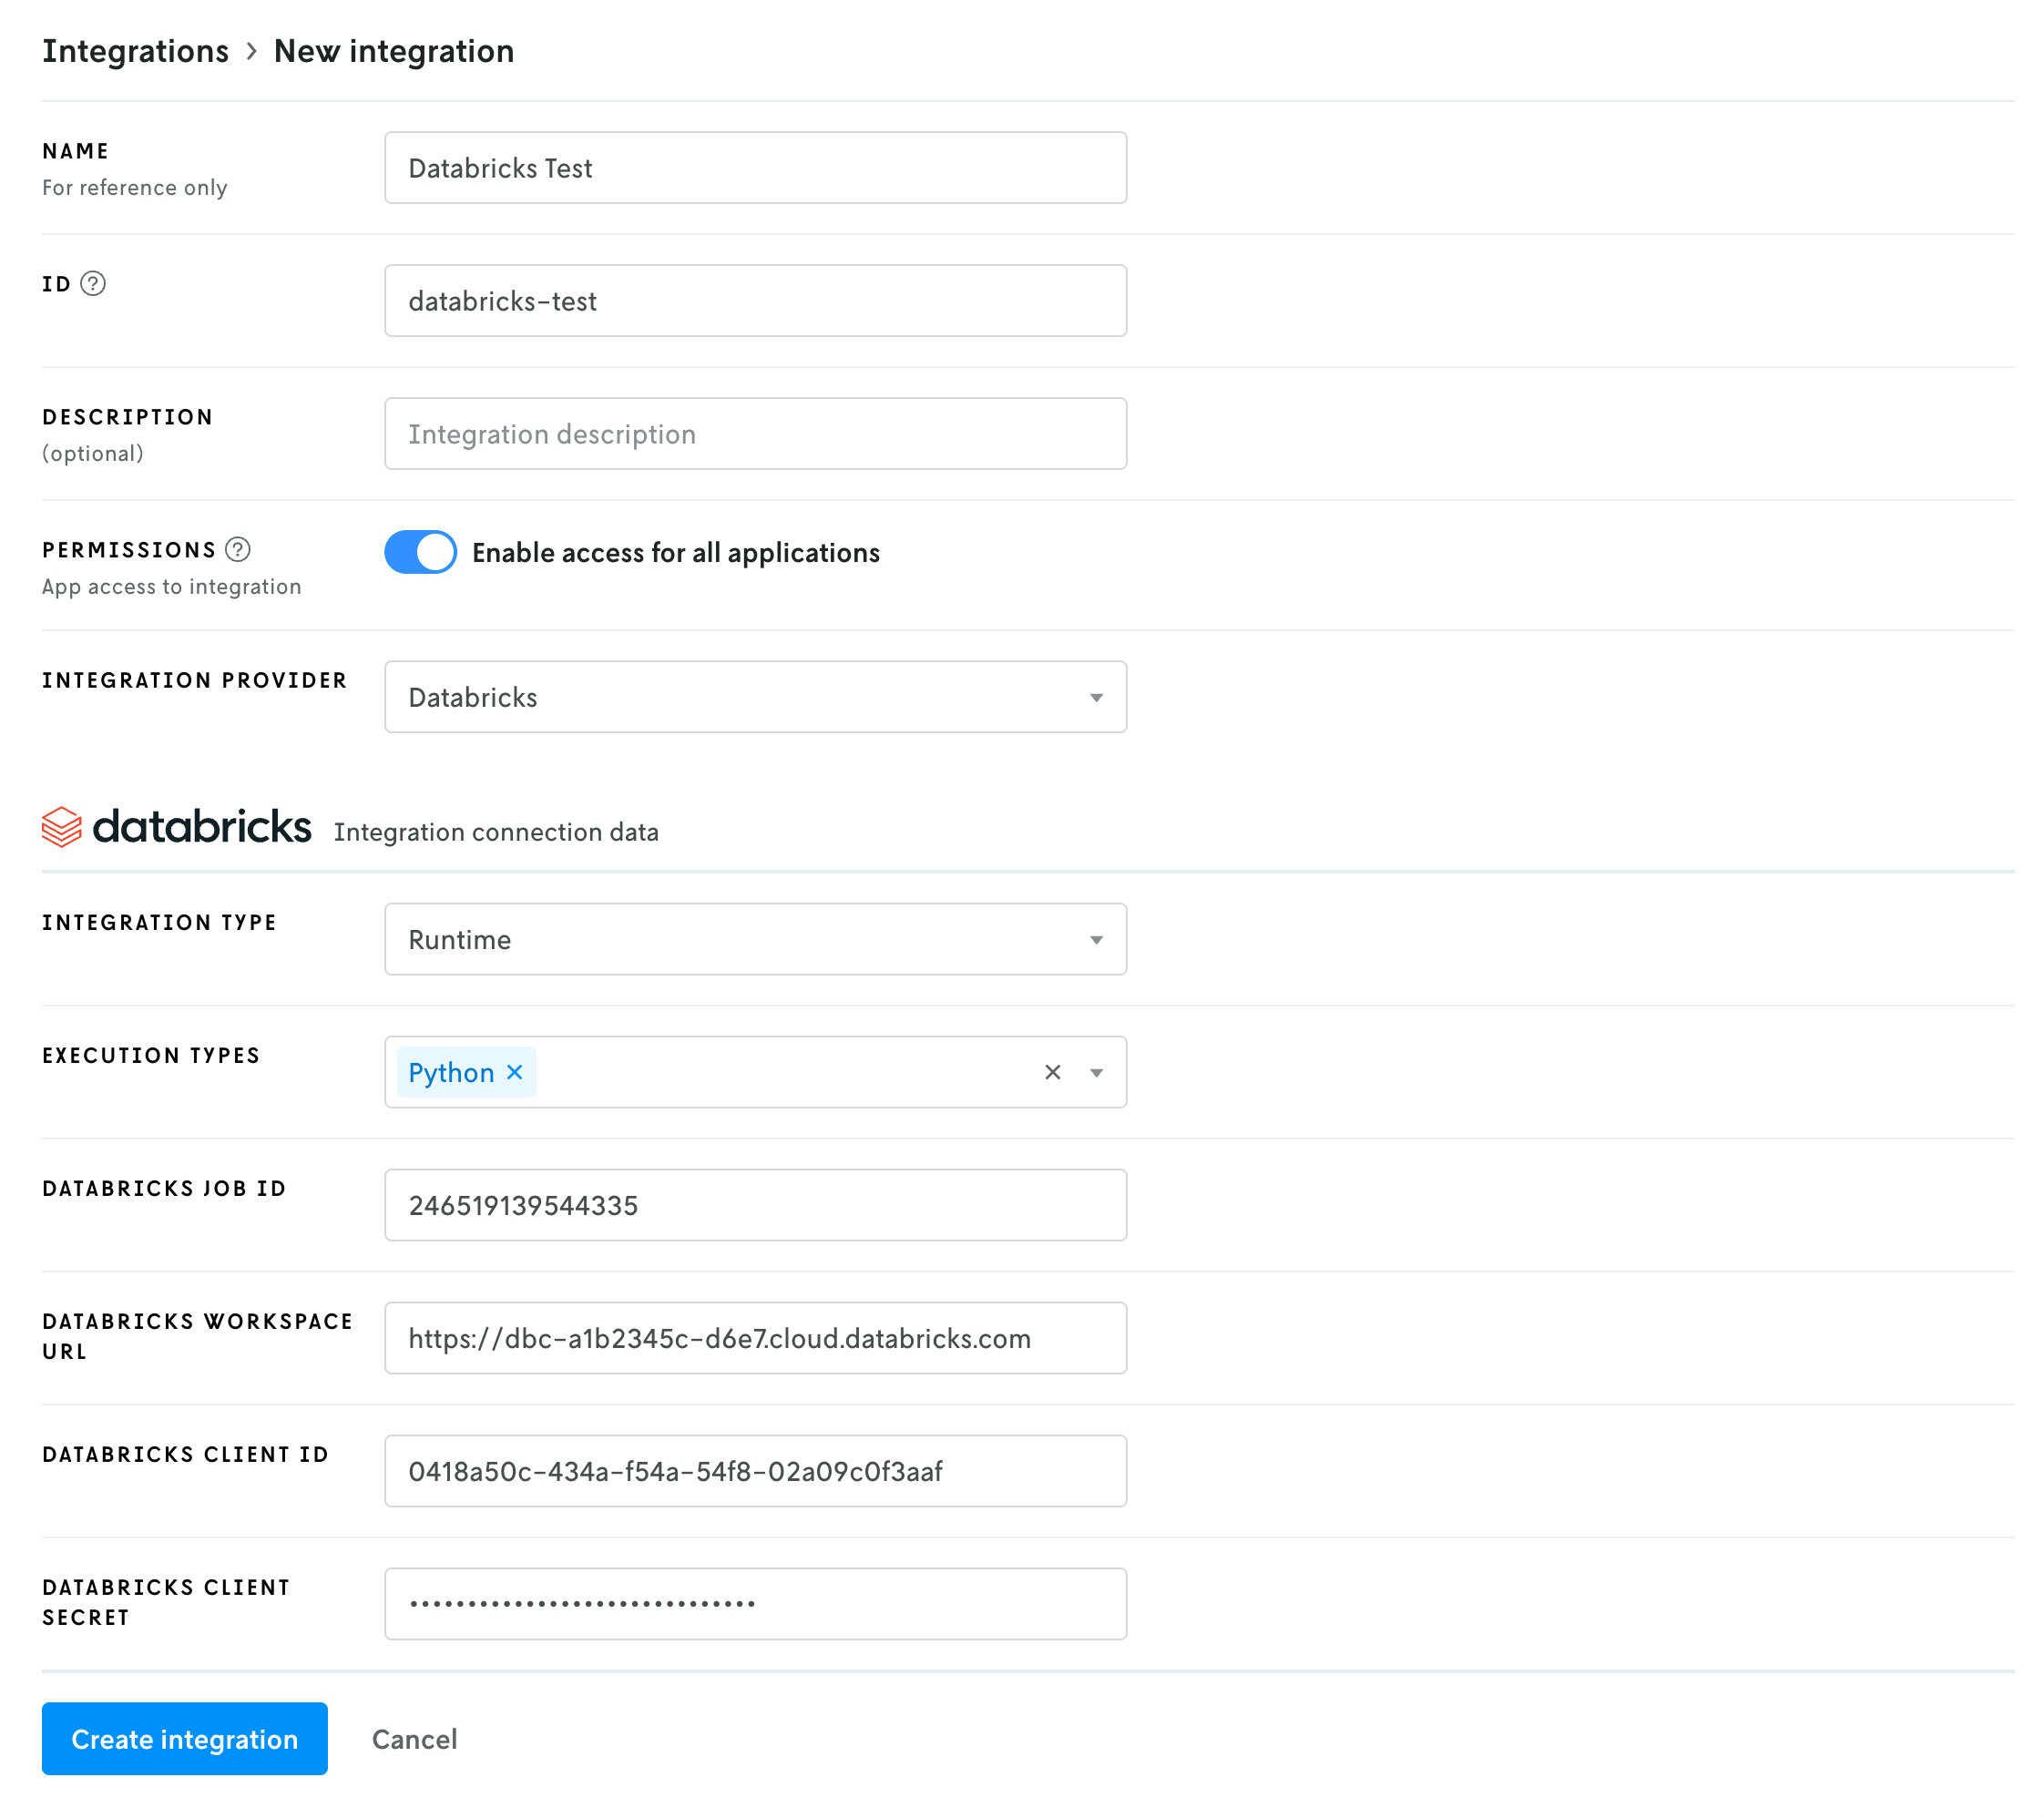
Once you have these fields filled out, click the Create integration button to create the integration. (Note that your exact values will be different than what is shown in the screenshot above.)
Create an app
If you have an existing app you would like to use instead of creating a new one, skip this step and proceed to Push updated binary.
Next, in Nextmv Console, create a new app by clicking on the Apps & Workflows main navigation link in the top header and then clicking the + button in the upper right. Select New custom app and then follow the steps to create a new custom app.
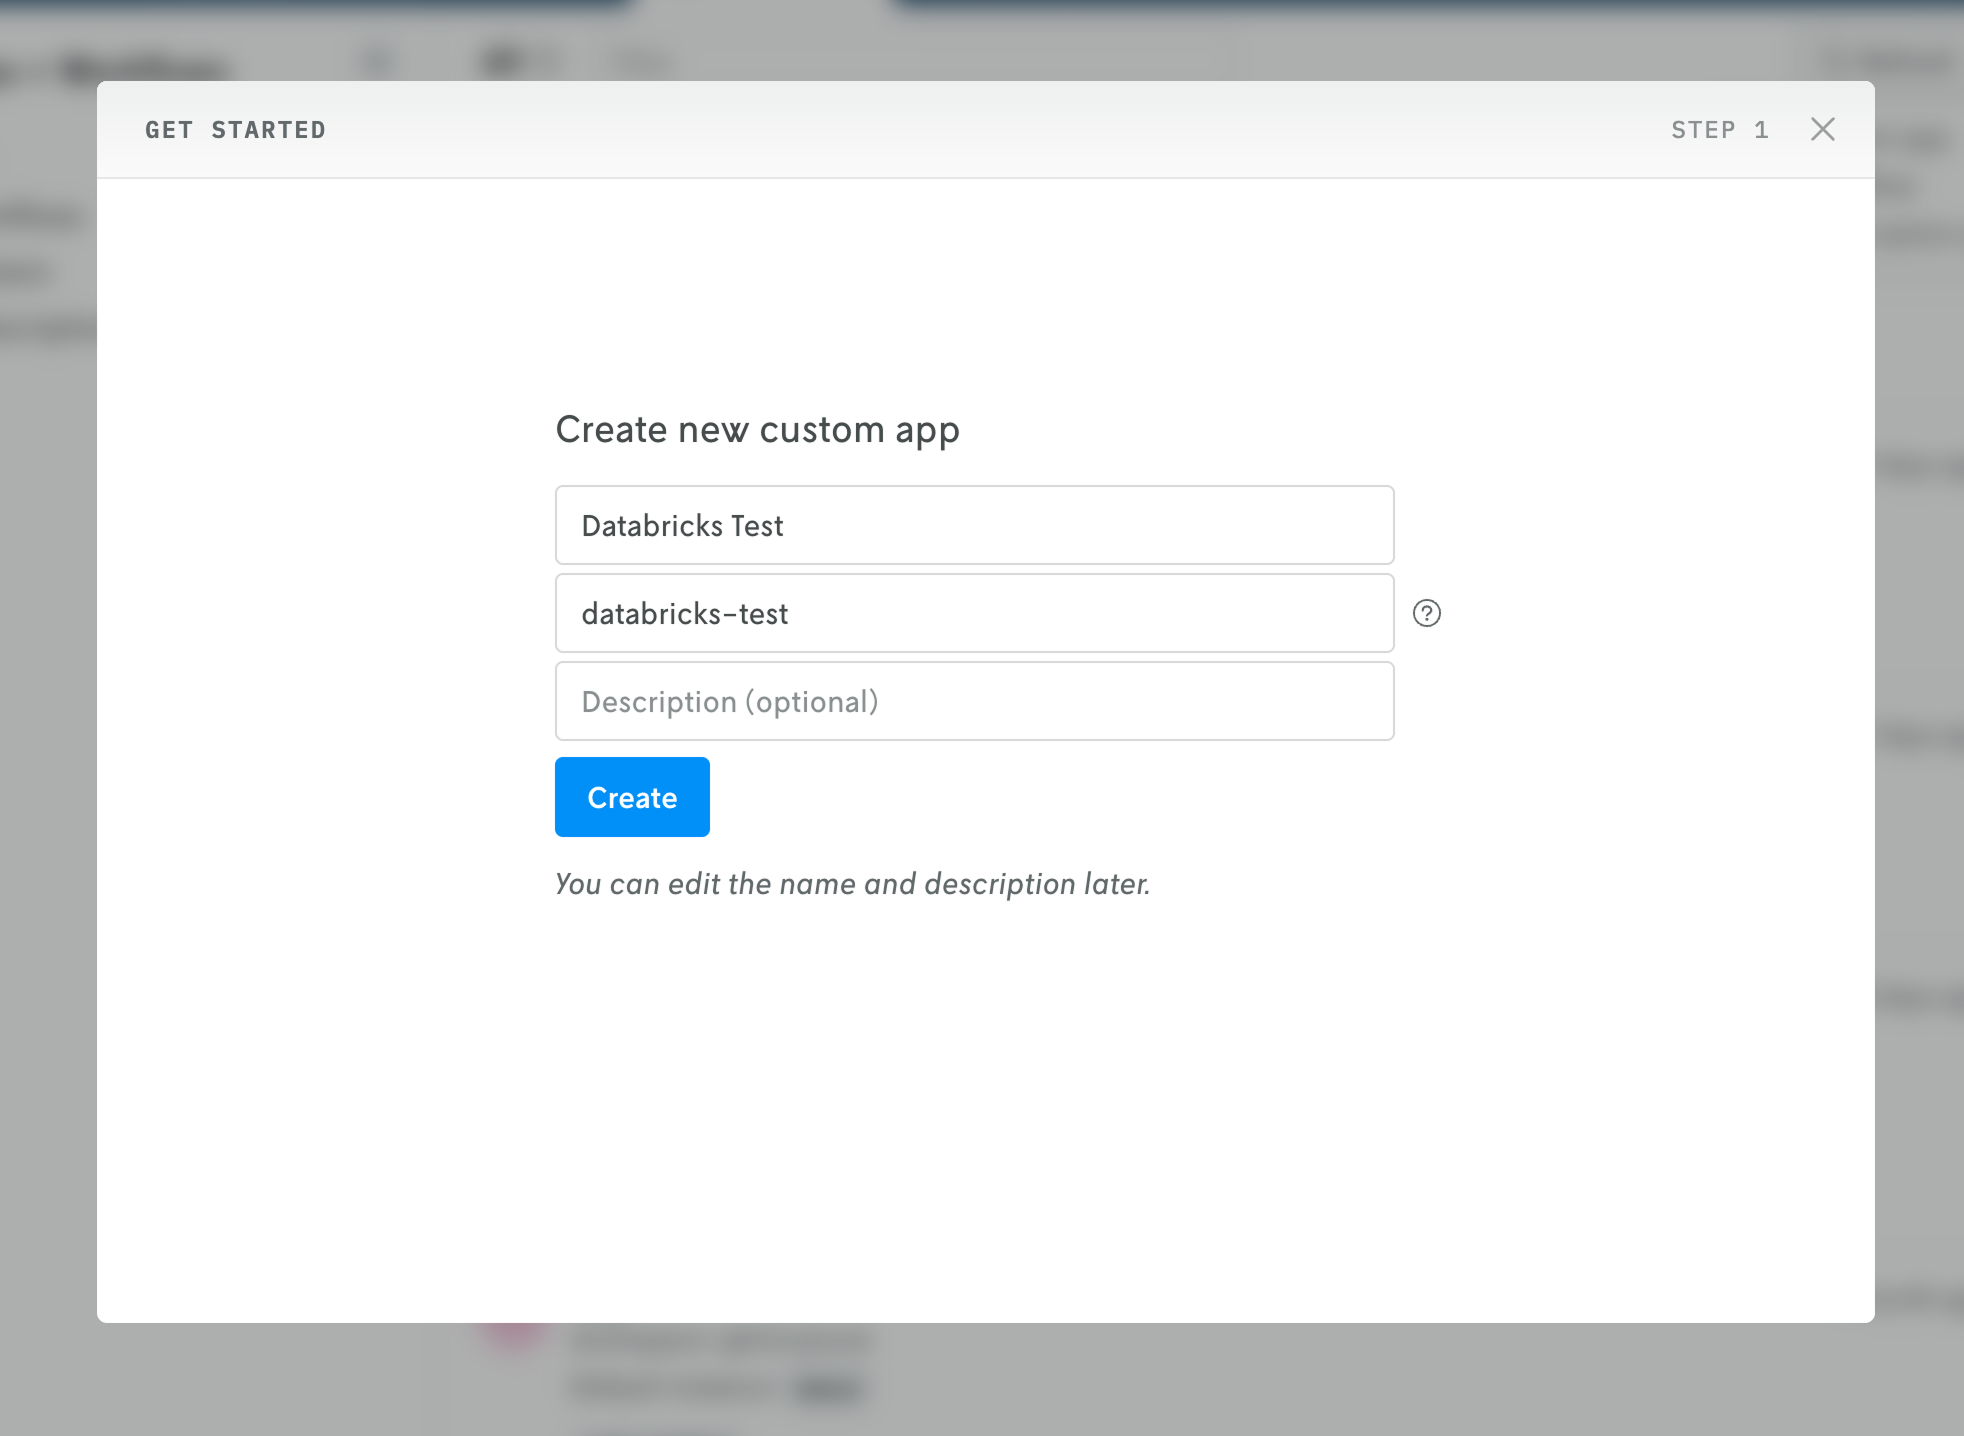
After filling out the name, ID, and description fields and clicking Create, you can click the Skip button at the bottom of the next screen to go to the newly created app’s details view.
Push updated binary
On the dashboard view for your app, at the top, copy the app’s ID to use for the push commands below.

First, if you made any updates to your app’s app.yaml file in section 2, make sure that these changes are saved. Then push your model to your app with either Nextmv CLI or the Python SDK. Examples for each are shown below (note the <YOUR_APP_ID> is the app ID you copied at the beginning of this step).
Once the push has completed, proceed to the next step.
Attach integration to Latest instance
In this step you will configure your Latest instance to use the Databricks integration so that whenever an application run is made with the Latest instance, the Databricks integration is initiated automatically and the run executed in Databricks.
Note that you do not need an instance to use integrations for runs. You can apply the Databricks integration directly to an application run via the advanced run settings menu; which is especially useful when you are doing ad hoc application runs. You could also programmatically apply the integration on a per run basis within your systems. However, in this tutorial, the integration will be configured on the Latest instance and used via the instance.
In your application in Nextmv Console, navigate to your Instances page and you should see an instance named Latest. (Note that you may need to refresh the page.)
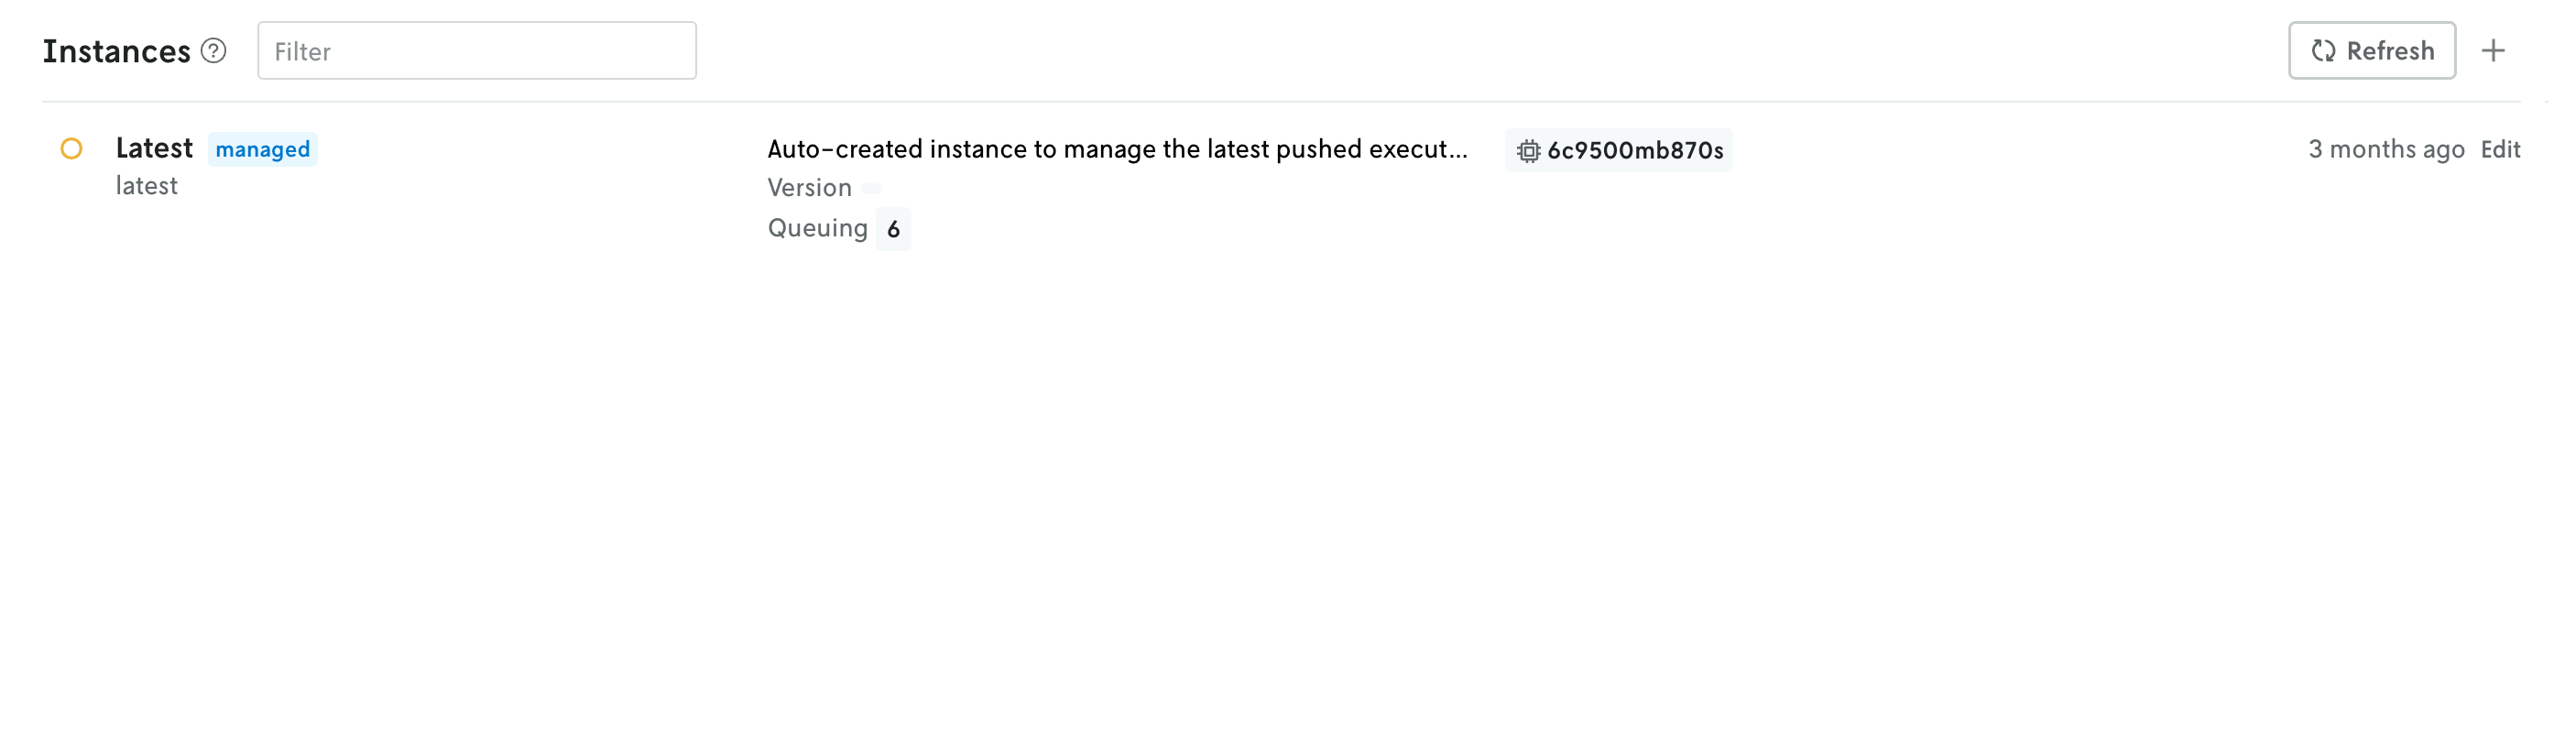
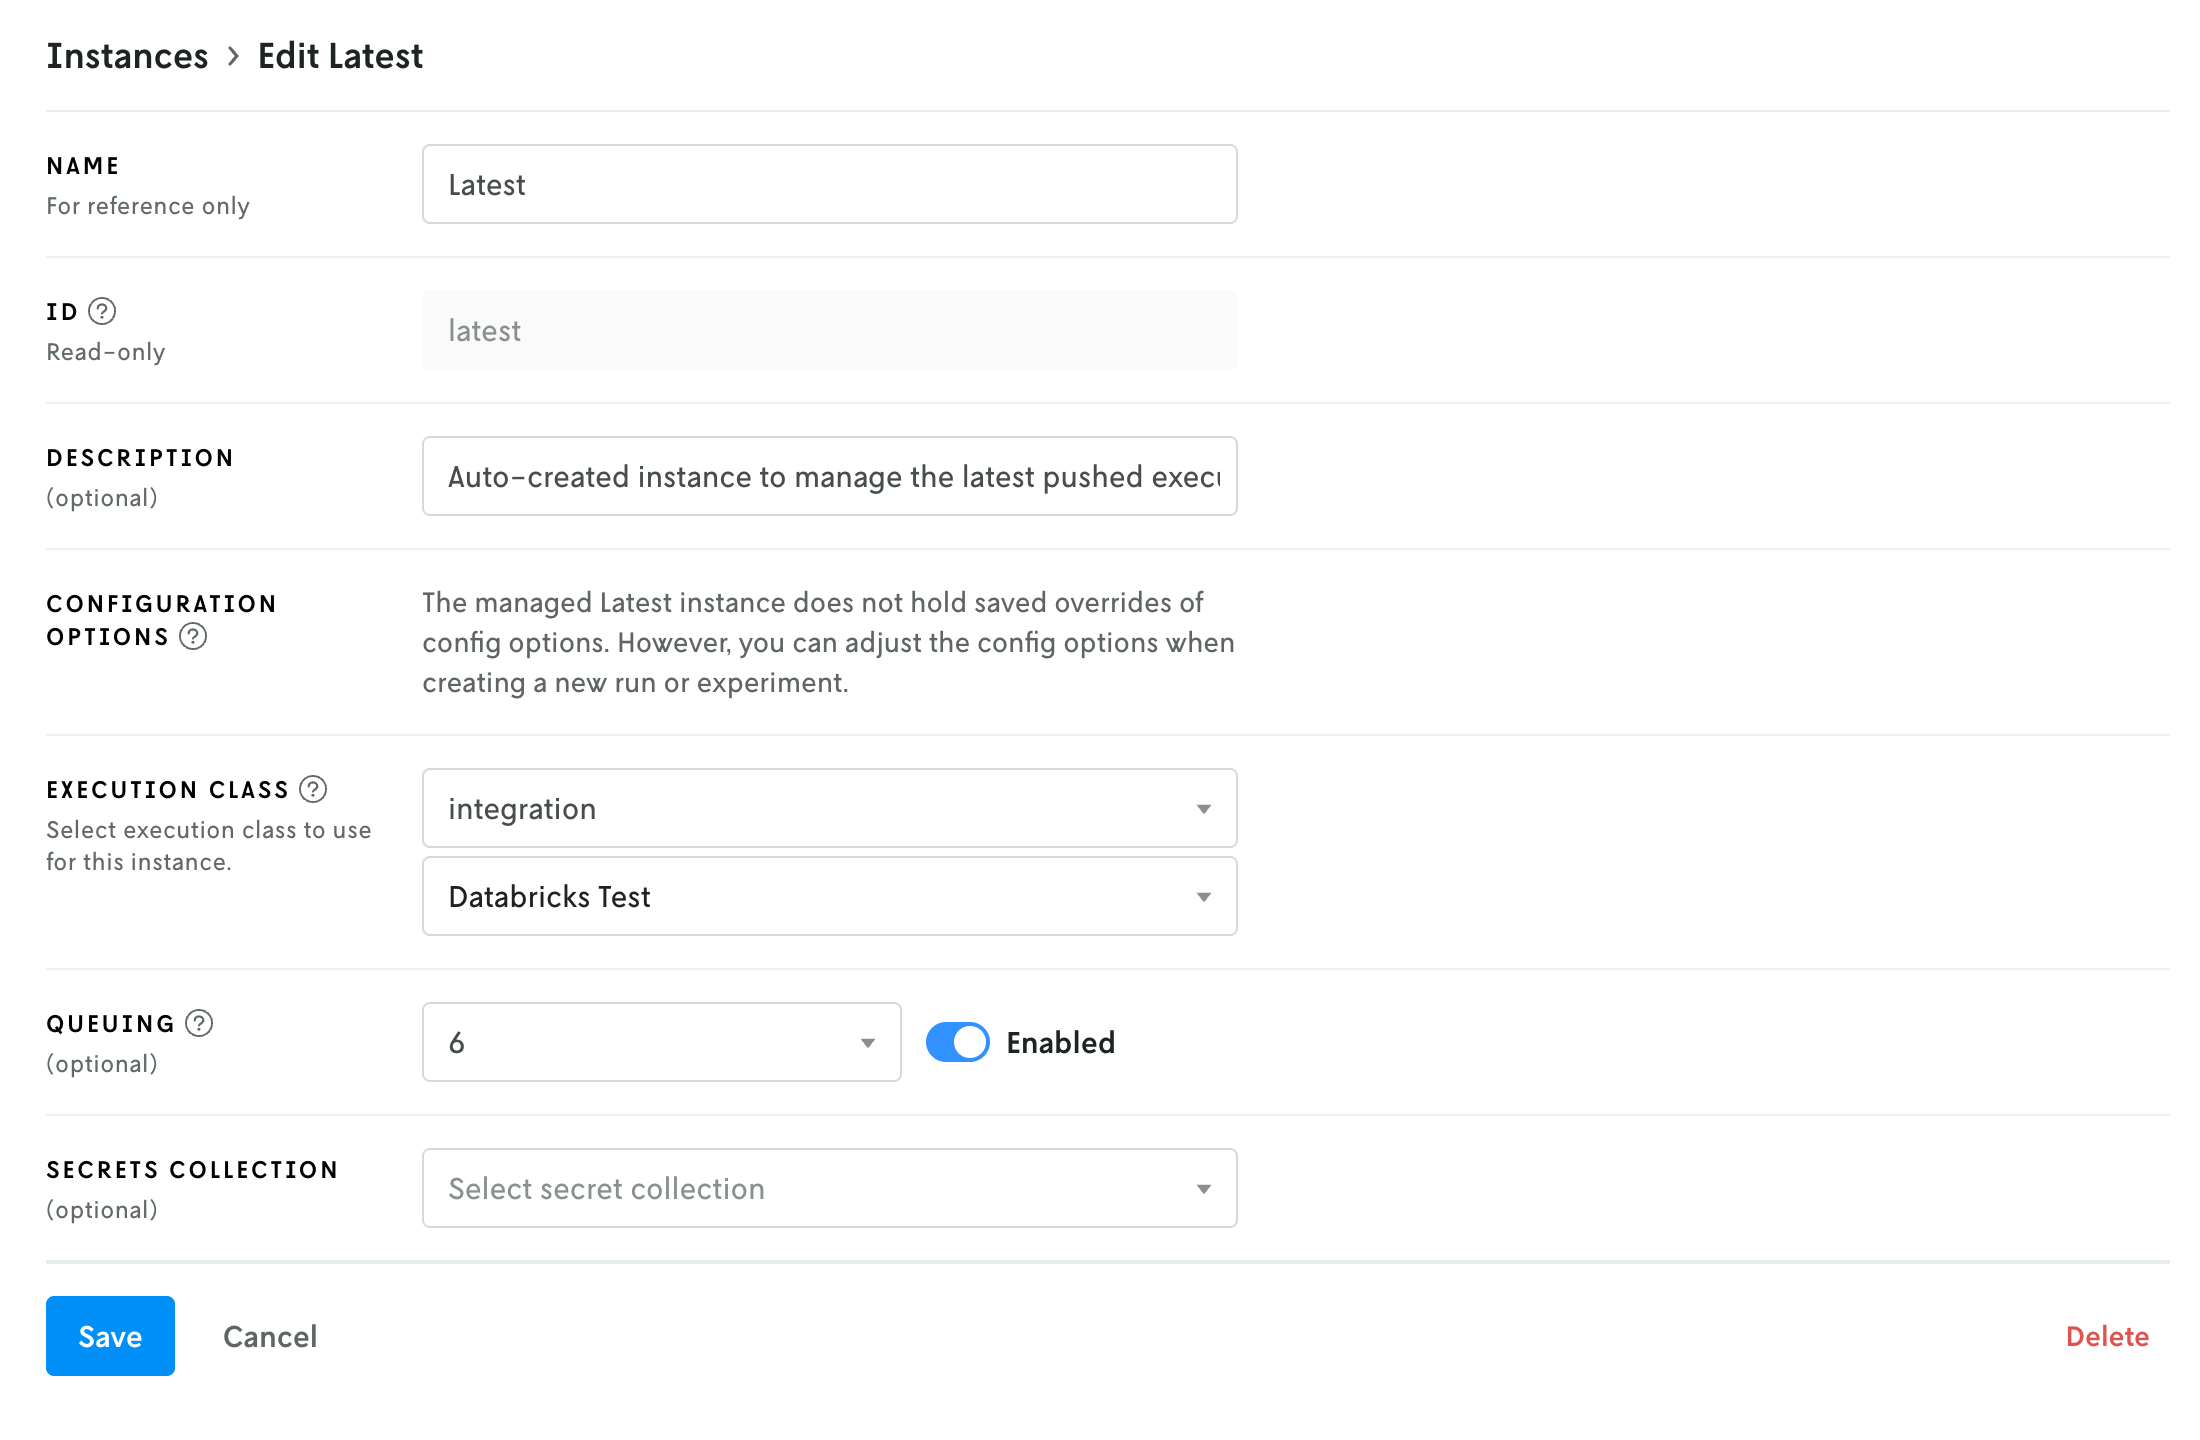
Click on this Latest instance to view the details. The integration is applied by way of the Execution Class field. Click the Edit button in the top right to edit your Latest instance.
On the edit view, in the Execution class dropdown, select integration as the execution class. Once selected, a new select dropdown box should appear beneath it that will allow you to select your integration. Select which integration you would like to use and then click Save to apply your changes.
Run with the Integration
Now that the integration is attached to the Latest instance, when you create a new run using that instance, your run will be executed in Databricks instead of in Nextmv’s infrastructure. However, you’ll still be able to view the input, output, metadata, and any other custom assets or metrics from your model runs in the Nextmv Console.
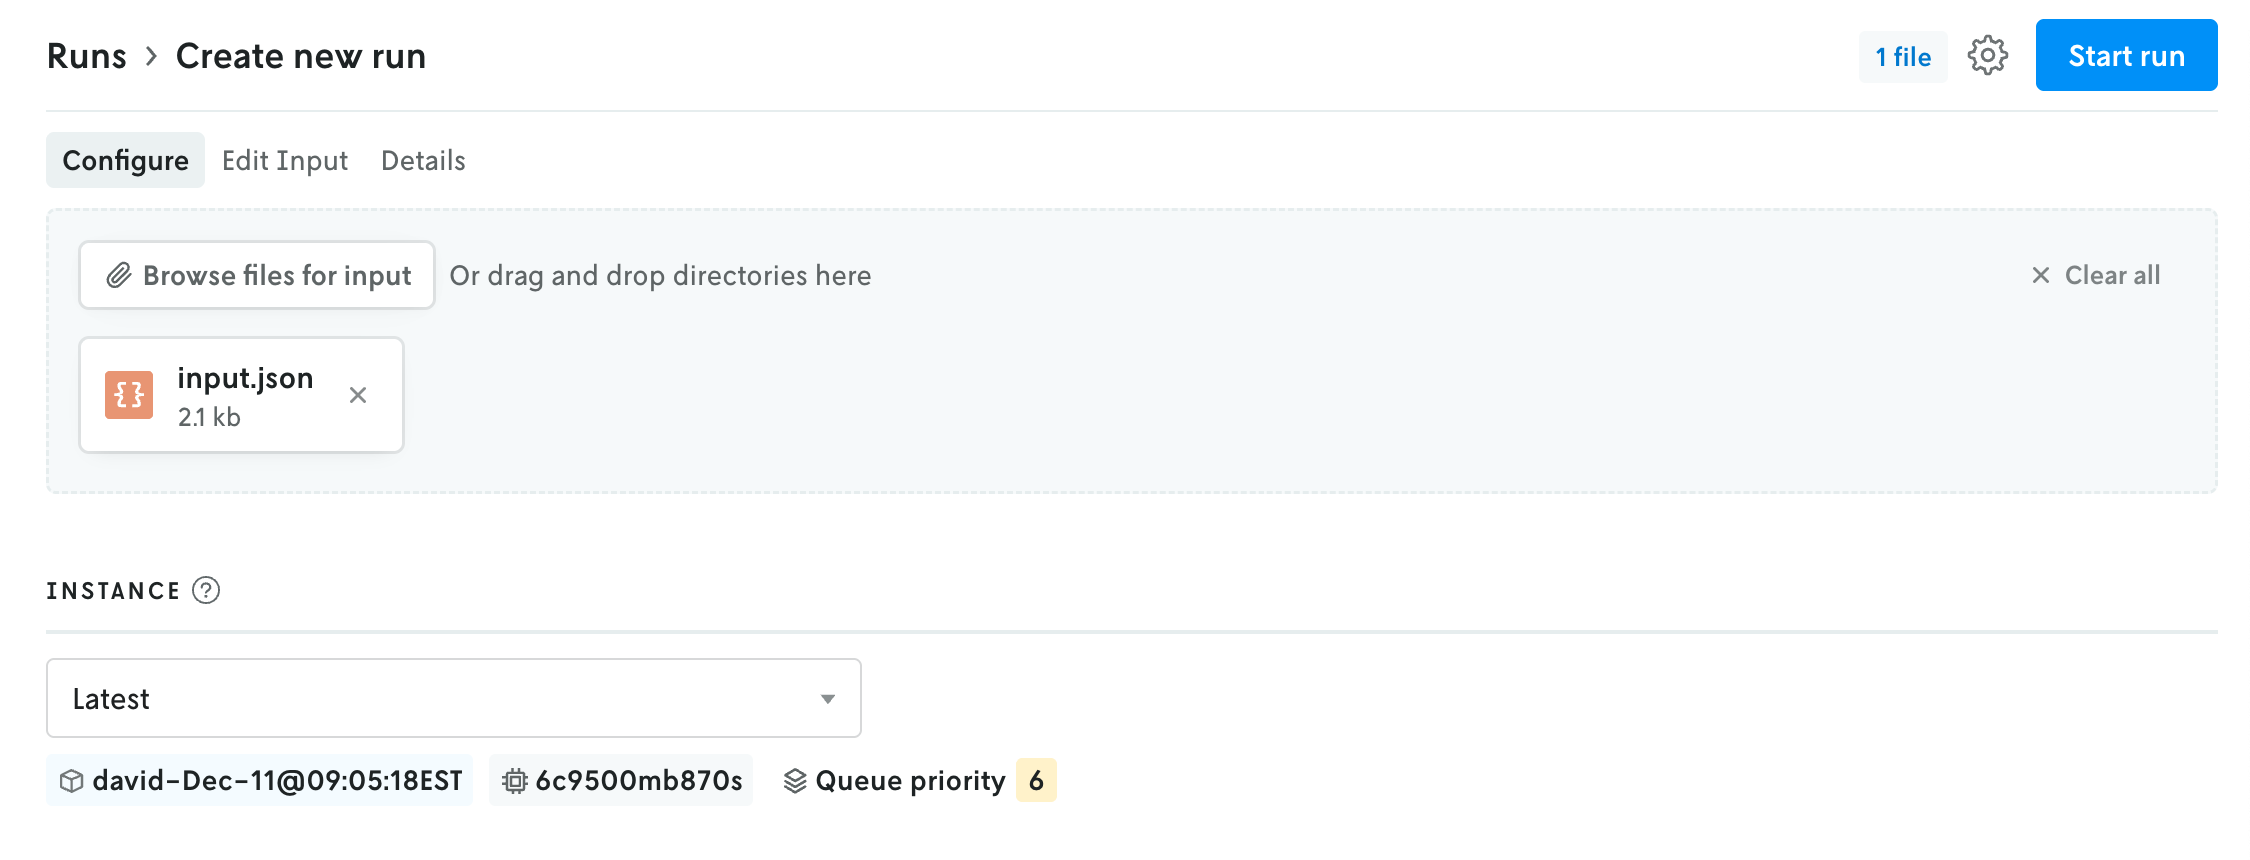
To create a run:
- In Nextmv, on the left sidebar of your application navigation, click the
New runbutton (at the bottom of the list). - Add the input for your model.
- In the Instance dropdown menu, select the Latest instance if it’s not already selected. Note that if your Nextmv role is Operator, the dropdown for selecting the instance will be in the advanced menu in the upper right.
- Click the
Start runbutton to start the run.
If you navigate to the job in Databricks, you should see your run initiated in the latest Runs table.

You can click into this run to view the output of the run and its details. This run will also be in Nextmv and you can view the run input and output like normally.
🎉🎉🎉 Congratulations, you have finished setting up your Nextmv integration!
Further
You can use the instance with the Databricks integration just like you would any other instance. Whatever version is assigned to the instance is the version that will run in Databricks. And any configuration set on the instance will be applied to the run sent to databricks (likewise for any run-specific configuration). And when you run scenario tests with an instance with the Databricks integration, the runs for that test will execute in Databricks.