Welcome to the Nextmv Platform!
Nextmv is a DecisionOps platform built for developers. It is a set of tools for building, testing, deploying, and operating decision models. The Nextmv Platform is built around various components:
- CLI: a command line interface for workflow management.
- Cloud: a cloud service for hosting and running decision models, including experiments and tests.
- Console: a web-based console for managing your apps, viewing results and collaborating.
- Go SDK: Go libraries and plugins for modeling and optimization.
- Python SDK: Python libraries for modeling and optimization.
- Community apps: pre-built decision apps for common use cases.
These components are fully integrated to make it quick and seamless to deploy decision apps to production-ready infrastructure and manage different developer operation workflows.
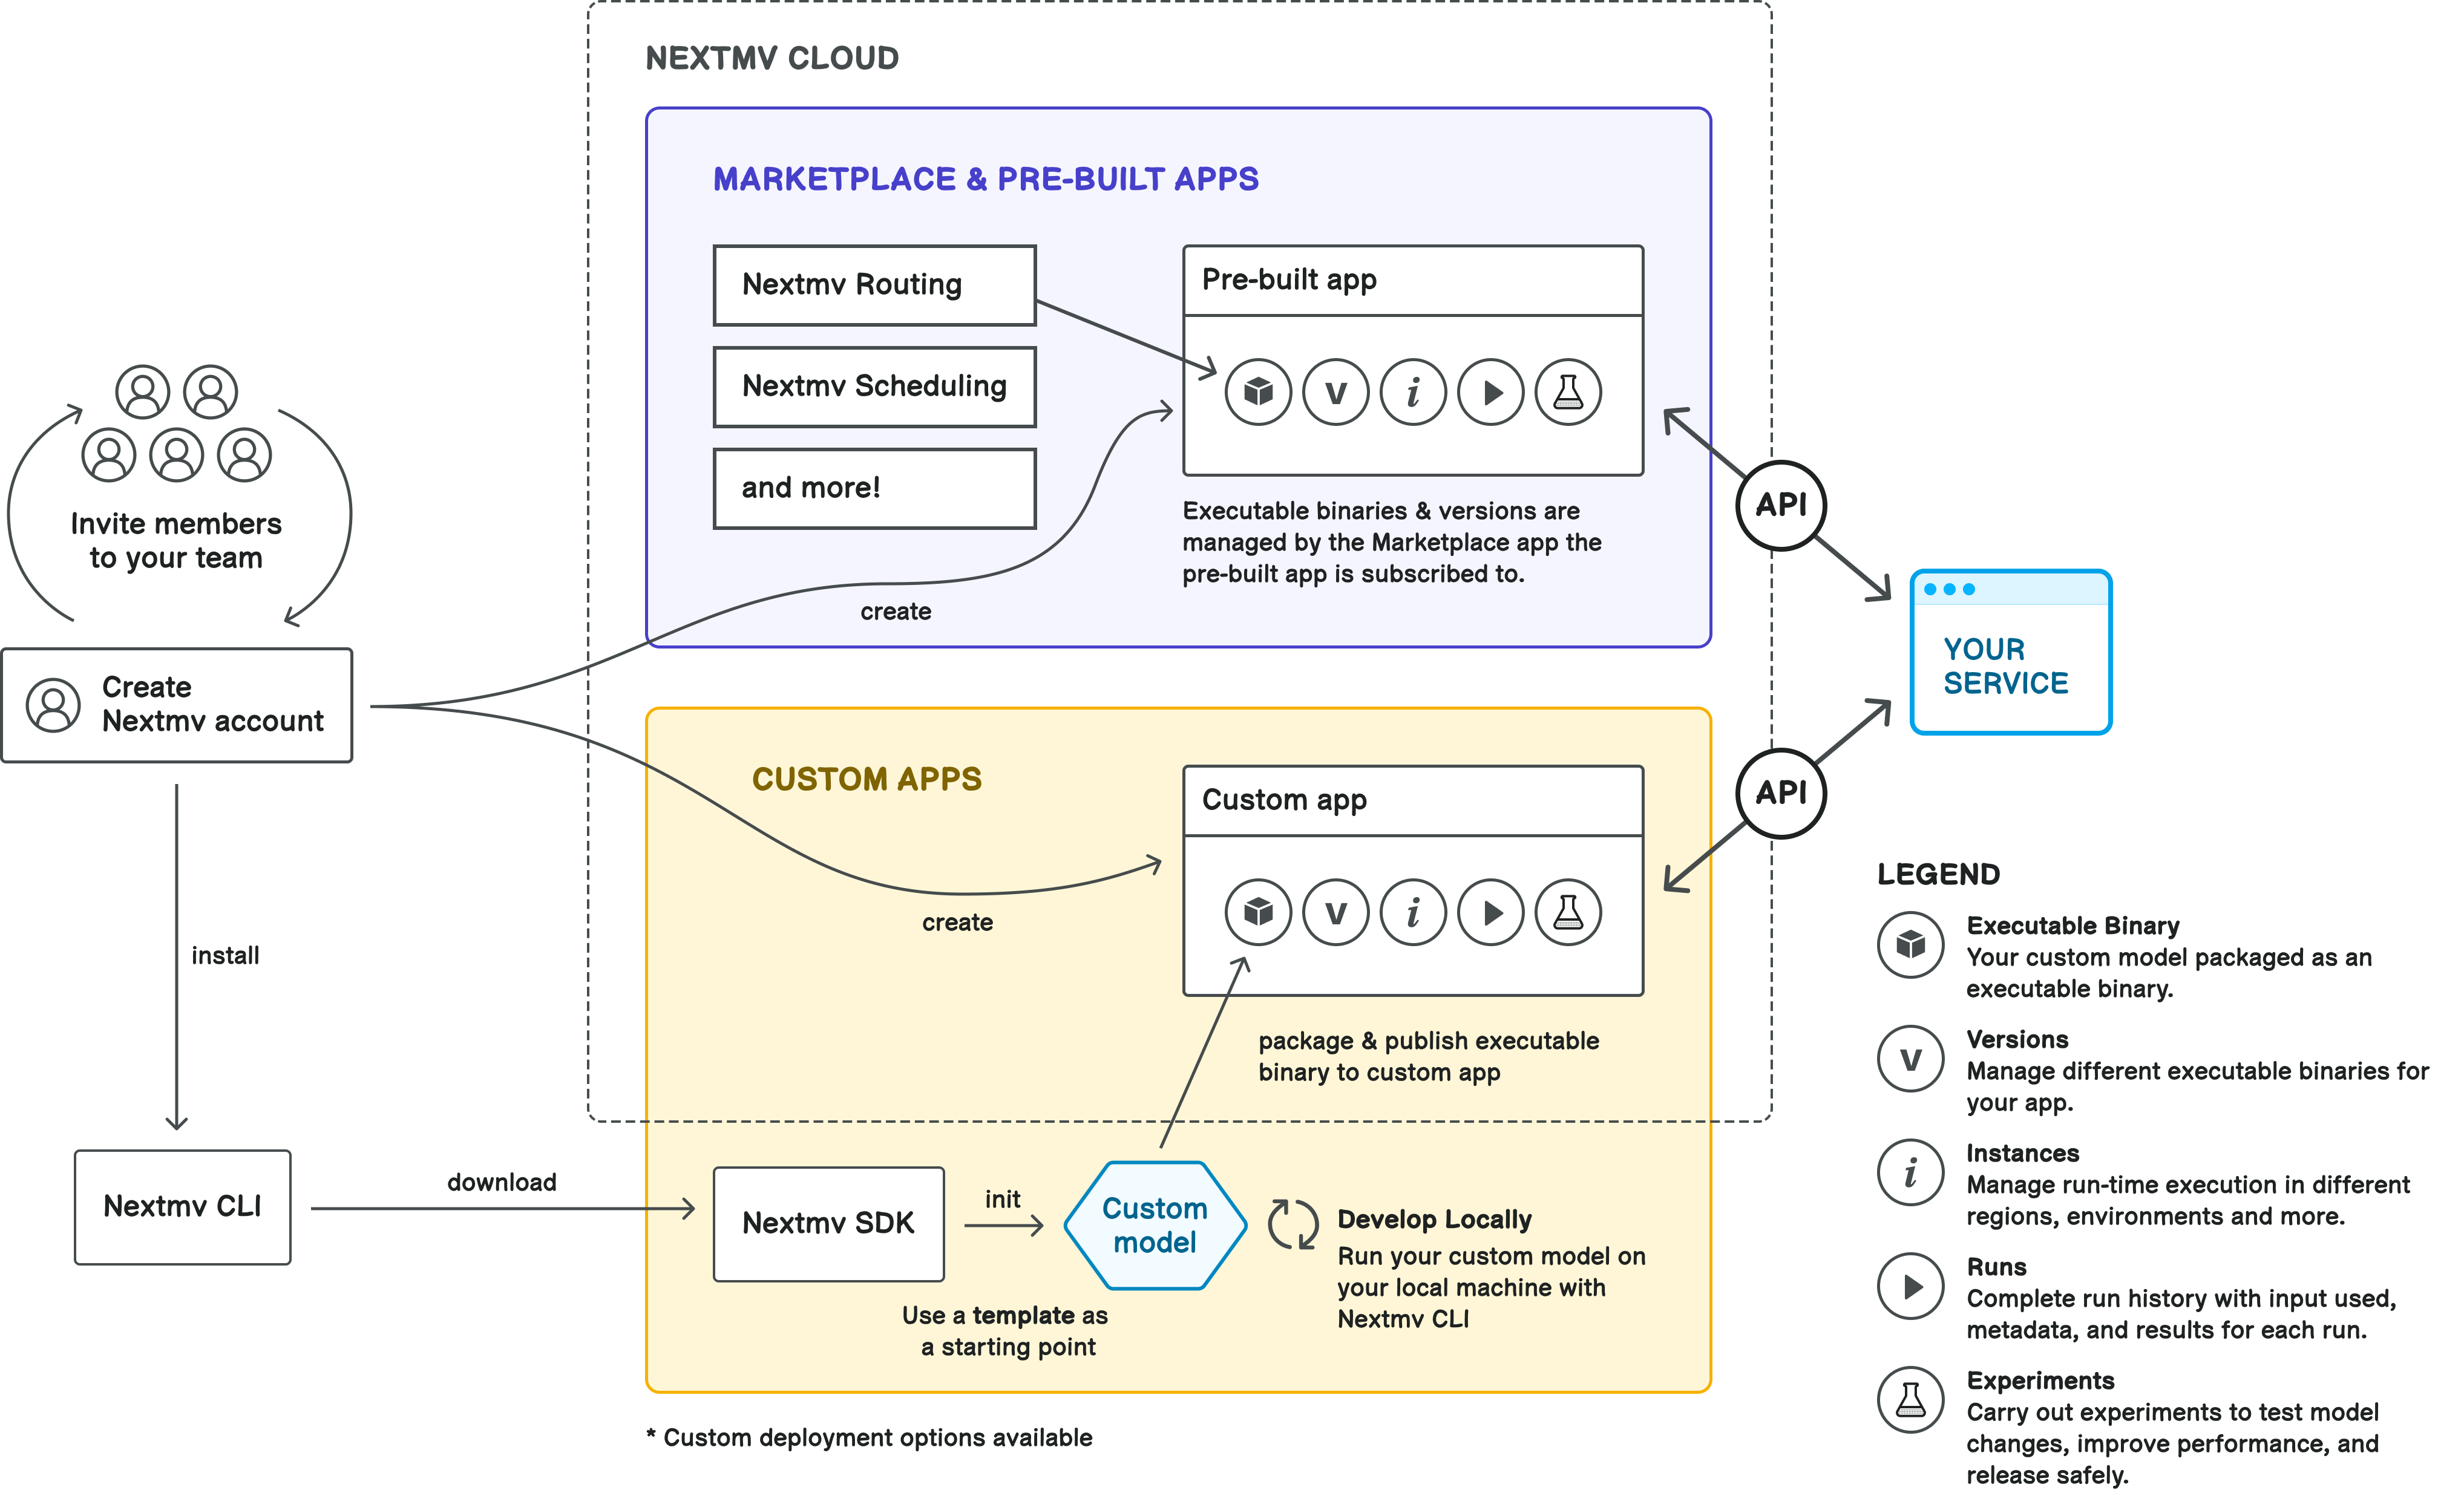
The Platform is built around the concept of applications (apps). An app represents a published decision model, essentially, a decision service. There are two types of apps:
- Subscription apps: pre-built decision apps that solve specific problems in domains like routing or shift scheduling. These apps are present in the Nextmv Marketplace and you subcribe to them. Nextmv publishes the executable code for these apps. Based on community apps.
- Custom apps: fully customizable applications for which you control the source code. Start from a community app or from scratch. Supported languages include: Go, Python.
Apps are used to:
- Run. You can submit input to the app which then runs it through your decision model and returns an ouput.
- Experiment & test. A framework for testing different model versions, input data, configurations, and scenarios and verifying changes. De-risk deploying to production.
The following sections will walk you through a brief introduction to the Nextmv Platform. You will:
- sign up for an account at https://cloud.nextmv.io,
- get access to your API key,
- subscribe to the Nextmv Routing App from the Marketplace, and
- make a remote run.
Sign up for an account
Sign up for a Nextmv account. Start a free trial and get access to all paid features. Visit our pricing at: https://www.nextmv.io/pricing.
Get your API key
Go to Console, Team section. Click on API Keys.

We suggest storing your API key in an environment variable.
Subscribe to Nextmv Routing app
Go to Console, Marketplace section. Click on the Nextmv Routing app. This app is packed with features to solve vehicle routing problems.

Click on the Add to my apps button and fill in the fields.
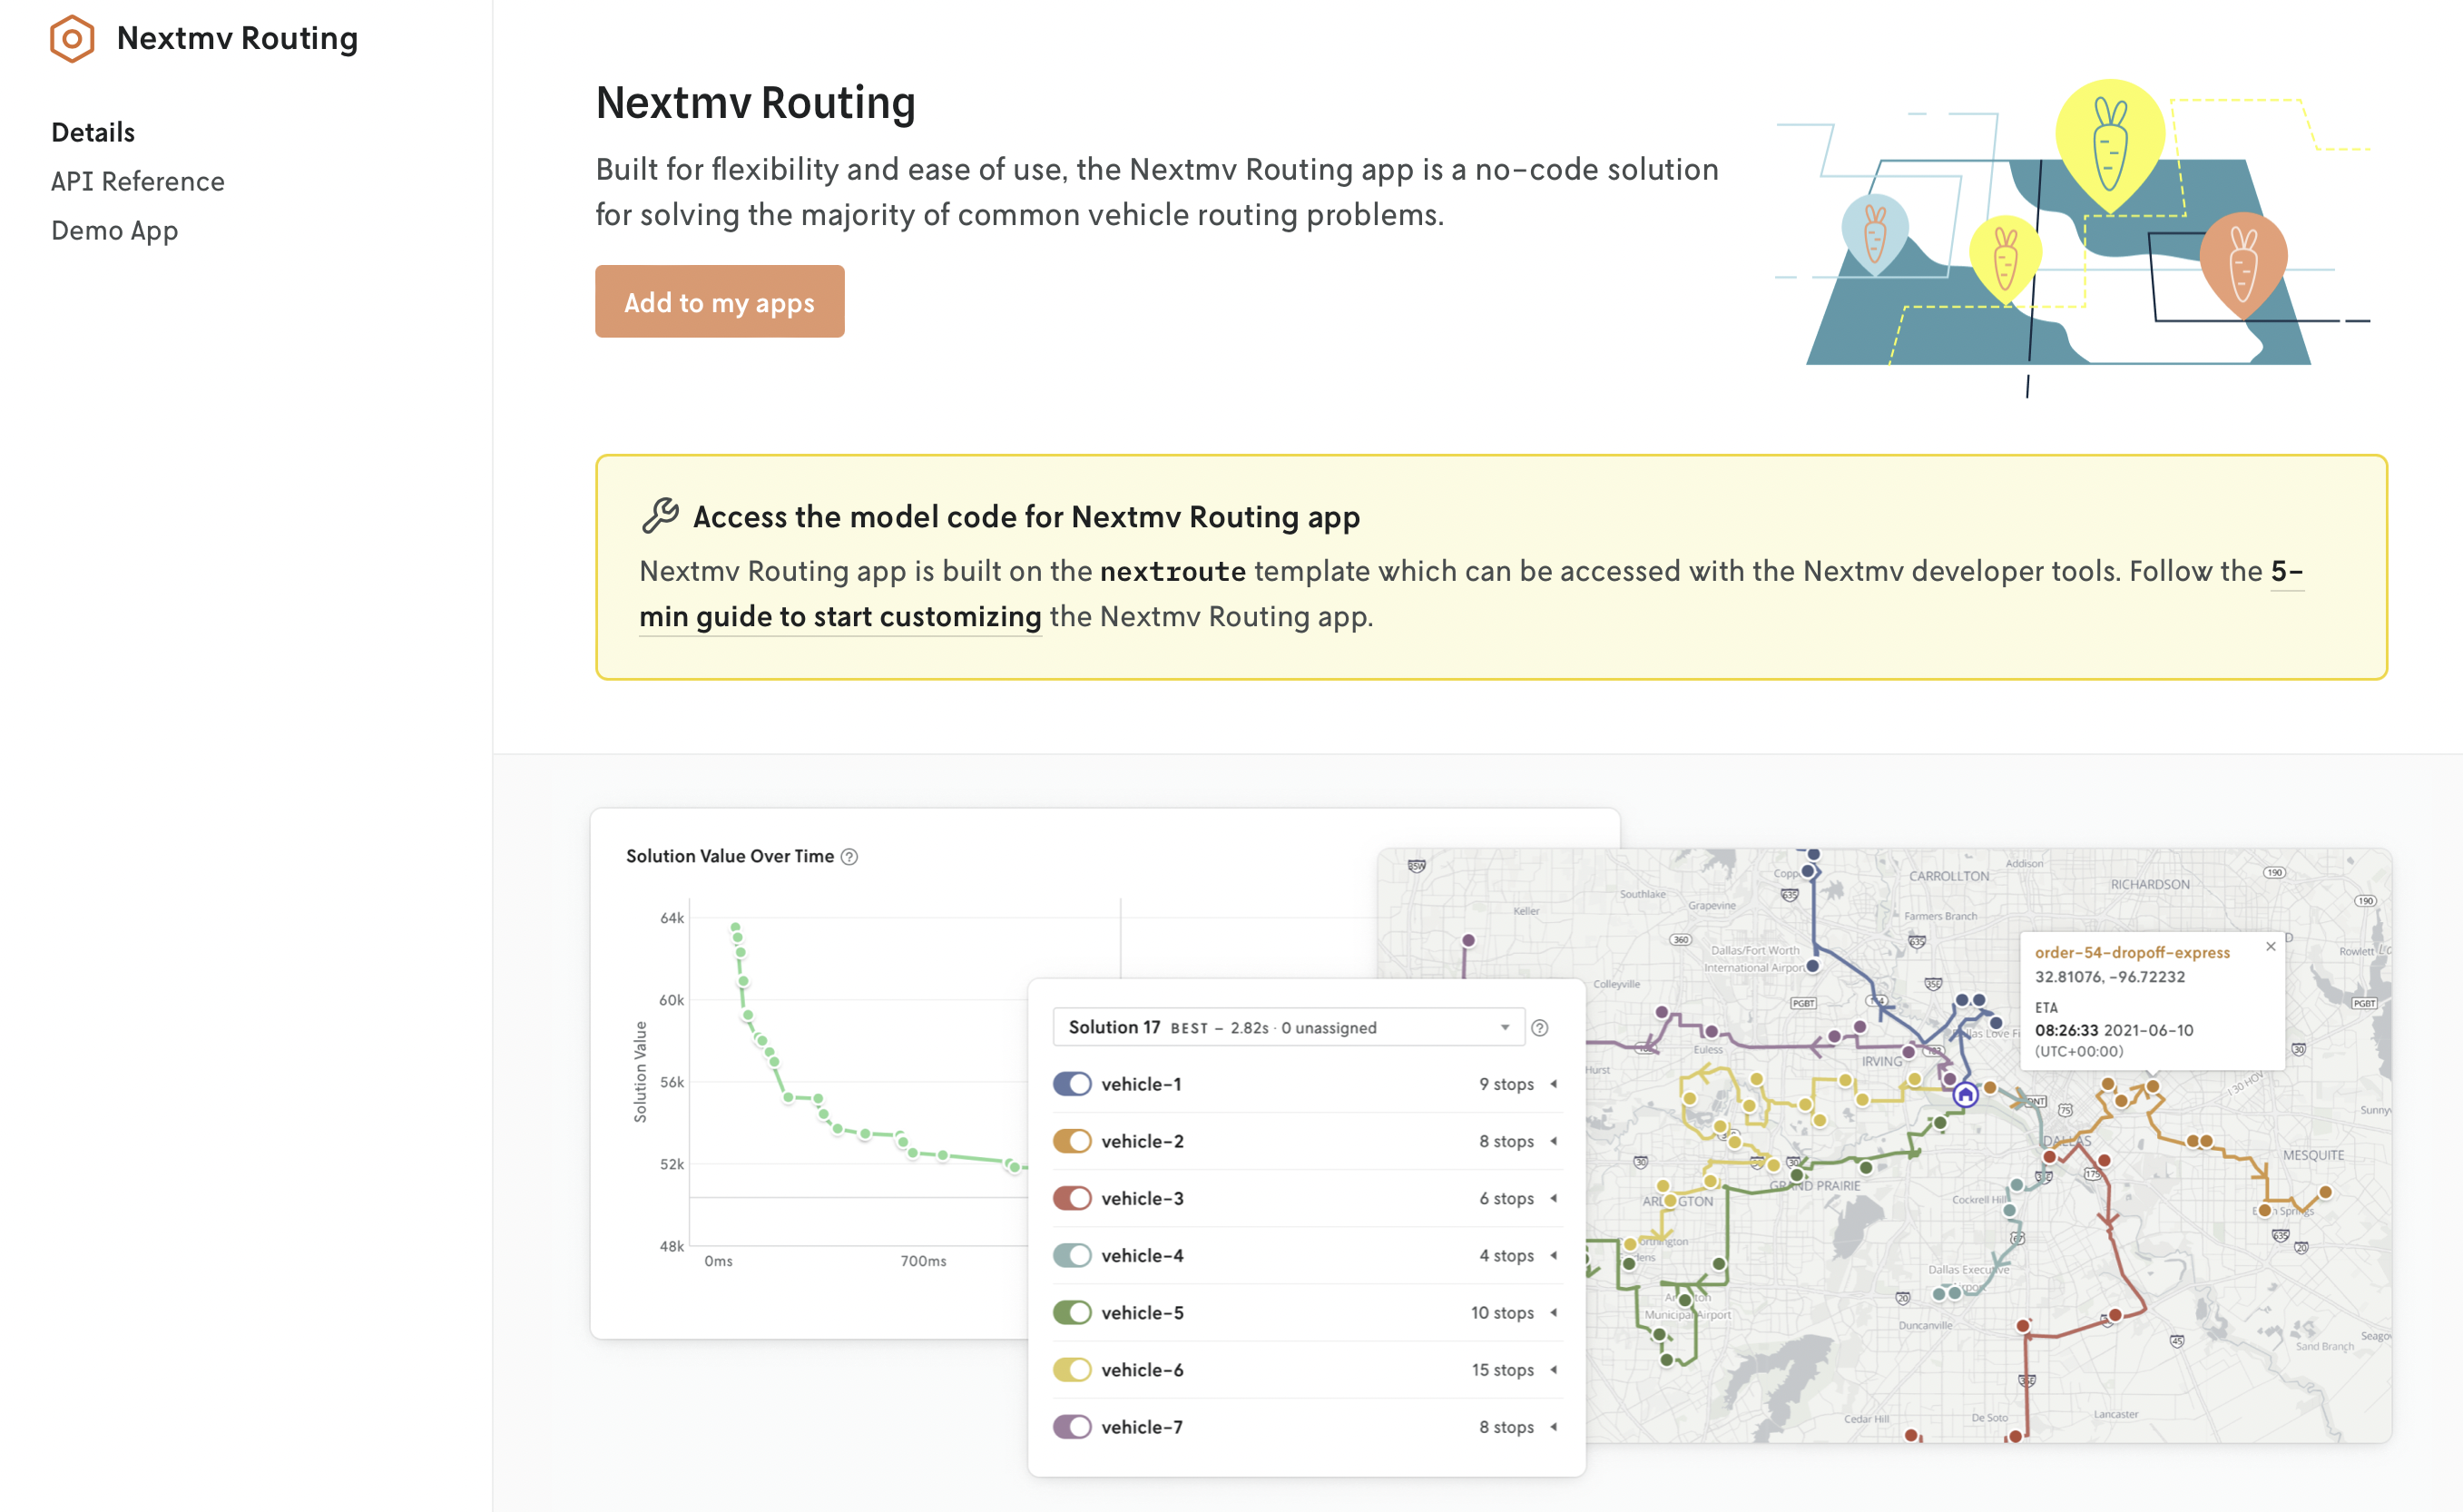
You can click on the app to view the details.
Make a remote run
Make sure your NEXTMV_API_KEY is set as an environment variable.
Now, execute the command below to submit a new run to the app, using the Cloud API. Replace $APP_ID with the ID of your app.
You should get a run ID as a response. This is the unique ID for your run.
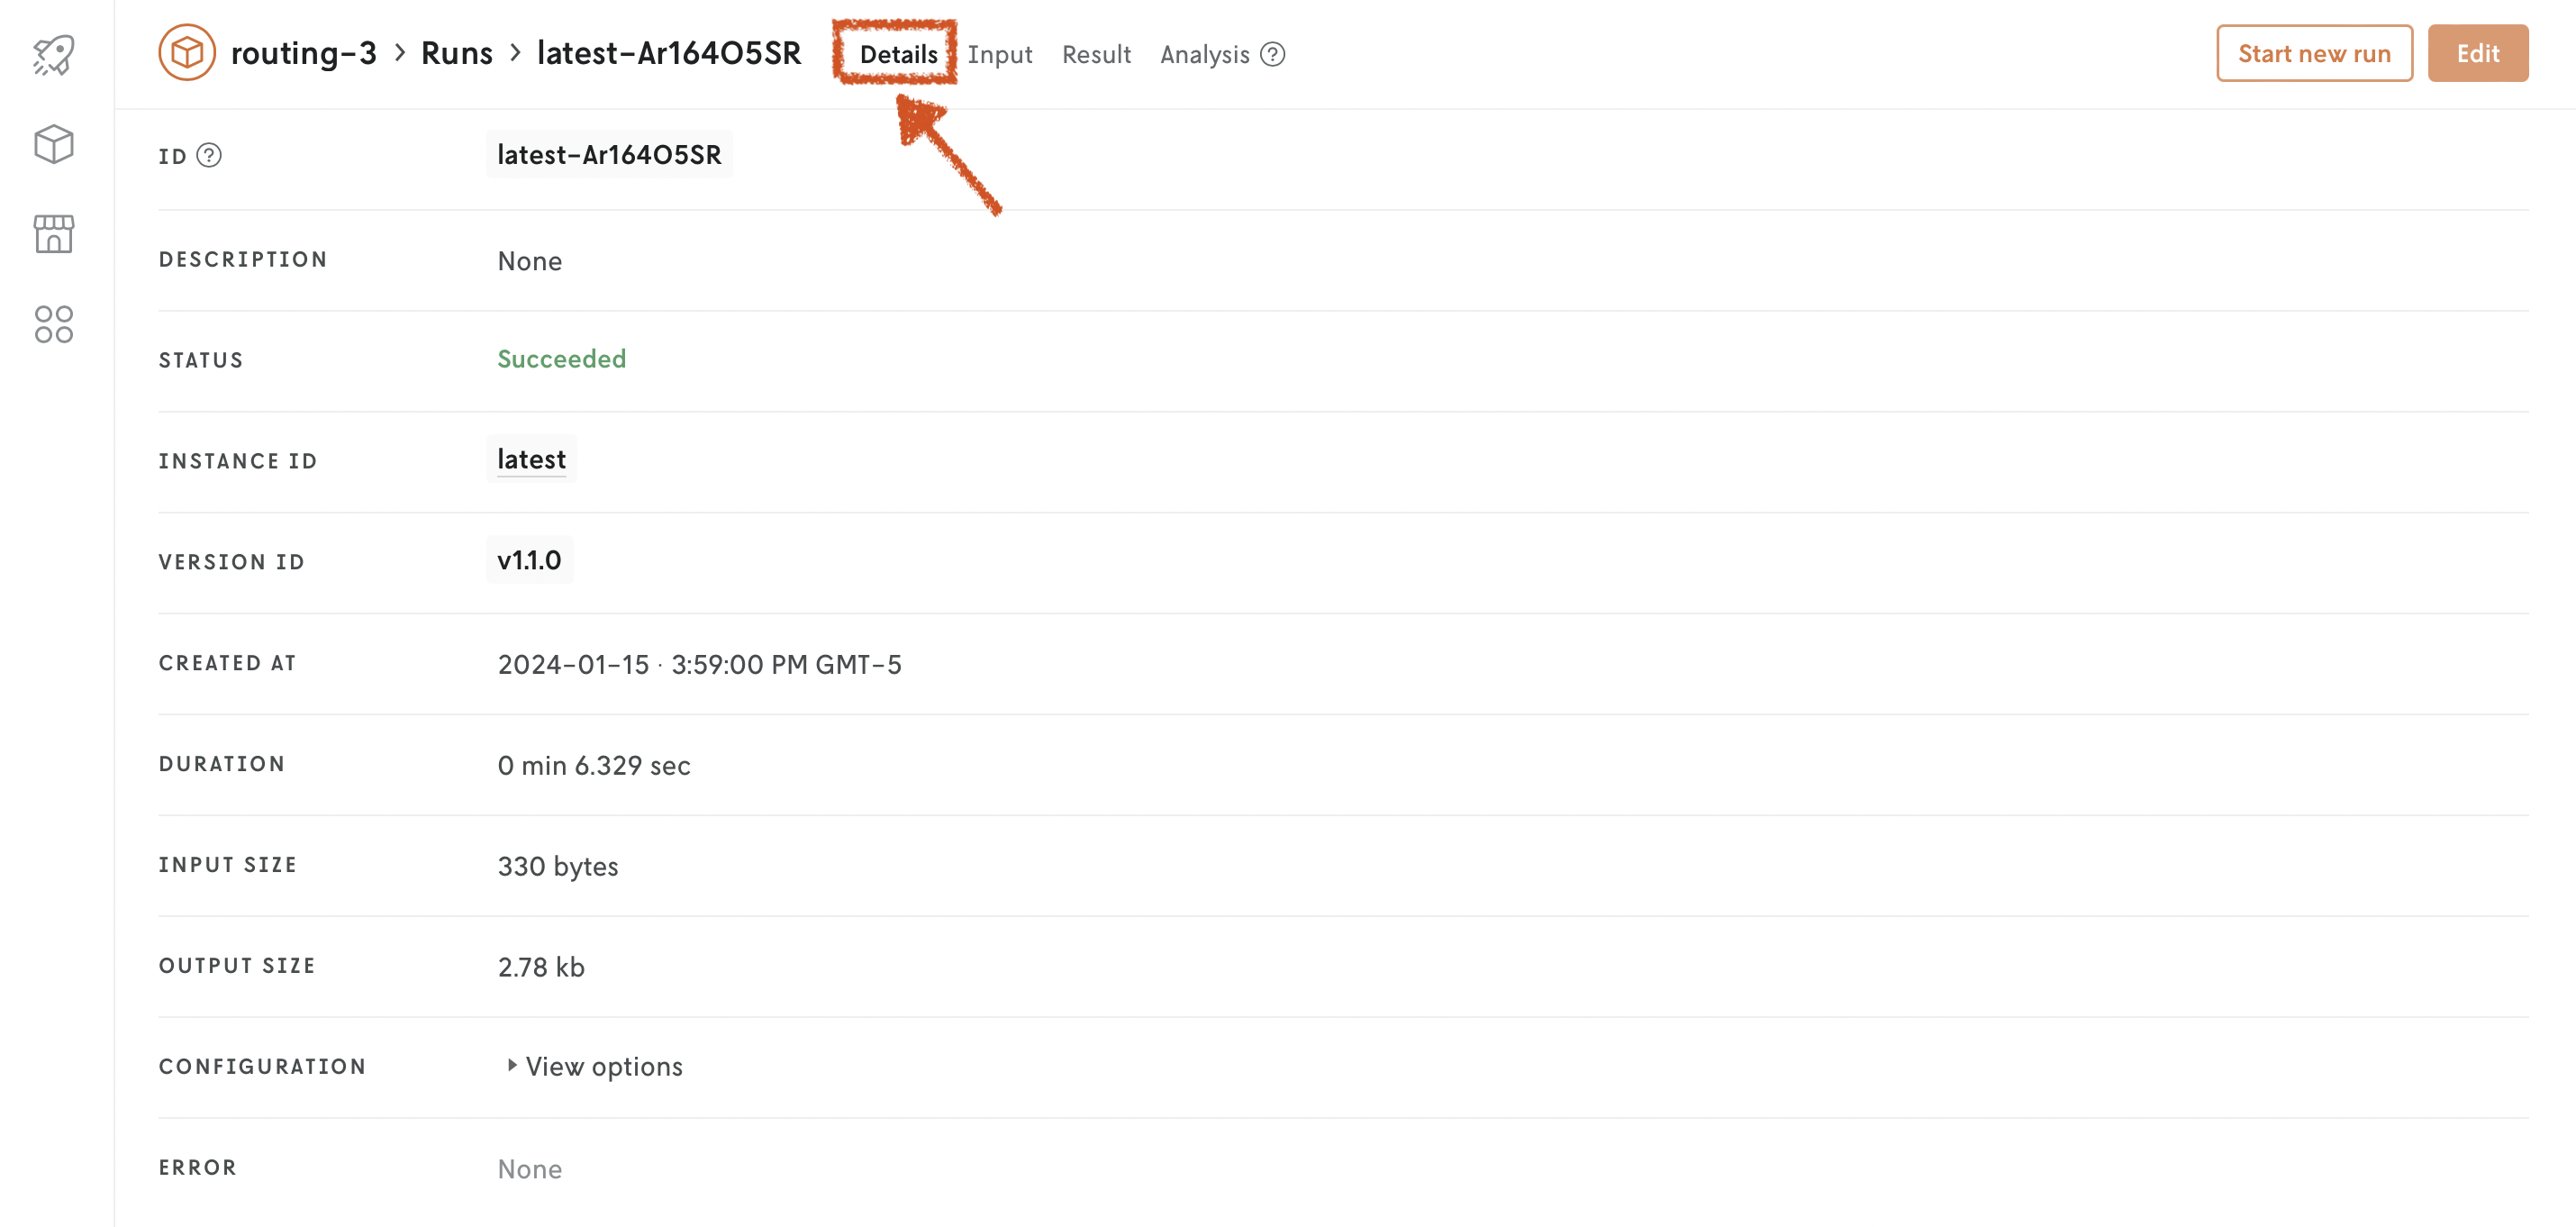
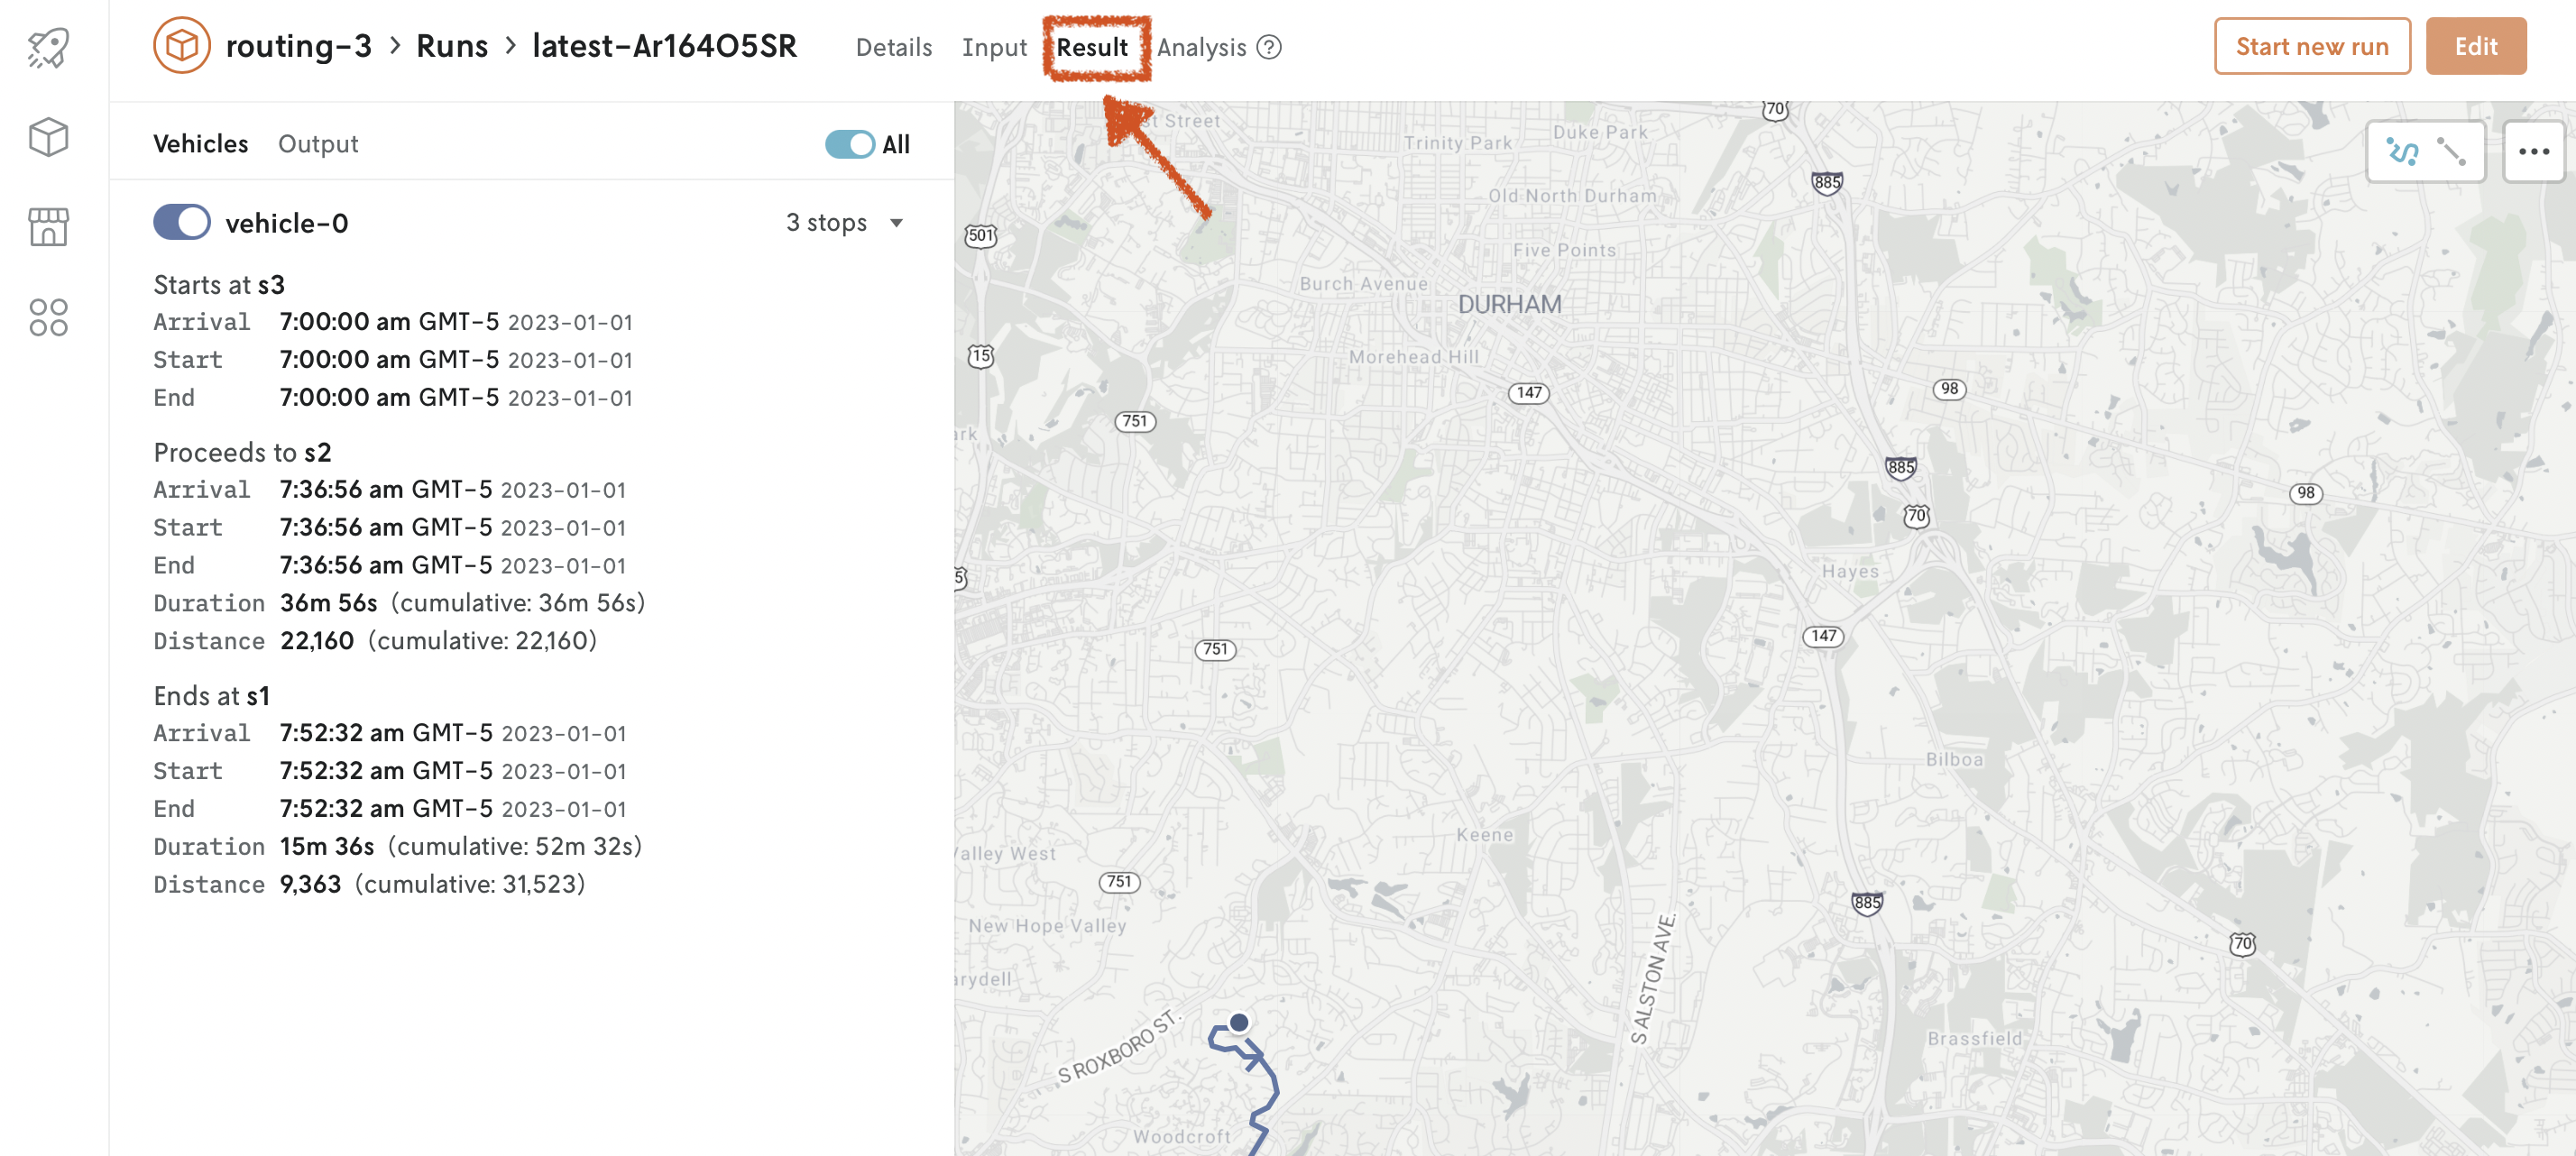
You can go to Console, Runs section. Click on the run to view its details.

Click on the different tabs to vew the Details, Result and more.
🎉🎉🎉 You completed this brief introduction to the Nextmv Decision Platform. Keep exploring!